> ## Documentation Index
> Fetch the complete documentation index at: https://docs.pipeshub.com/llms.txt
> Use this file to discover all available pages before exploring further.
# Claude Desktop
> Connect Claude Desktop to the PipesHub MCP server via a custom connector or a local stdio bridge
Claude Desktop can talk to the PipesHub MCP server, but there's one important catch to understand before you start.
**Claude Desktop does not support local HTTP MCP transport.** Unlike a server-side tool, it won't connect to a plain `http://localhost:.../mcp` endpoint. To connect PipesHub you have two options, and which one you pick depends on how PipesHub is hosted:
1. **Add it as a custom connector** — works only when PipesHub is reachable over **public HTTPS** (a real domain with a valid SSL certificate), exactly like [Claude.ai (Web)](/mcp/claude-ai).
2. **Run a local stdio bridge** — works for **localhost / self-hosted** instances with no public domain, using the `@pipeshub-ai/mcp` npm package.
## Which option should I use?
| Your situation | Use this |
| --------------------------------------------------------------------------------------------------------- | -------------------------------------------------------------- |
| PipesHub is hosted on a public domain with valid SSL (e.g. `https://app.pipeshub.com`) | [Custom connector](#option-1-custom-connector-hosted-pipeshub) |
| PipesHub runs locally or on an internal host without a public HTTPS domain (e.g. `http://localhost:3000`) | [Local stdio bridge](#option-2-local-stdio-bridge) |
***
## Option 1: Custom connector (hosted PipesHub)
If your PipesHub instance is served over HTTPS on a valid domain, Claude Desktop can connect to the remote MCP endpoint directly — no local setup, no npm packages. This is the same flow as [Claude.ai (Web)](/mcp/claude-ai).
Before you start, create an OAuth app in PipesHub and note your **Client ID** and **Client Secret**. See [MCP Server Overview](/mcp/overview#step-1-create-an-oauth-app).
In Claude Desktop, go to **Settings > Connectors**.
Click **Add custom connector** at the bottom of the Connectors section.
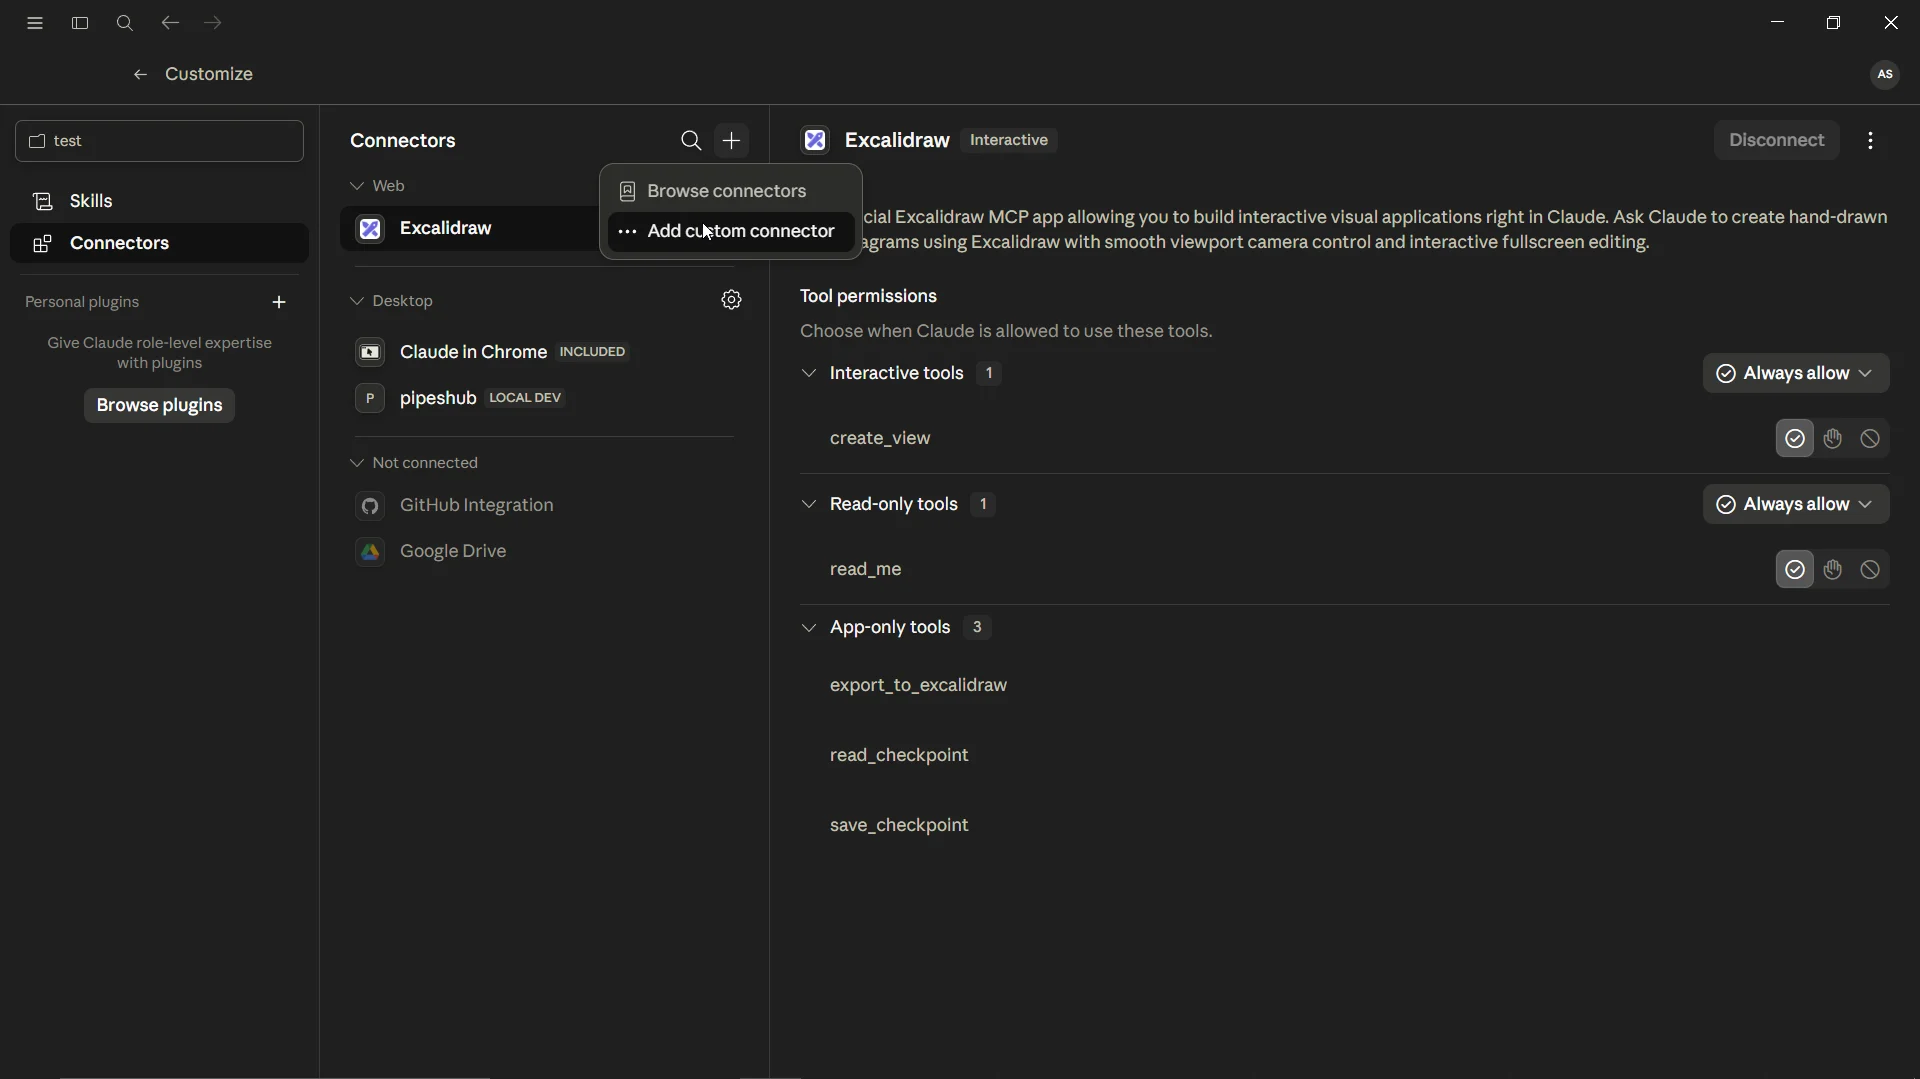 Use your public HTTPS instance URL with the `/mcp` path:
```
PIPESHUB_INSTANCE_URL/mcp
```
For example: `https://app.pipeshub.com/mcp`.
Click **Advanced settings** and enter your OAuth credentials:
* **OAuth Client ID**: `YOUR_CLIENT_ID`
* **OAuth Client Secret**: `YOUR_CLIENT_SECRET`
Use your public HTTPS instance URL with the `/mcp` path:
```
PIPESHUB_INSTANCE_URL/mcp
```
For example: `https://app.pipeshub.com/mcp`.
Click **Advanced settings** and enter your OAuth credentials:
* **OAuth Client ID**: `YOUR_CLIENT_ID`
* **OAuth Client Secret**: `YOUR_CLIENT_SECRET`
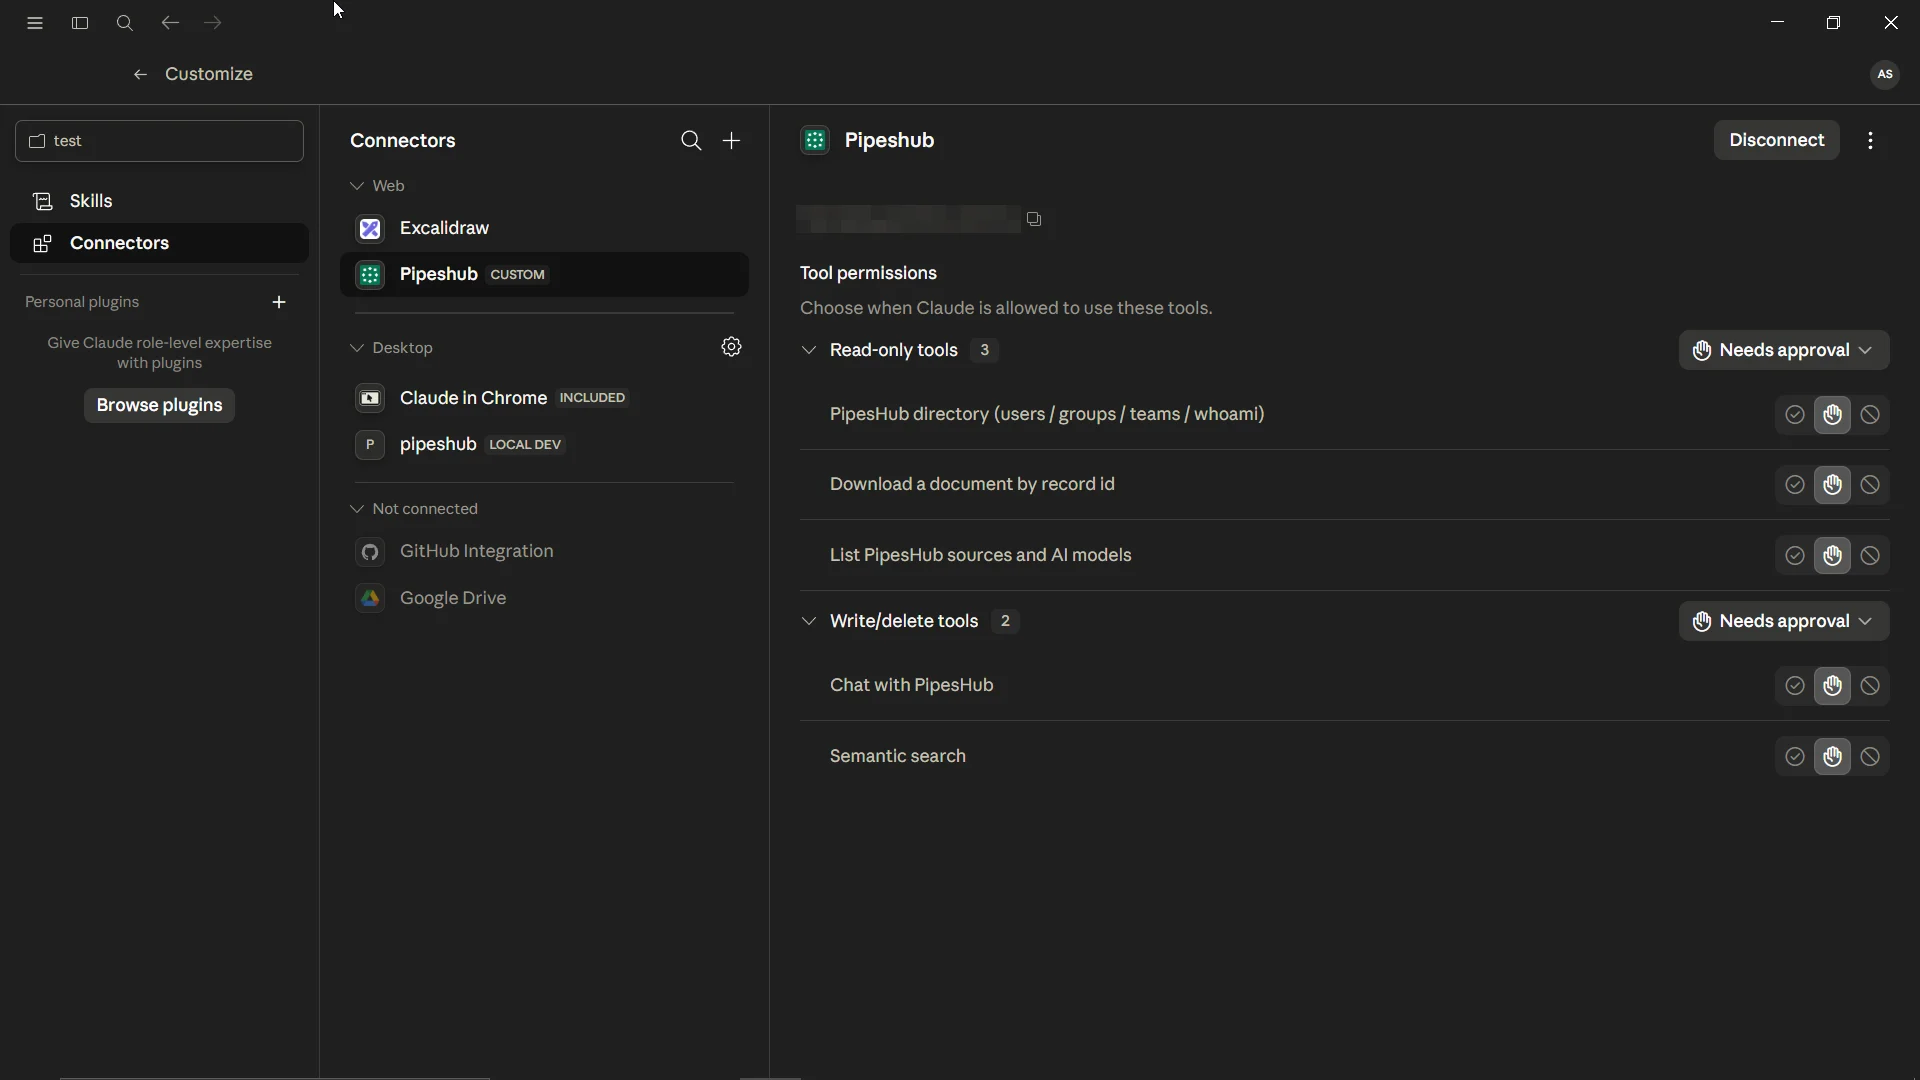
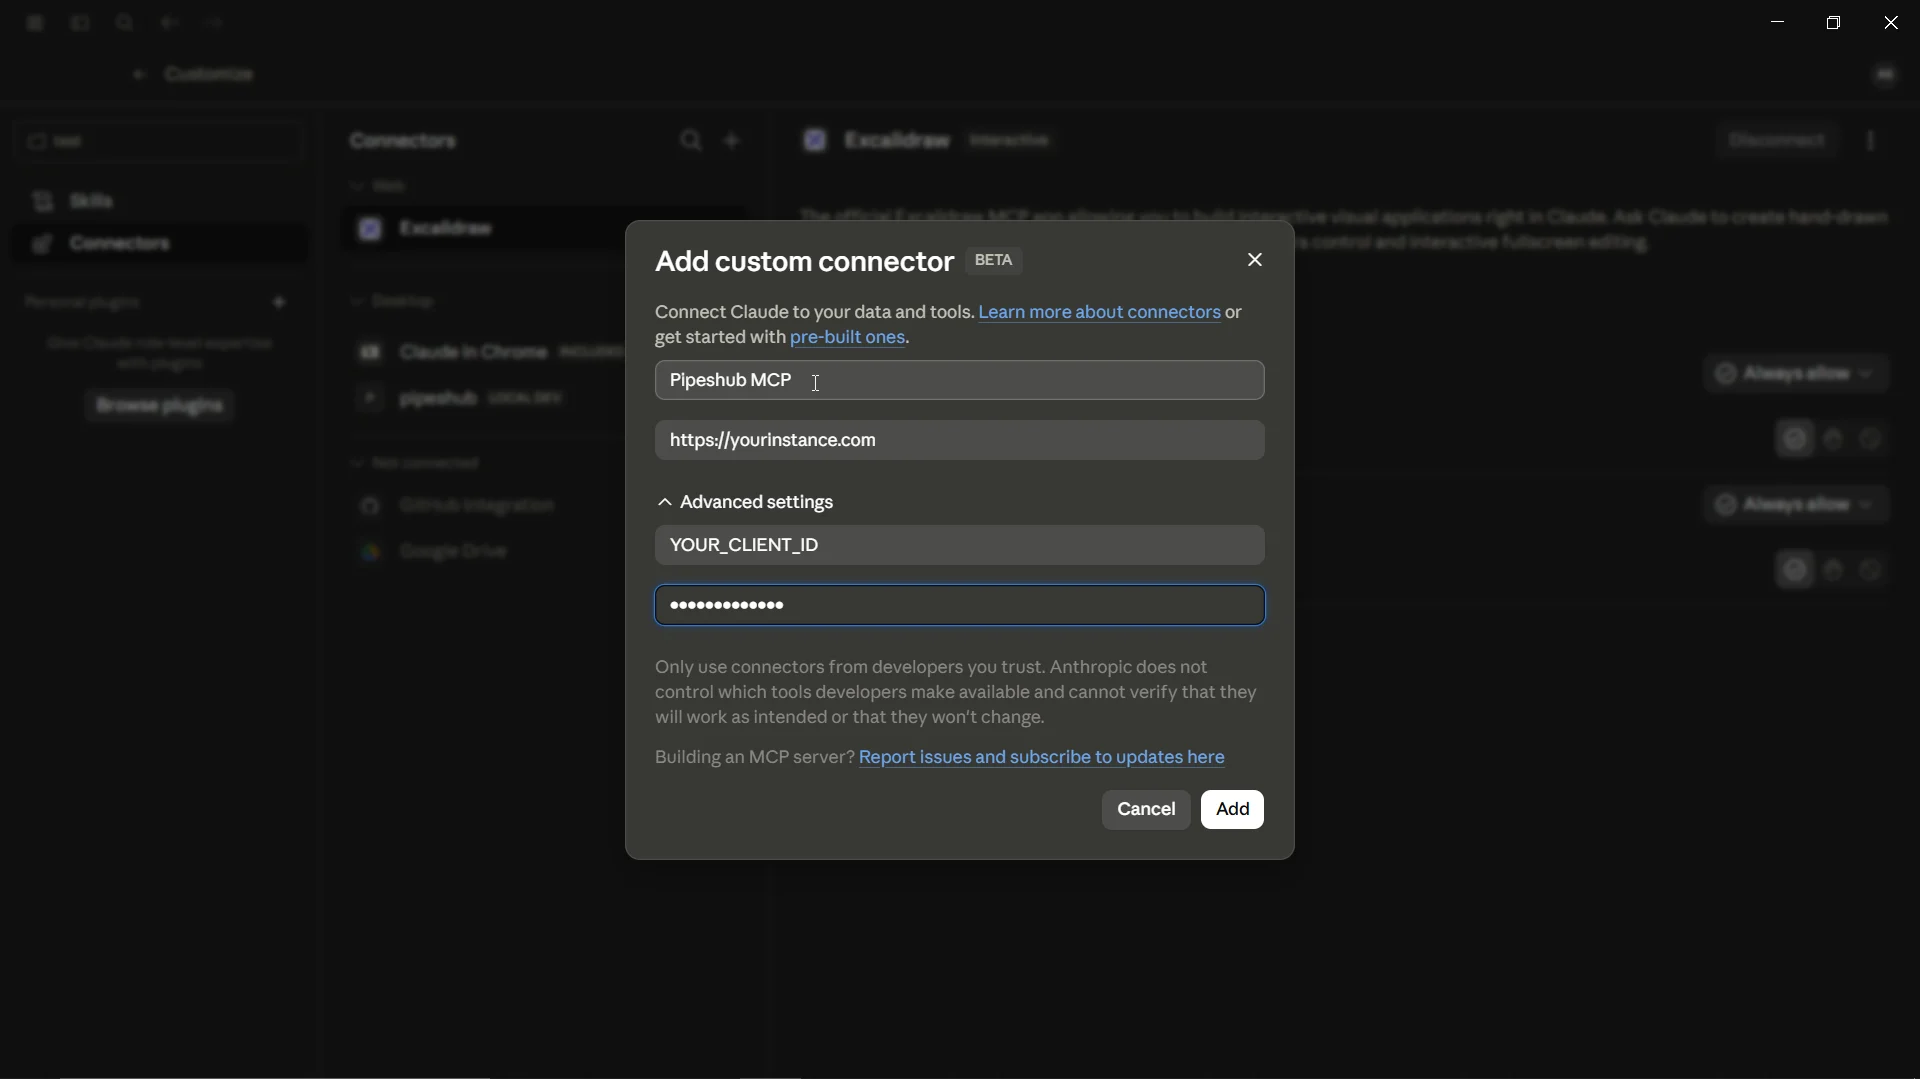 Click **Add**. Claude Desktop opens your browser to PipesHub's login page so you can authenticate and grant permissions. Once that's done, the connector goes active and PipesHub becomes visible in your list of connectors.
 ### Redirect URI
Claude Desktop uses the same OAuth callback as the Claude web app:
```
https://claude.ai/api/mcp/auth_callback
```
Register this as an allowed redirect URI in your PipesHub OAuth app.
A custom connector needs PipesHub to be reachable from the public internet over HTTPS. If you only have a `localhost` instance, the connector flow won't work — use [Option 2](#option-2-local-stdio-bridge) instead.
***
## Option 2: Local stdio bridge
When PipesHub runs on `localhost` or an internal host without a public HTTPS domain, run the MCP server locally as a **stdio process**. Claude Desktop launches the `@pipeshub-ai/mcp` bridge, which then talks to your PipesHub instance over HTTP on your behalf.
### Prerequisites
* Node.js 20+ installed
* Your PipesHub instance URL (e.g. `http://localhost:3000/api/v1`)
* An OAuth app configured for the **Client Credentials** grant (see below)
For this route, your OAuth app **must have the Client Credentials grant enabled**. When you [create the OAuth app](/mcp/overview#step-1-create-an-oauth-app), choose **Client Credentials** as the grant type so the bridge can exchange your Client ID and Secret for a token directly — no browser redirect is involved. (The redirect URI used by the connector flow does **not** apply here.)
### Configuration
Open Claude Desktop's config file (`claude_desktop_config.json`) and add the PipesHub server. You can find it via **Settings > Developer > Edit Config**, or at:
* **macOS**: `~/Library/Application Support/Claude/claude_desktop_config.json`
* **Windows**: `%APPDATA%\Claude\claude_desktop_config.json`
```json theme={null}
{
"mcpServers": {
"pipeshub": {
"command": "npx",
"args": [
"-y",
"@pipeshub-ai/mcp",
"start",
"--server-url",
"http://localhost:3000/api/v1",
"--client-id",
"YOUR_CLIENT_ID",
"--client-secret",
"YOUR_CLIENT_SECRET",
"--token-url",
"/api/v1/oauth2/token"
]
}
}
}
```
Replace `http://localhost:3000` with your actual instance host, and `YOUR_CLIENT_ID` / `YOUR_CLIENT_SECRET` with the credentials from your OAuth app.
### Apply the changes
Save the file and **fully quit and reopen Claude Desktop** (a window reload isn't enough). Once it restarts, the PipesHub tools appear under the tools menu in your conversations.
### Redirect URI
Claude Desktop uses the same OAuth callback as the Claude web app:
```
https://claude.ai/api/mcp/auth_callback
```
Register this as an allowed redirect URI in your PipesHub OAuth app.
A custom connector needs PipesHub to be reachable from the public internet over HTTPS. If you only have a `localhost` instance, the connector flow won't work — use [Option 2](#option-2-local-stdio-bridge) instead.
***
## Option 2: Local stdio bridge
When PipesHub runs on `localhost` or an internal host without a public HTTPS domain, run the MCP server locally as a **stdio process**. Claude Desktop launches the `@pipeshub-ai/mcp` bridge, which then talks to your PipesHub instance over HTTP on your behalf.
### Prerequisites
* Node.js 20+ installed
* Your PipesHub instance URL (e.g. `http://localhost:3000/api/v1`)
* An OAuth app configured for the **Client Credentials** grant (see below)
For this route, your OAuth app **must have the Client Credentials grant enabled**. When you [create the OAuth app](/mcp/overview#step-1-create-an-oauth-app), choose **Client Credentials** as the grant type so the bridge can exchange your Client ID and Secret for a token directly — no browser redirect is involved. (The redirect URI used by the connector flow does **not** apply here.)
### Configuration
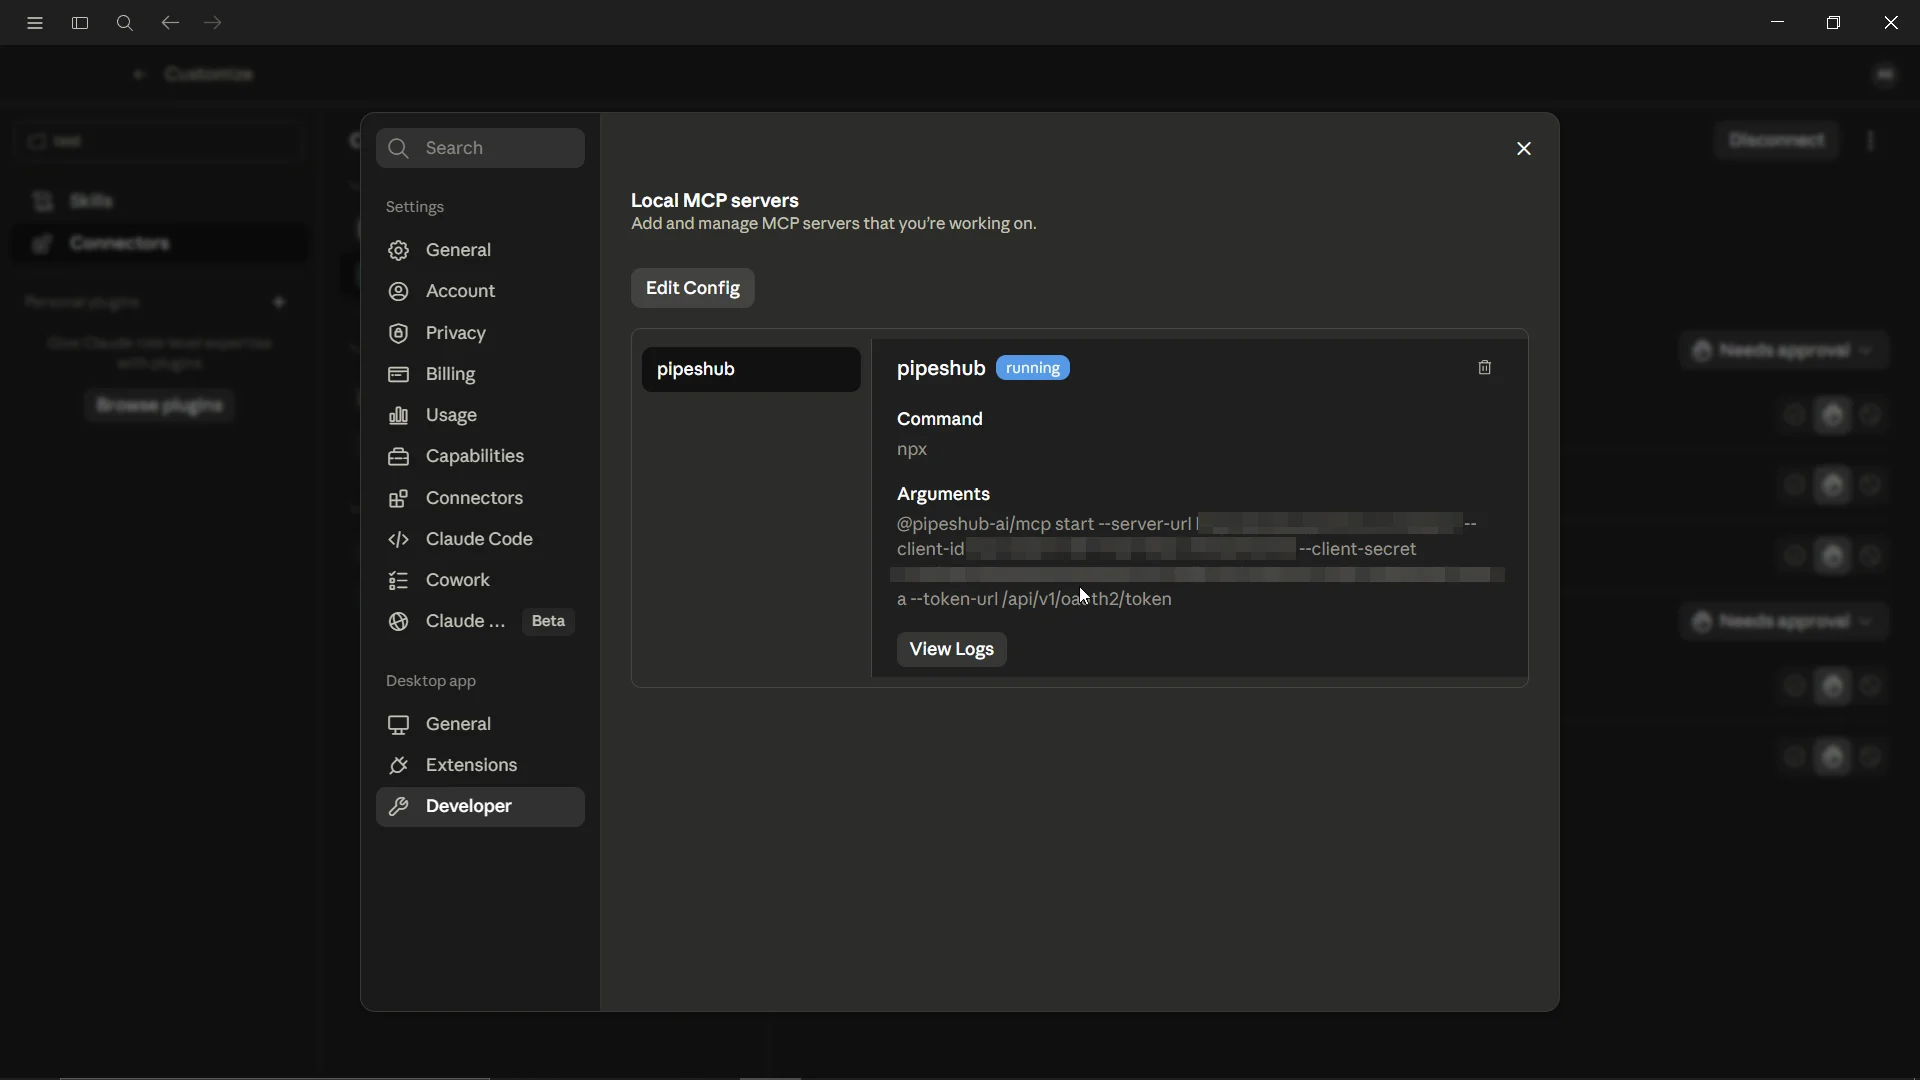
Open Claude Desktop's config file (`claude_desktop_config.json`) and add the PipesHub server. You can find it via **Settings > Developer > Edit Config**, or at:
* **macOS**: `~/Library/Application Support/Claude/claude_desktop_config.json`
* **Windows**: `%APPDATA%\Claude\claude_desktop_config.json`
```json theme={null}
{
"mcpServers": {
"pipeshub": {
"command": "npx",
"args": [
"-y",
"@pipeshub-ai/mcp",
"start",
"--server-url",
"http://localhost:3000/api/v1",
"--client-id",
"YOUR_CLIENT_ID",
"--client-secret",
"YOUR_CLIENT_SECRET",
"--token-url",
"/api/v1/oauth2/token"
]
}
}
}
```
Replace `http://localhost:3000` with your actual instance host, and `YOUR_CLIENT_ID` / `YOUR_CLIENT_SECRET` with the credentials from your OAuth app.
### Apply the changes
Save the file and **fully quit and reopen Claude Desktop** (a window reload isn't enough). Once it restarts, the PipesHub tools appear under the tools menu in your conversations.
 ***
## Troubleshooting
Custom connectors require a **public HTTPS** endpoint with a valid SSL certificate. Claude Desktop can't reach `http://localhost`, self-signed certificates, or private hostnames through the connector flow. Either put PipesHub behind a real domain with valid SSL, or switch to the [local stdio bridge](#option-2-local-stdio-bridge).
* Make sure Node.js 20+ is installed and `npx` is on your `PATH`.
* Confirm your instance is reachable: `curl http://localhost:3000/api/v1` should respond (not a connection refused error).
* After editing `claude_desktop_config.json`, fully quit and relaunch Claude Desktop.
Verify the OAuth app has the **Client Credentials** grant enabled, and that the `--token-url` points to your instance's token endpoint (`PIPESHUB_INSTANCE_URL/api/v1/oauth2/token`). Double-check the Client ID and Secret are correct and the app is active.
***
## Troubleshooting
Custom connectors require a **public HTTPS** endpoint with a valid SSL certificate. Claude Desktop can't reach `http://localhost`, self-signed certificates, or private hostnames through the connector flow. Either put PipesHub behind a real domain with valid SSL, or switch to the [local stdio bridge](#option-2-local-stdio-bridge).
* Make sure Node.js 20+ is installed and `npx` is on your `PATH`.
* Confirm your instance is reachable: `curl http://localhost:3000/api/v1` should respond (not a connection refused error).
* After editing `claude_desktop_config.json`, fully quit and relaunch Claude Desktop.
Verify the OAuth app has the **Client Credentials** grant enabled, and that the `--token-url` points to your instance's token endpoint (`PIPESHUB_INSTANCE_URL/api/v1/oauth2/token`). Double-check the Client ID and Secret are correct and the app is active.