> ## Documentation Index
> Fetch the complete documentation index at: https://docs.pipeshub.com/llms.txt
> Use this file to discover all available pages before exploring further.
# ClickUp Toolset
> Project and task management integration for AI agents
ClickUp Toolset
Tasks, lists, docs, and team collaboration
Ready
Project Management
## Overview
The ClickUp toolset enables AI agents to interact with your ClickUp workspace. Agents can create and update tasks, manage spaces, folders, and lists, add comments and checklists, and author docs and pages — all through natural language. It uses OAuth 2.0 so agents act on behalf of the authenticated user in the Workspaces they consent to.
### Key Capabilities
* **Task management** - Create, update, search, and filter tasks across the workspace
* **Workspace structure** - Create and browse spaces, folders, and lists
* **Comments and replies** - Post comments on tasks and reply in threads
* **Checklists** - Add checklists and check/uncheck items with assignees
* **Docs and pages** - Create docs, add pages, and edit content in markdown
* **Deep linking** - Every entity returned includes a `web_url` back to ClickUp
***
## Available Tools
### Tasks
| Tool | Description |
| -------------- | ----------------------------------------------------------------------- |
| `get_tasks` | Filter tasks workspace-wide by status, assignee, tags, dates |
| `search_tasks` | Search tasks by keyword or phrase |
| `get_task` | Get full details of a specific task |
| `create_task` | Create a new task or subtask in a list |
| `update_task` | Update task fields (name, status, priority, dates, assignees, archived) |
### Workspace Structure
| Tool | Description |
| --------------------------------- | --------------------------------------------------------------------- |
| `get_authorized_teams_workspaces` | List all workspaces accessible to the user |
| `get_spaces` | Get all spaces in a workspace |
| `create_space` | Create a new space in a workspace |
| `get_folders` | Get all folders in a space |
| `create_folder` | Create a new folder in a space |
| `get_lists` | Get all lists in a folder |
| `get_folderless_lists` | Get lists at space level (not in a folder) |
| `create_list` | Create a list in a folder or at space level |
| `update_list` | Update list properties (name, content, due date, priority, assignees) |
### Comments
| Tool | Description |
| --------------------- | ---------------------------------------------- |
| `get_comments` | Get comments on a task or replies to a comment |
| `create_task_comment` | Add a comment to a task or reply to a comment |
### Checklists
| Tool | Description |
| ----------------------- | ---------------------------------------- |
| `create_checklist` | Create a checklist on a task |
| `create_checklist_item` | Add an item to a checklist |
| `update_checklist_item` | Check/uncheck or update a checklist item |
### Docs and Pages
| Tool | Description |
| -------------------- | ----------------------------------------------------- |
| `get_workspace_docs` | List docs in a workspace |
| `get_doc_pages` | List pages in a doc |
| `get_doc_page` | Get a specific page's content |
| `create_doc` | Create a new doc in a workspace |
| `create_doc_page` | Create a page inside a doc |
| `update_doc_page` | Edit a doc page (replace, append, or prepend content) |
### Auth
| Tool | Description |
| --------------------- | ---------------------------------- |
| `get_authorized_user` | Get the authenticated ClickUp user |
***
## Configuration Guide
### Step 1: Open the ClickUp API settings
1. Sign in to ClickUp as a **Workspace Owner or Admin**.
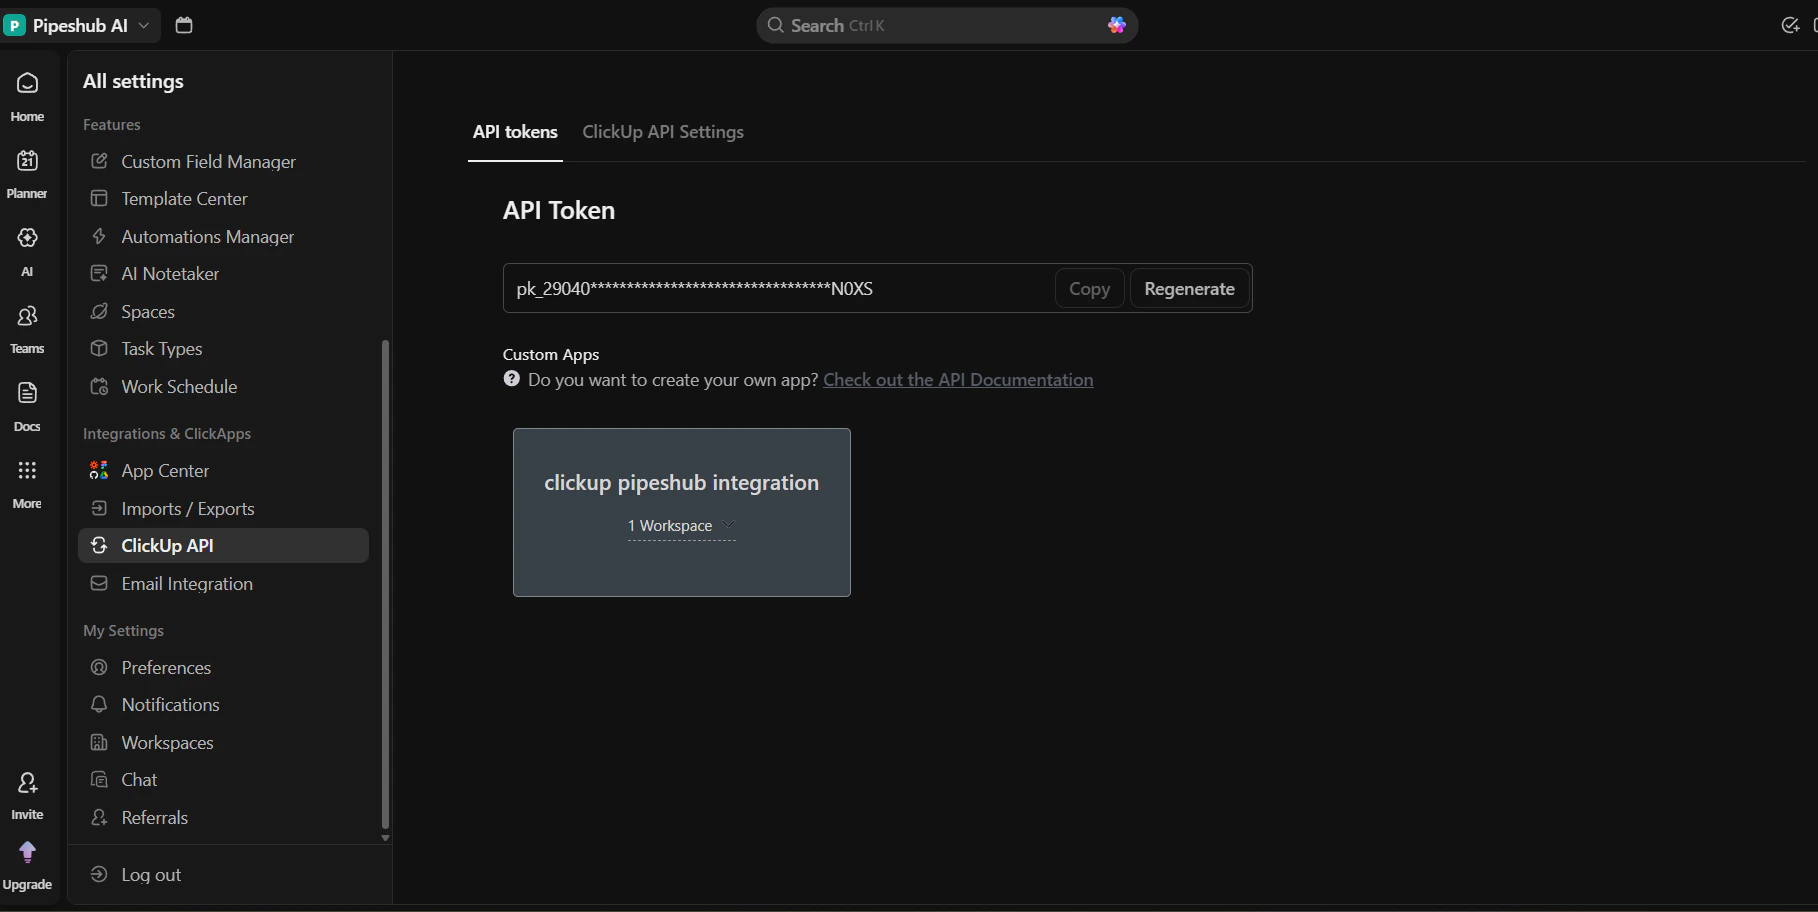
2. In the top-left corner, click **Settings**.
3. Scroll to the **Integrations & ClickApps** section and click **ClickUp API**.
4. On the **ClickUp API** page, switch from the **API Tokens** tab to the **ClickUp API Settings** tab.
If **ClickUp API** or the **ClickUp API Settings** tab is not visible, your role doesn't permit creating OAuth apps. Ask a Workspace Owner or Admin to complete this step.
### Step 2: Get the Redirect URI from PipesHub
Before creating the app, copy the Redirect URI from PipesHub so the values match exactly.
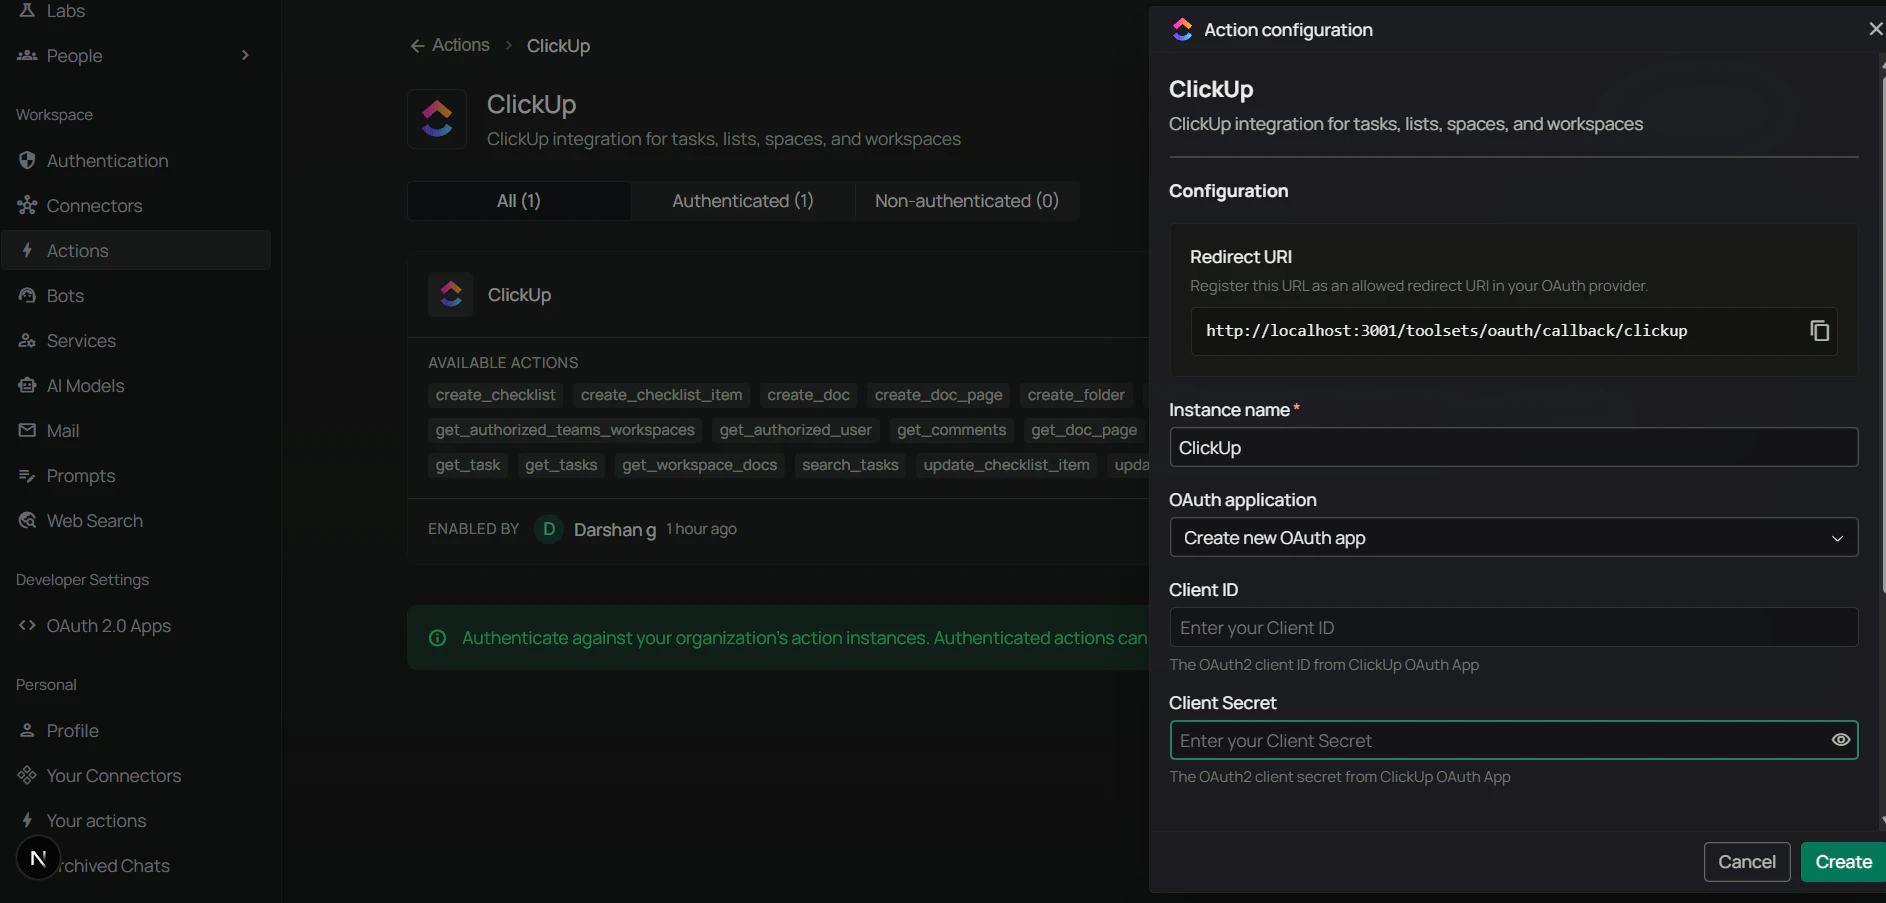
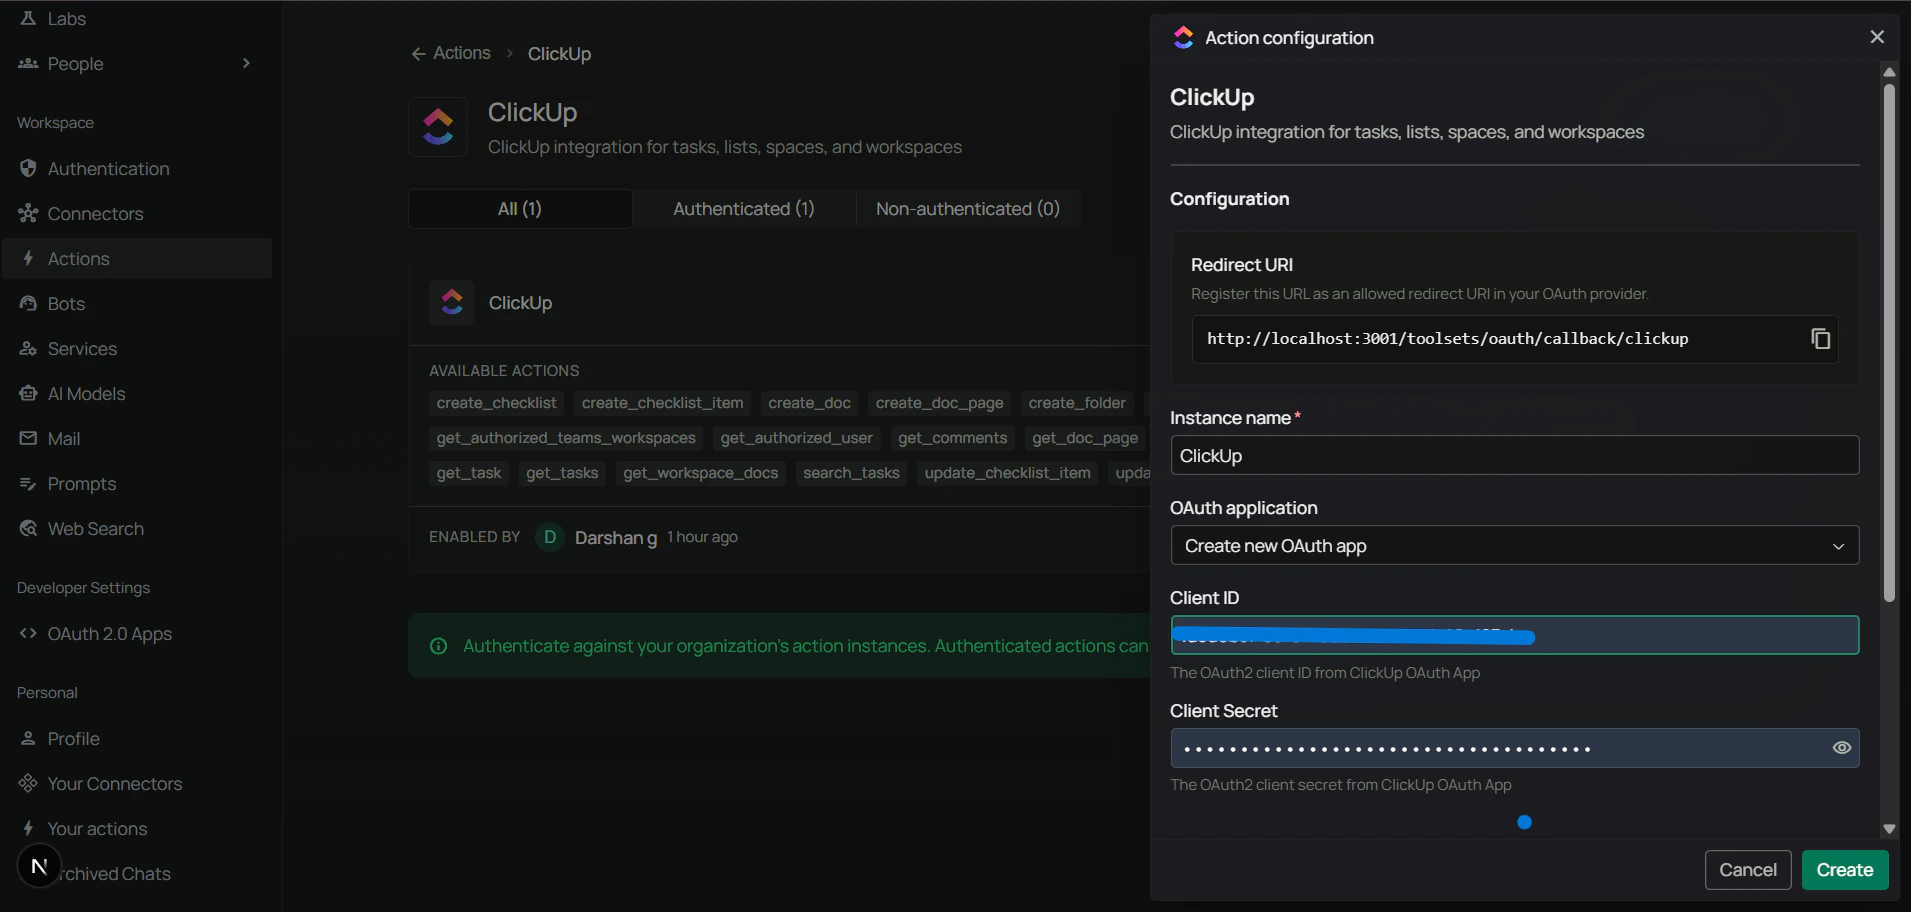
1. In PipesHub, go to **Workspace Settings** → **Actions**.
2. Find **ClickUp** in the list and click **+ Setup** (or **Configure**).
3. Copy the **Redirect URI** shown in the dialog.
### Step 3: Create the OAuth app
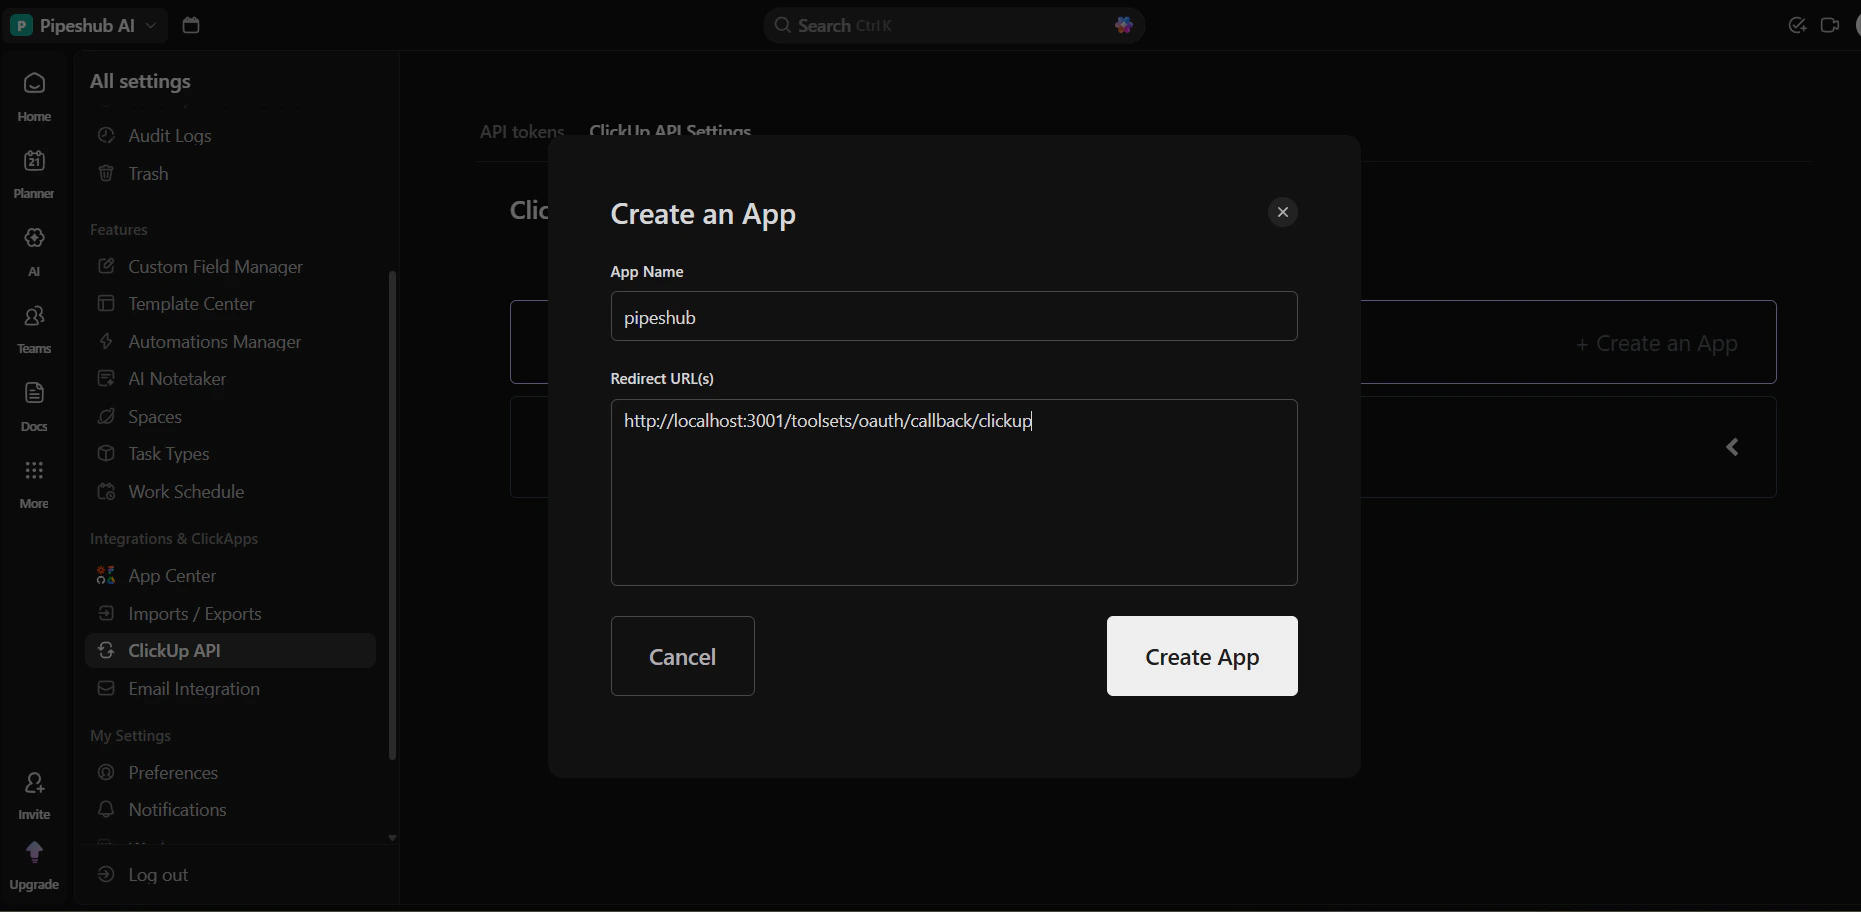
1. Back on the **ClickUp API Settings** tab, click **Create an App**.
2. In the dialog that opens, enter an **App Name** (for example, `PipesHub ClickUp Toolset`).
3. Paste the **Redirect URI** you copied from PipesHub into the **Redirect URL** field.
4. Click **Create App**.
The Redirect URL must match exactly. Any difference (trailing slash, protocol, casing) will cause authentication to fail. ClickUp also recommends HTTPS — non-SSL redirect URIs may be deprecated in the future.
### Step 4: Copy Client ID and Client Secret
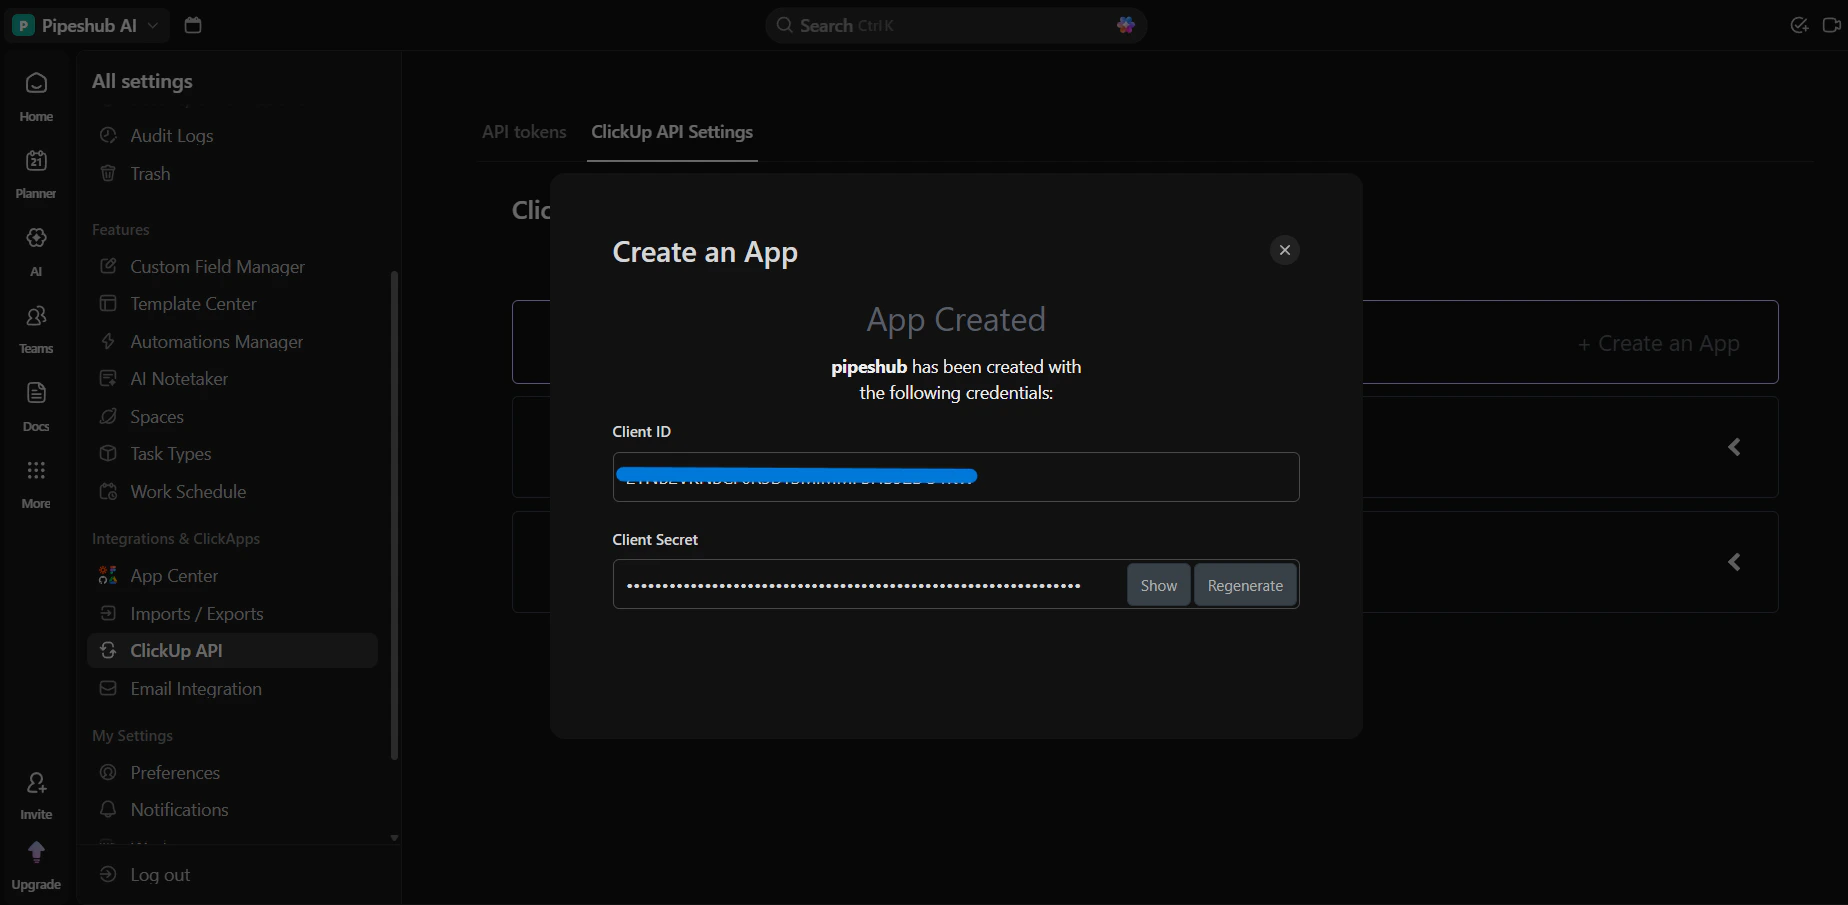
After you click **Create App**, ClickUp lists the app on the **ClickUp API Settings** tab with its **Client ID** and **Client Secret**.
* **Client ID** — used as **Client ID** in PipesHub.
* **Client Secret** — used as **Client Secret** in PipesHub. Copy it immediately; you cannot view it again later.
The **Client Secret is shown only once**. If you leave this page without copying it, create a new secret.
### Step 5: Permissions and scopes
ClickUp OAuth does **not** use granular scopes. When a user authorizes the app, they choose one or more **Workspaces** to grant access to, and the access token inherits whatever permissions that user already has in those Workspaces. There is no scope selection step on either side.
### Step 6: Configure the ClickUp toolset in PipesHub
1. In PipesHub, return to **Workspace Settings** → **Actions**.
2. Find **ClickUp** and open setup / configuration (**+ Setup** or **Configure**).
3. Confirm the **Redirect URI** in the dialog matches the **Redirect URL** you registered in ClickUp in **Step 3**.
4. Paste your **Client ID** and **Client Secret**, then save the instance.
### Step 7: Authenticate the ClickUp toolset
Authentication uses the same OAuth flow in either location:
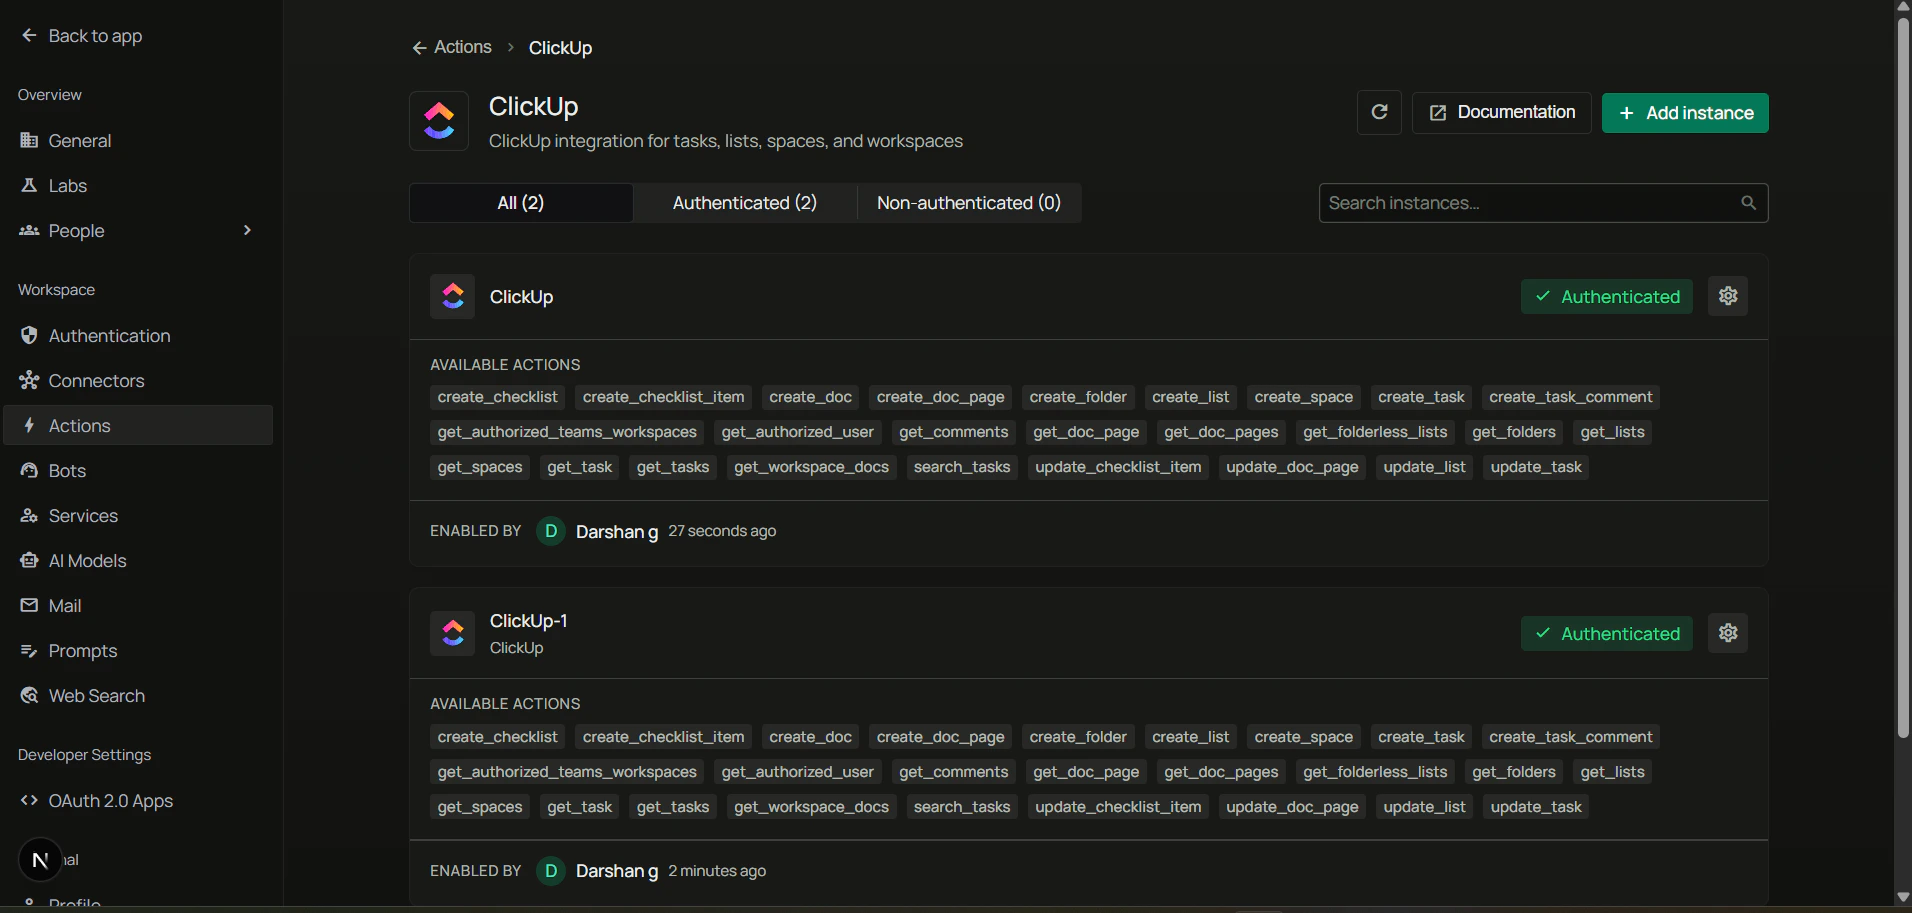
* **Admins** can authenticate the shared instance directly under **Workspace Settings → Actions**.
* **Users** can authenticate their own personal instance under **Your actions** (in the **Personal** section of the sidebar).
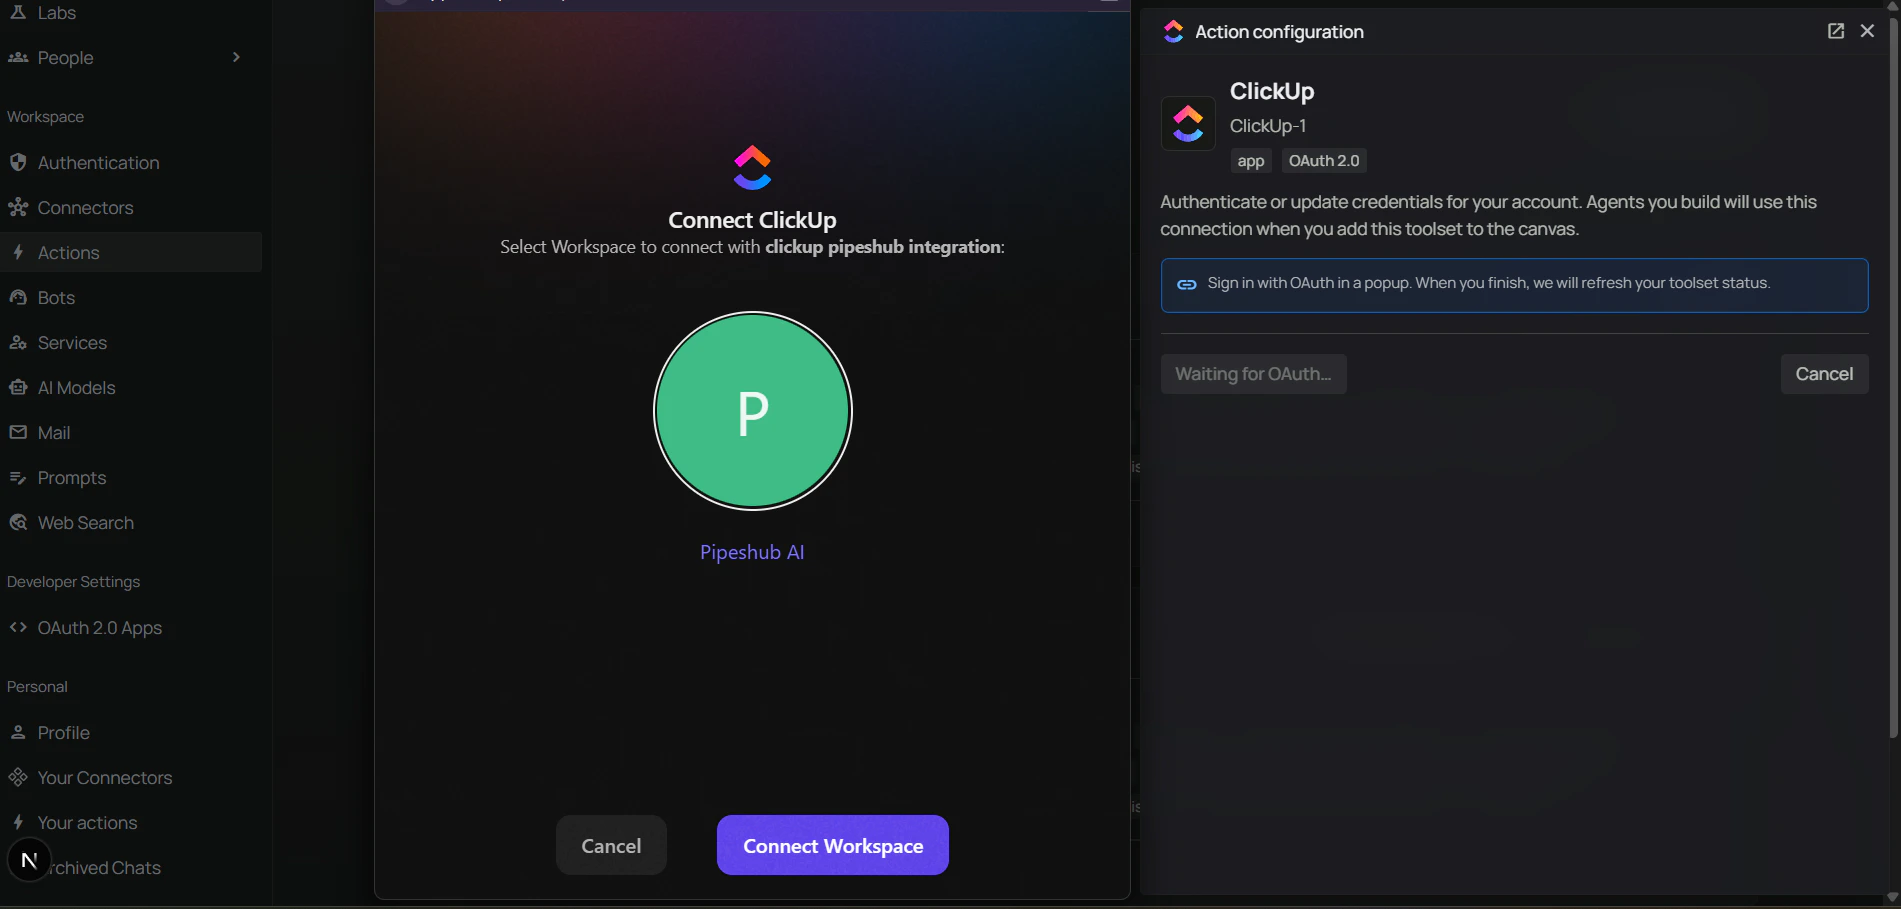
1. On the ClickUp tile (in **Actions** or **Your actions**), click **Authenticate with OAuth**.
2. A popup opens to ClickUp's authorization page — select the **Workspace(s)** to connect and click **Connect Workspace**.
3. The popup closes and the ClickUp tile now shows **Authenticated** status.
### Step 8: Add ClickUp to an agent
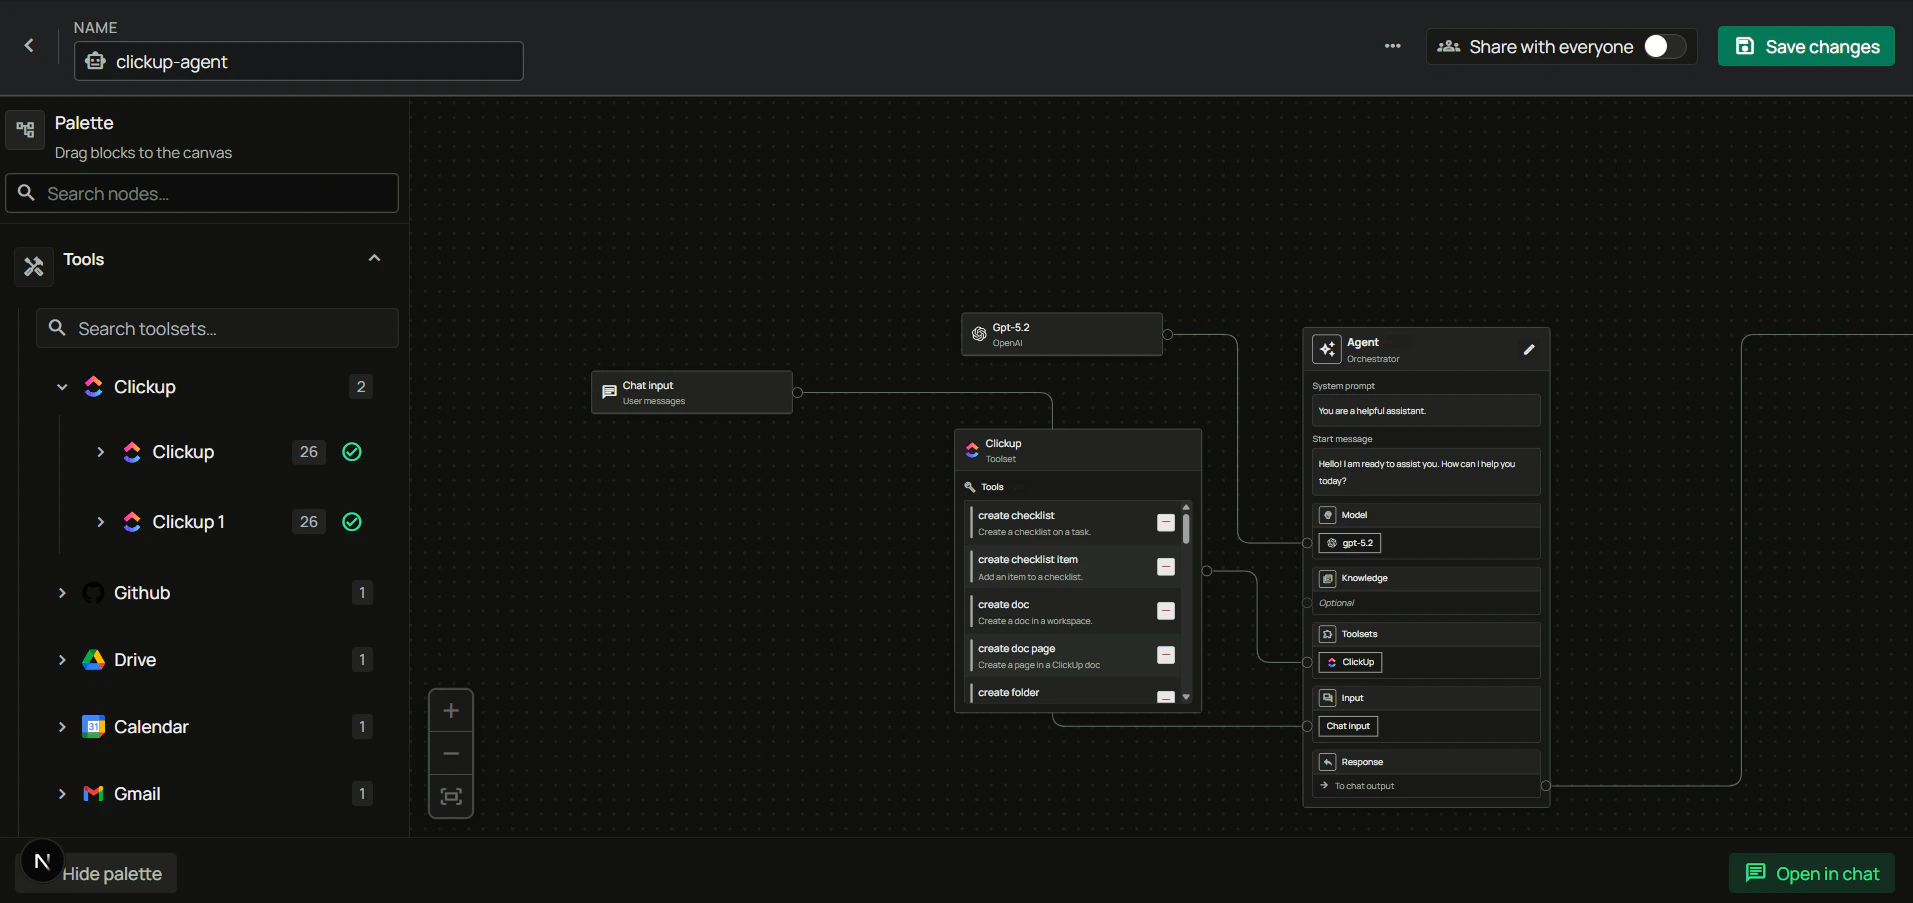
1. Go to the **Home** page.
2. Next to **Agents**, click **+** to create a new agent.
3. Give the agent a name, drag the **ClickUp** toolset onto the canvas, connect it to the **Agent Core** node with your model and chat input/output, then create the agent.
***
## FAQ
ClickUp's OAuth implementation does not support granular scopes. Instead of picking individual permissions, the authorizing user selects which **Workspaces** to expose to the app. The resulting token can do anything that user can do inside those Workspaces. If you want to restrict what the toolset can touch, authorize as a user with narrower Workspace permissions.
ClickUp only lists Workspaces where your account is a member. Workspaces you've been removed from, or that belong to other accounts, will not appear. If a Workspace you expect is missing, check that you're signed in to ClickUp with the correct account in the same browser session.
You can create an OAuth app and authorize the toolset on any ClickUp plan. However, rate limits and some API endpoints vary by plan, so heavy usage may benefit from a higher tier.
***
## Usage Tips
**Example: Create a task**\
Ask your agent to "create a task in the Marketing list called Launch checklist" — it will pick the right list and file the task. You can also specify assignees, priority, due date, and description in the same sentence.
**Example: Update a task**\
Ask to "move task abc123 to In Progress" or "set the due date on task xyz789 to next Friday". The agent updates status, priority, dates, and assignees in place.
**Example: Search for tasks**\
Ask to "find all open tasks assigned to me due this week" or "search tasks tagged 'bug' updated in the last 7 days".
**Example: Add a checklist**\
Ask to "add a QA checklist to task abc123 with items Review, Test, and Ship". The agent creates the checklist and each item in one flow.
**Example: Work with docs**\
Ask to "create a page called Release Notes in the Engineering doc" or "append today's standup to the Team Updates page". ClickUp docs accept markdown directly.