> ## Documentation Index
> Fetch the complete documentation index at: https://docs.pipeshub.com/llms.txt
> Use this file to discover all available pages before exploring further.
# Jira Data Center Toolset
> Issue tracking and project management integration for AI agents on self-hosted Jira
Jira Data Center Toolset
Issue tracking and project management on self-hosted Jira
Ready
Atlassian
## Overview
The Jira Data Center toolset lets AI agents work with the Jira you run on your own servers. Agents can create issues, search tickets, add comments, update issues, and more. Use it to automate project management work and to bring Jira into a conversation with an agent.
If Atlassian hosts your Jira for you, that is Jira Cloud. Use the [Jira Cloud toolset](/toolsets/jira/jira) instead. The two toolsets are not interchangeable.
### Key Capabilities
* **Create and manage issues** - Create tickets, update them, move them to a new status
* **Search with JQL** - Find issues using Jira Query Language
* **Discover required fields** - Ask Jira which fields a project needs before creating an issue
* **Comment management** - Add and read comments on issues
* **Project operations** - List projects, read project metadata
* **User operations** - Search users, get the current user
***
## Available Tools
| Tool | Description | Type |
| ------------------------- | --------------------------------------------------------------------------------- | ------- |
| `get_create_issue_fields` | Get every field a project and issue type needs, with field IDs and allowed values | Search |
| `create_issue` | Create a new issue | Action |
| `update_issue` | Update an issue (summary, description, assignee, status, and more) | Action |
| `get_issue` | Get details of a specific issue | Search |
| `search_issues` | Search issues using JQL | Search |
| `add_comment` | Add a comment to an issue | Action |
| `get_comments` | Get comments on an issue | Search |
| `get_projects` | Get all projects you can see | Search |
| `get_project` | Get details of a specific project | Search |
| `get_project_metadata` | Get project metadata (issue types, components) | Search |
| `search_users` | Search users by name or email | Search |
| `get_current_user` | Get the signed-in user's details | Search |
| `validate_connection` | Check the Jira connection and show diagnostics | Utility |
***
## Configuration Guide
The Jira Data Center toolset supports **two ways to sign in**: Personal Access Token (PAT) and Basic Authentication.
In both cases the work is split between an admin and each user:
* **The admin** sets up the shared instance under **Workspace Settings → Actions** and enters only the **Base URL**.
* **Each user** then opens **Your actions** and enters their own credentials.
Every user who wants to use the toolset needs their own credentials, because each agent action runs as that user in Jira.
**This toolset supports Personal Access Token and Basic Authentication only.** OAuth apps you create in the Atlassian Developer Console are for Jira Cloud and will not work here.
| Method | Best for |
| ------------------------------- | ------------------------------------------------------------------------------------------------------------------------------------------ |
| **Personal Access Token (PAT)** | Recommended. Needs Jira Core 8.14 or later. Each user creates their own token and can revoke it at any time. |
| **Basic Authentication** | Older instances that do not support tokens, or where an admin has turned token creation off. Each user enters their username and password. |
#### Step 1: Each user creates a Personal Access Token
Every user who will use the toolset needs their own token.
1. Sign in to your Jira.
2. Click your **profile picture** in the top right, then select **Profile**.
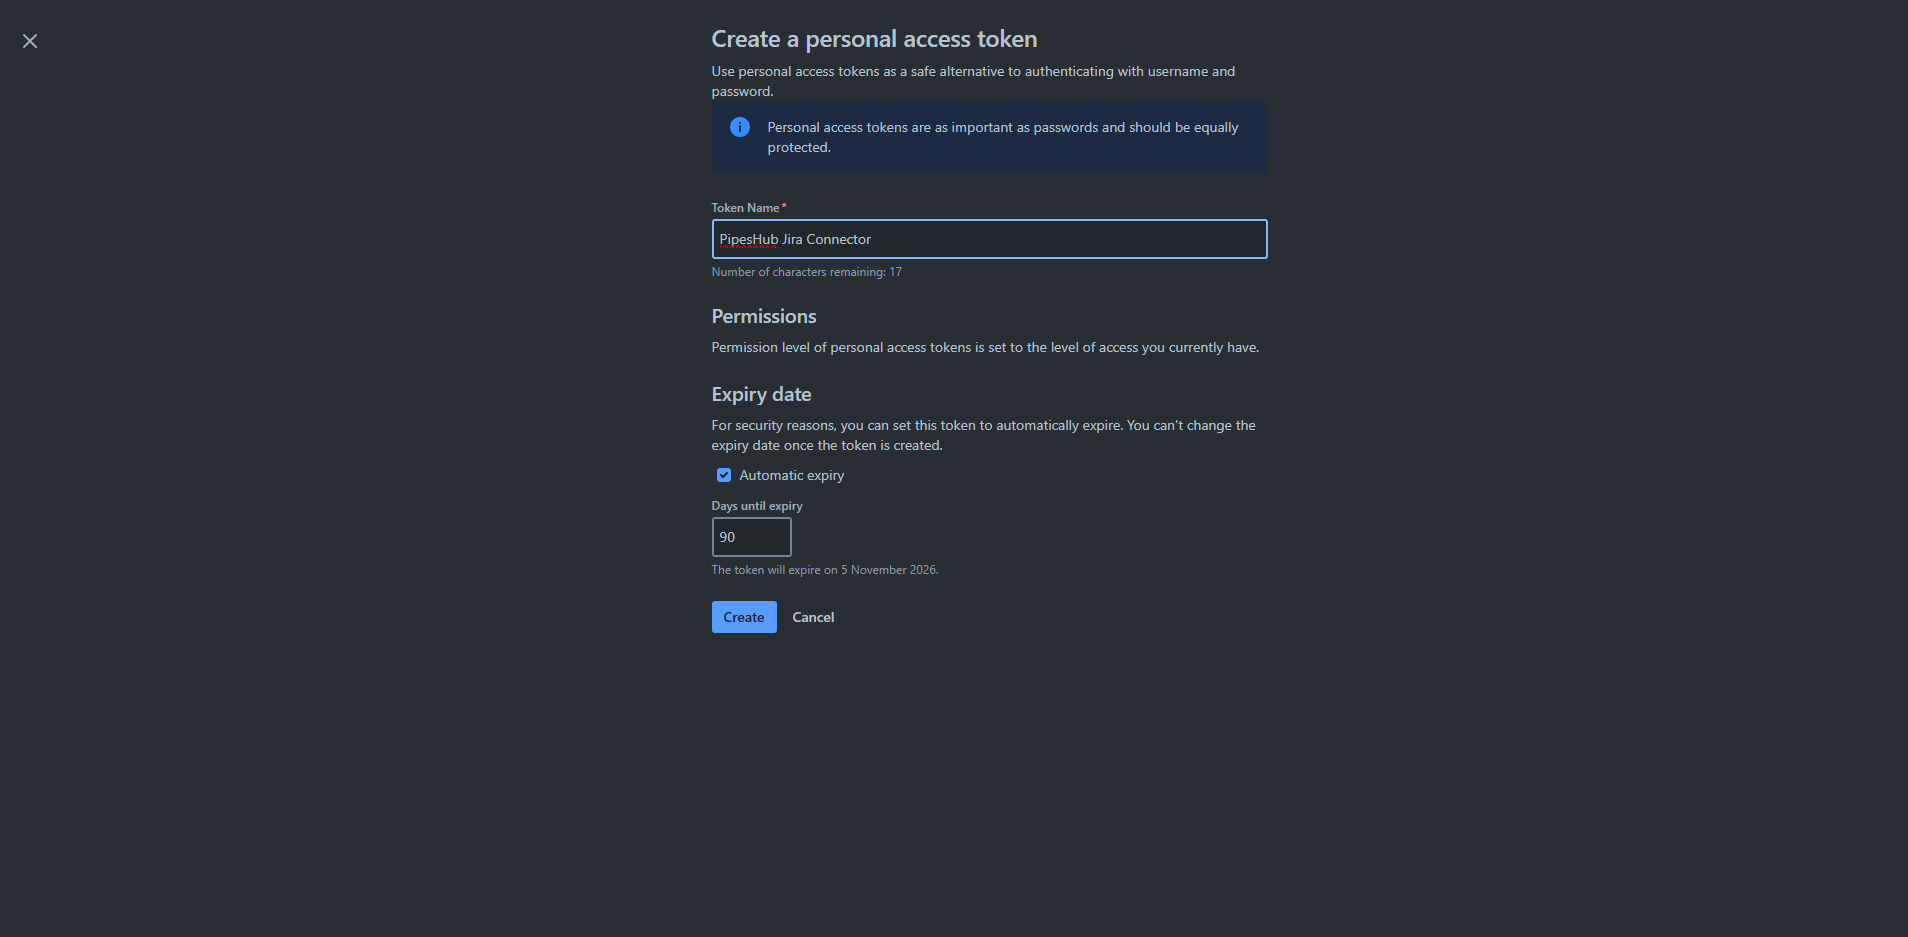
3. Open the **Personal Access Tokens** tab and click **Create token**.
4. Give it a name you will recognise, such as `PipesHub Jira Toolset`, set an expiry if you want, then click **Create**.
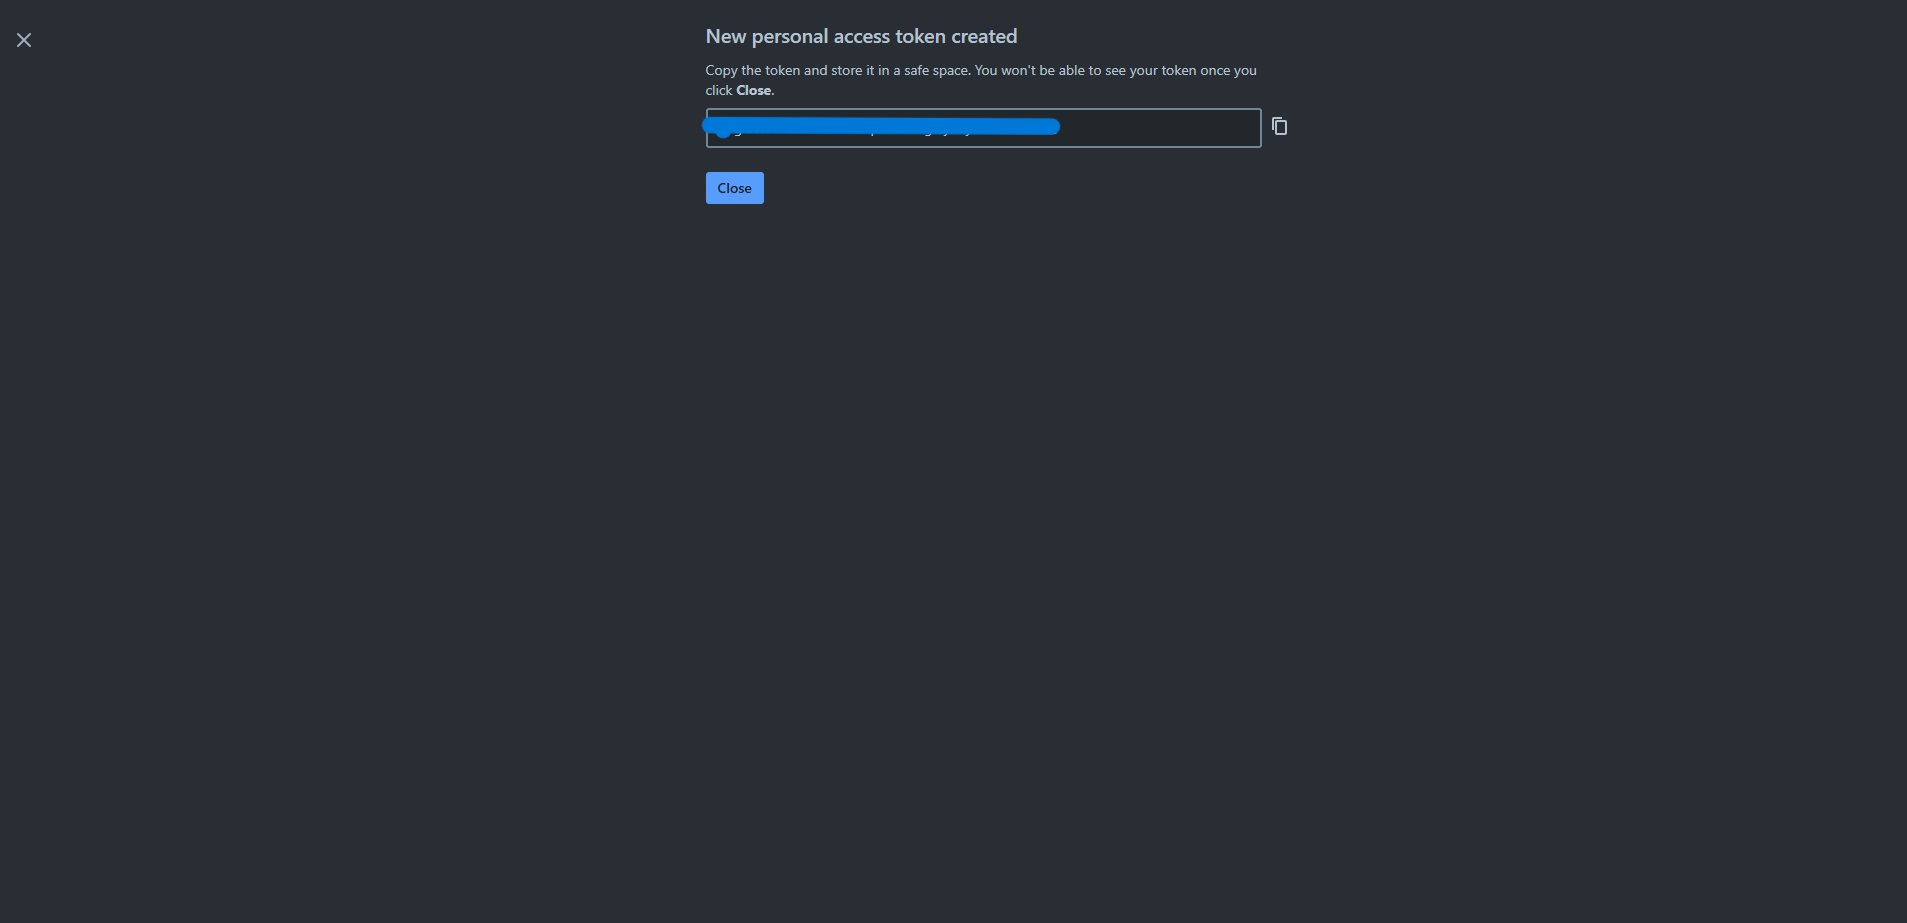
5. Jira shows the token **once**. Copy it and store it somewhere safe.
The token is shown only once. If you close the dialog before copying it, revoke it and create a new one.
A token has the same access as the person who created it. An agent using your token can only do what you can do in Jira.
#### Step 2: Admin — create the instance in Actions
The admin sets only the Base URL here. No credentials are entered at this step.
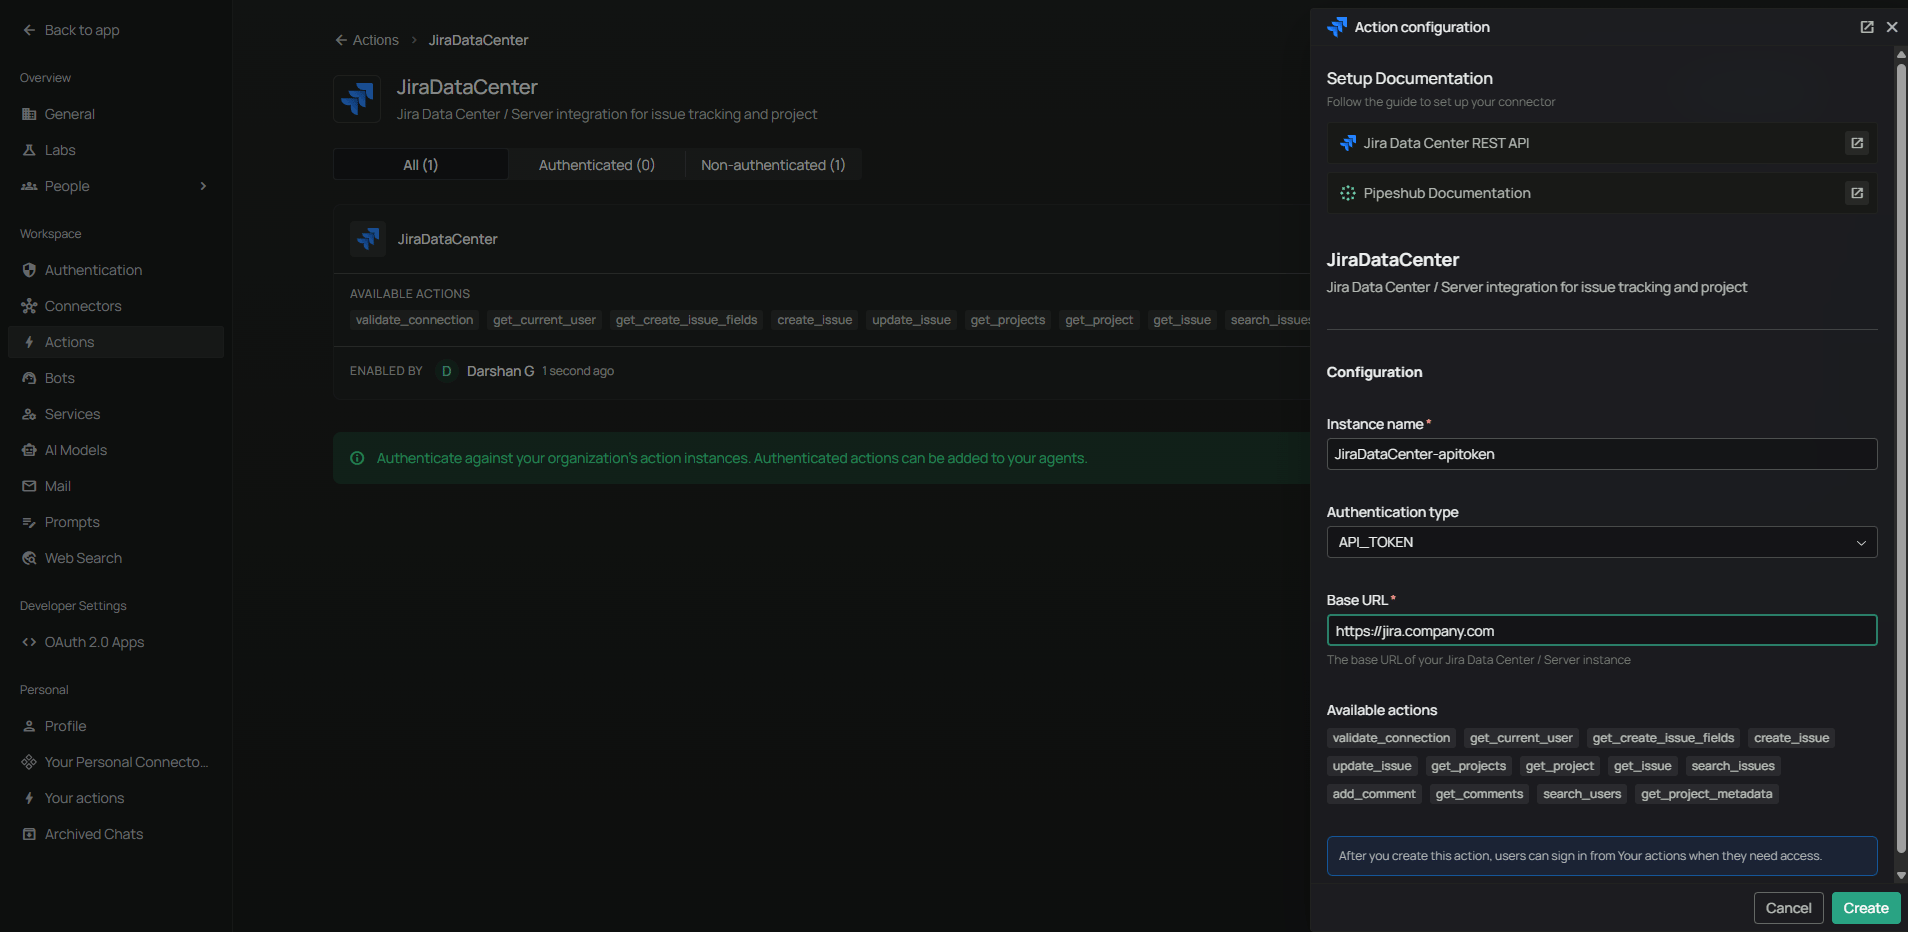
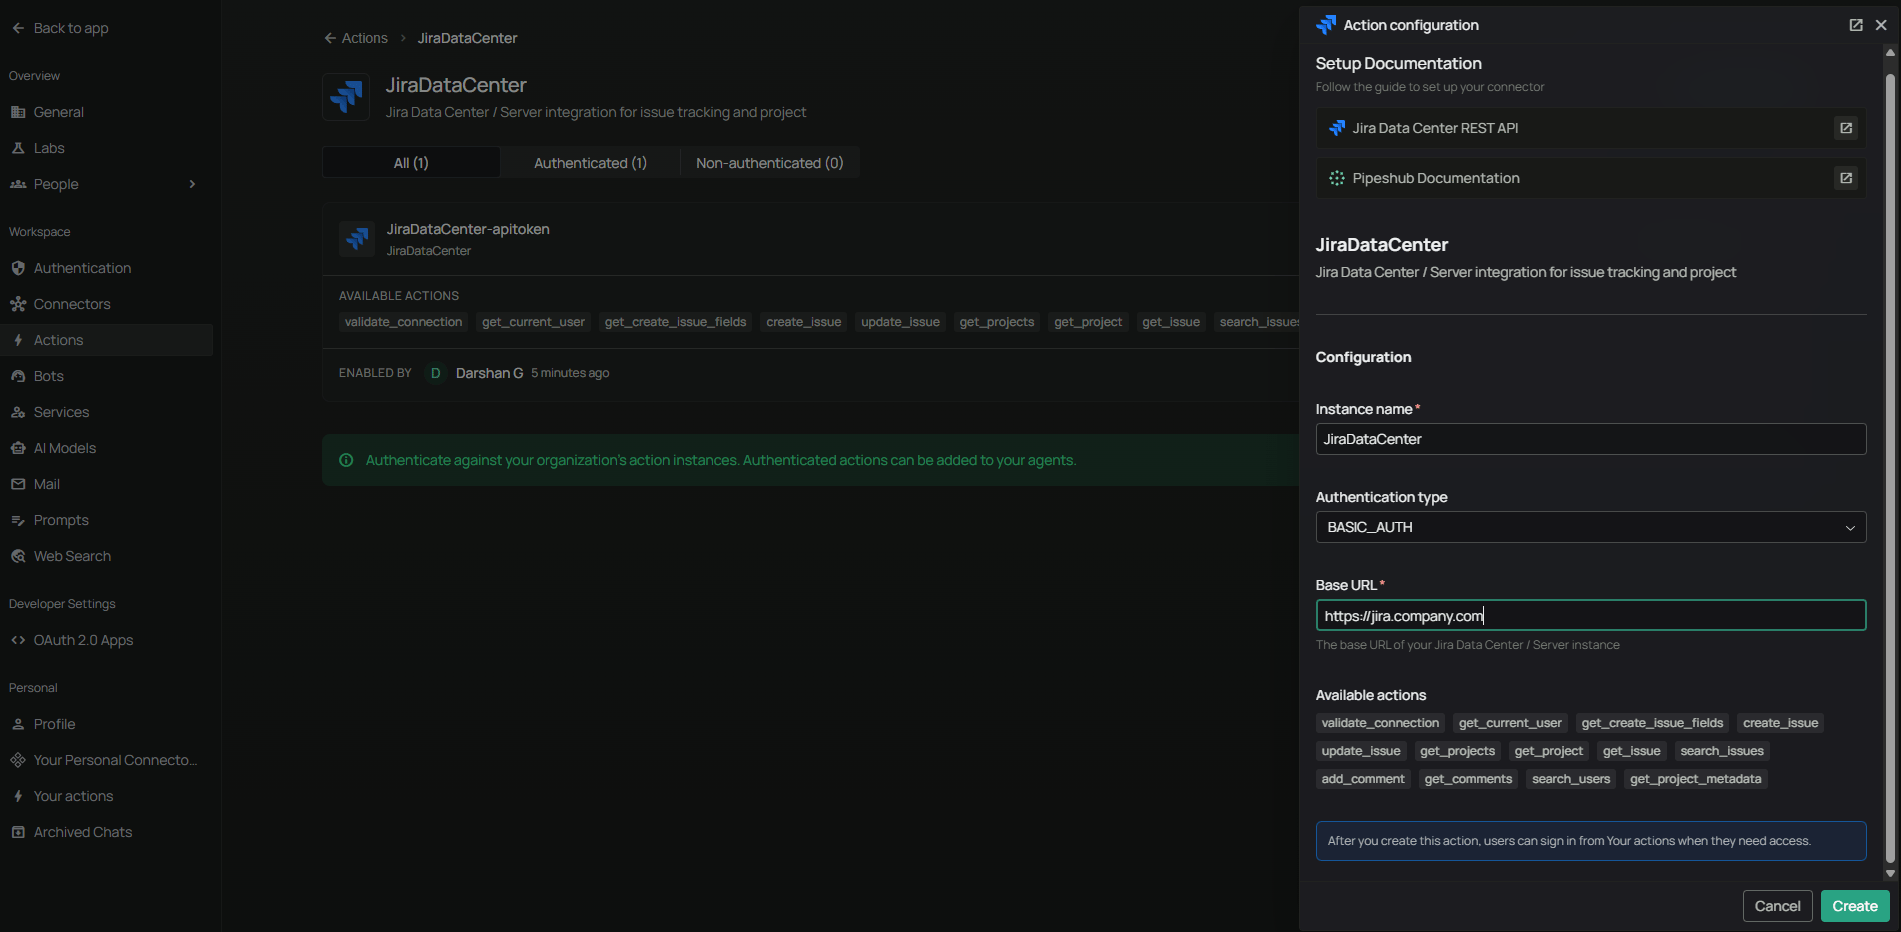
1. In PipesHub, go to **Workspace Settings** → **Actions**.
2. Find **Jira Data Center** and click **+ Setup** for a new instance.
3. Choose **Personal Access Token** as the sign-in method, then enter:
* **Instance Name** (e.g., `Jira Production`)
* **Base URL** — the root URL of your Jira, such as `https://jira.company.com`, with no trailing slash
4. Click **Create**.
Opening the instance settings later brings this dialog back, where you can change the **Instance Name** and **Base URL**. A button below it opens **Your actions** so each user can add their own credentials.
#### Step 3: Each user — add their token in Your actions
Every user who wants to use the toolset does this with their own token.
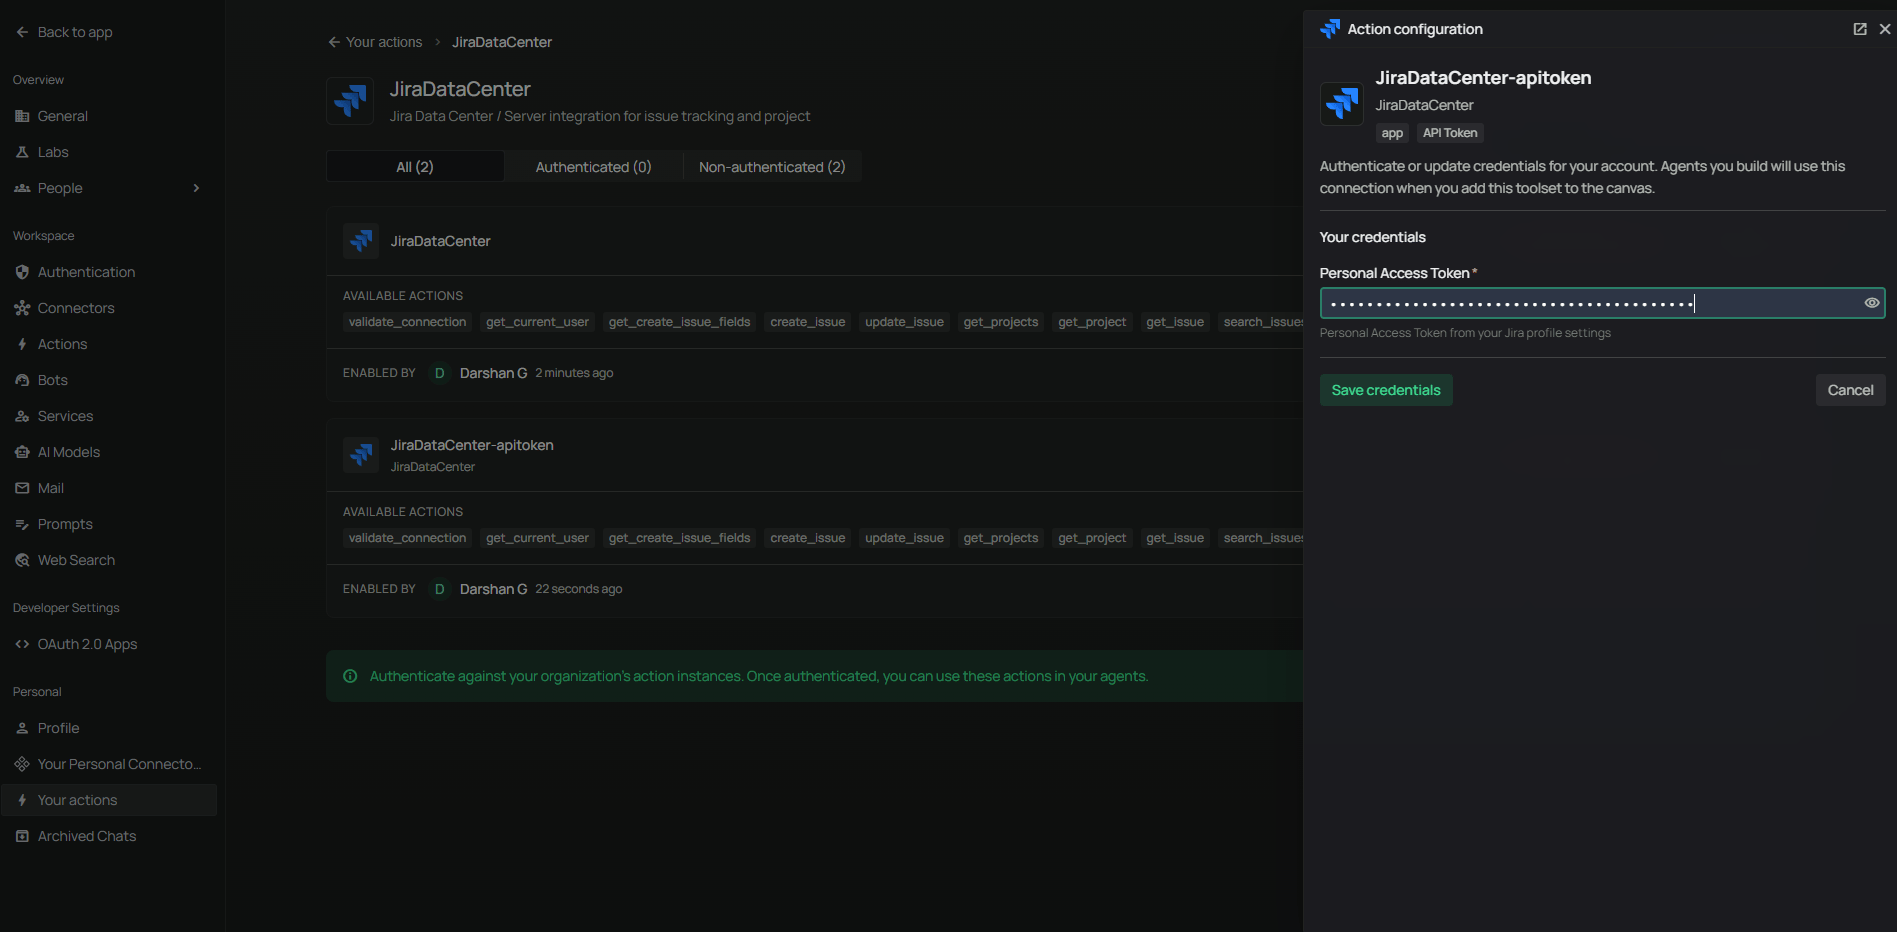
1. In PipesHub, open **Your actions** (under **Personal** in the sidebar).
2. Find the Jira Data Center instance and open it.
3. Enter your **Personal Access Token** from Step 1.
4. Click **Save credentials**.
The tile in **Your actions** now shows **Authenticated**. The toolset is connected for you only. Every other user has to repeat this step with their own token.
#### Step 4: Add the toolset to an agent
1. Go to the **Home** page.
2. Next to **Agents**, click **+** to create a new agent.
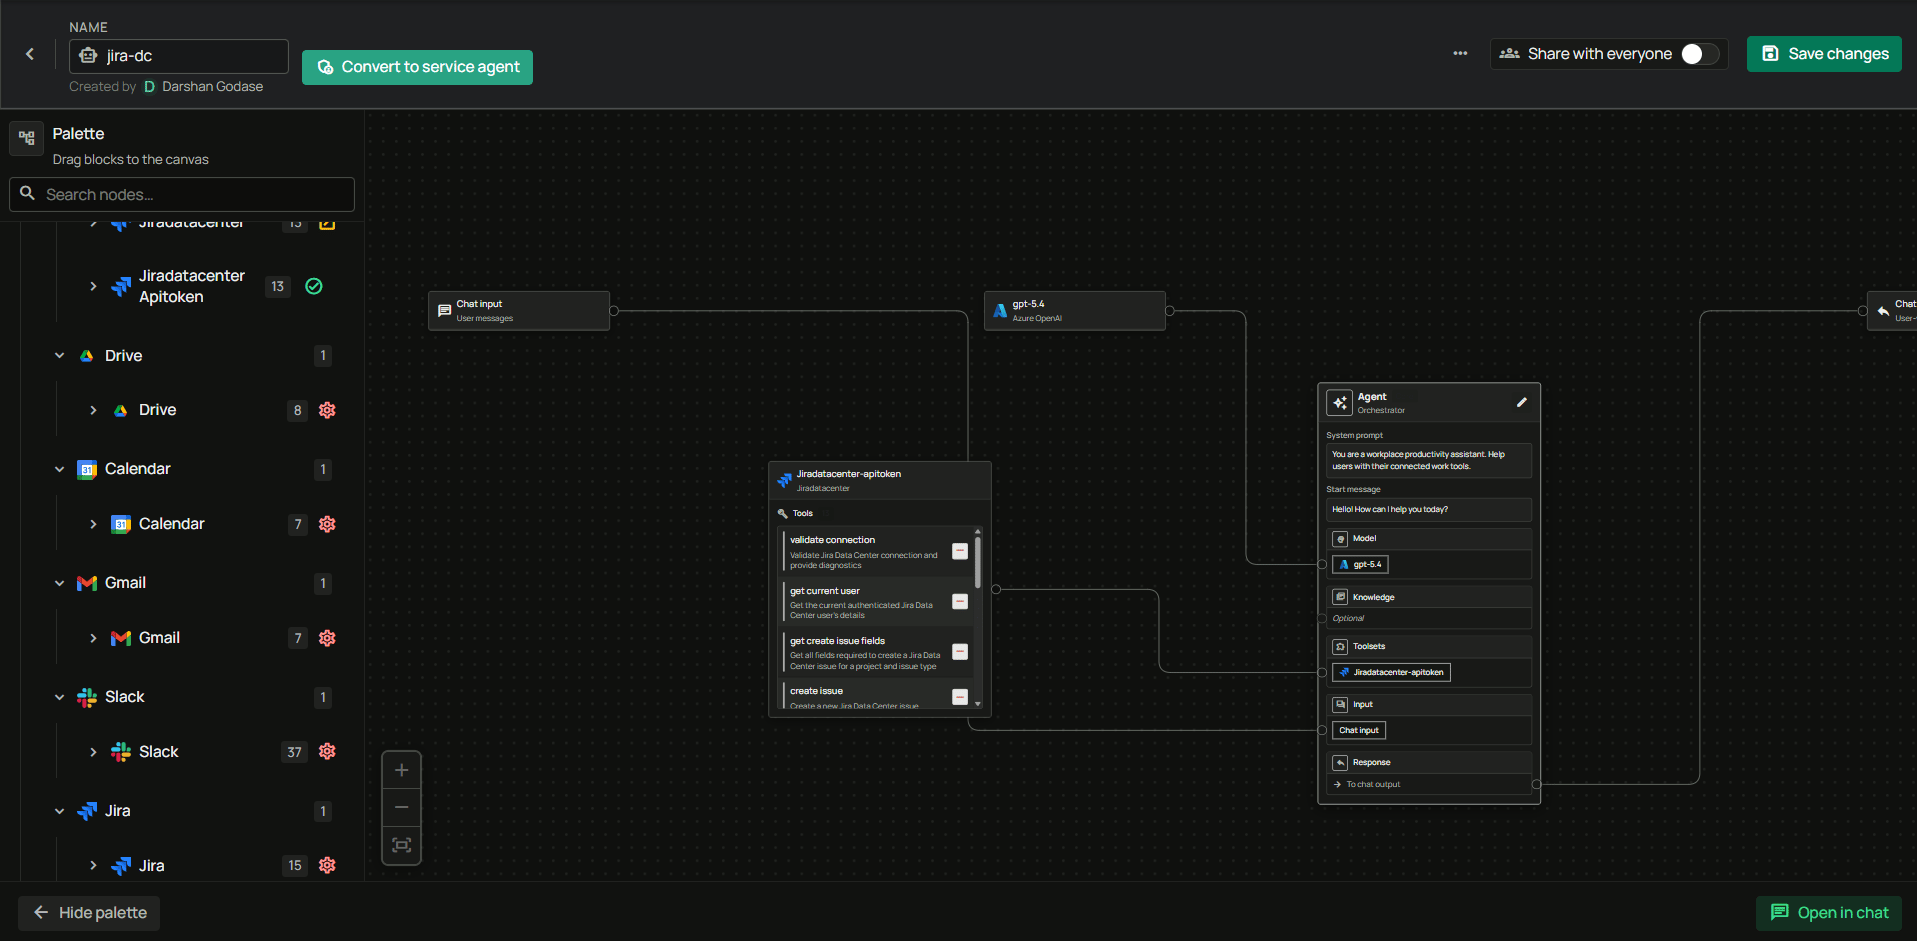
3. Name the agent, drag the **Jira Data Center** toolset onto the canvas, connect it to the **Agent Core** node along with your model and chat input and output, then create the agent.
Use this on instances that do not support Personal Access Tokens, or where an admin has turned off token creation.
#### Step 1: Admin — create the instance in Actions
The admin sets only the Base URL here. No credentials are entered at this step.
1. In PipesHub, go to **Workspace Settings** → **Actions**.
2. Find **Jira Data Center** and click **+ Setup** for a new instance.
3. Choose **Basic Authentication** as the sign-in method, then enter:
* **Instance Name** (e.g., `Jira Production`)
* **Base URL** — the root URL of your Jira, such as `https://jira.company.com`, with no trailing slash
4. Click **Create**.
#### Step 2: Each user — add their username and password in Your actions
Every user who wants to use the toolset does this with their own account.
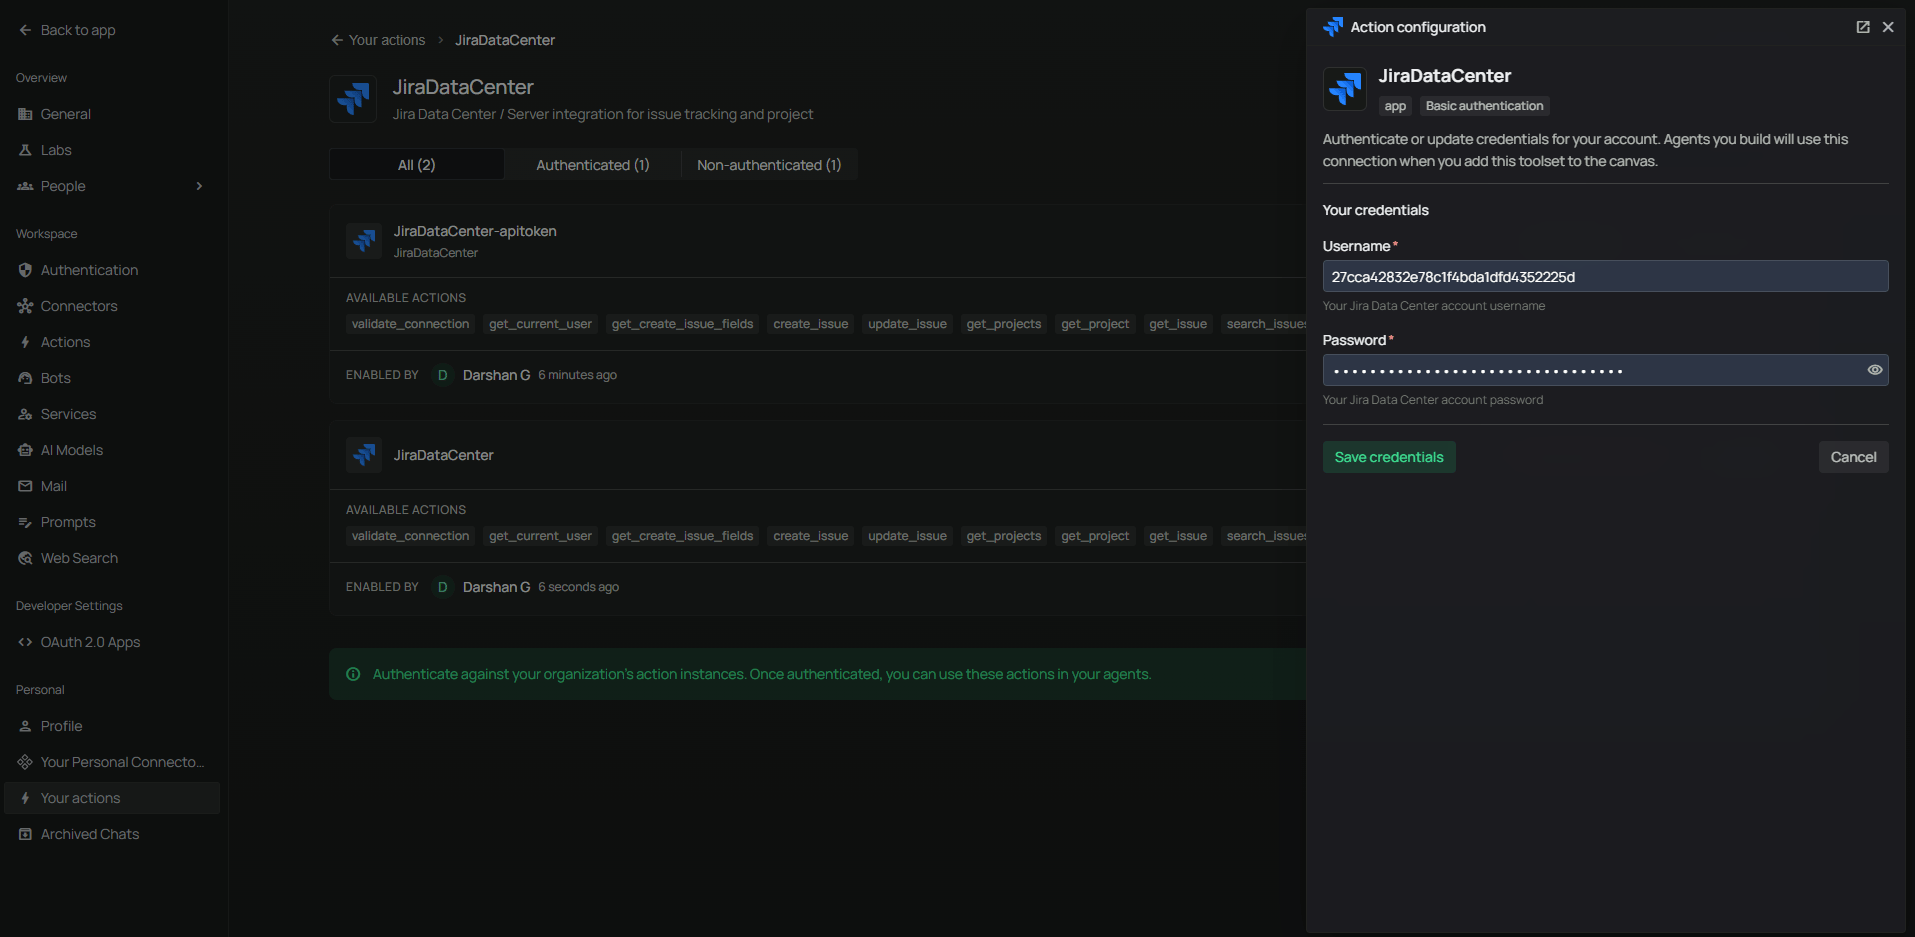
1. In PipesHub, open **Your actions** (under **Personal** in the sidebar).
2. Find the Jira Data Center instance and open it.
3. Enter:
* **Username** — your Jira username
* **Password** — your Jira password
4. Click **Save credentials**.
Enter the Jira **username**, not the email address. On many instances these are different.
#### Step 3: Add the toolset to an agent
1. Go to the **Home** page.
2. Next to **Agents**, click **+** to create a new agent.
3. Name the agent, drag the **Jira Data Center** toolset onto the canvas, connect it to the **Agent Core** node along with your model and chat input and output, then create the agent.
***
## FAQ
No. This toolset supports **Personal Access Token** and **Basic Authentication** only. OAuth apps created in the Atlassian Developer Console are for Jira Cloud and will not work here.
| | Personal Access Token | Basic Authentication |
| -------------------- | -------------------------- | ----------------------------------------------- |
| **Best for** | Jira Core 8.14 or later | Older instances, or where tokens are turned off |
| **Admin sets up** | Instance Name and Base URL | Instance Name and Base URL |
| **Each user enters** | Their own token | Their username and password |
Use a **Personal Access Token** unless your instance cannot create them.
| Aspect | Connector | Toolset |
| ------------- | --------------------------------------------- | ------------------------------------------- |
| **Purpose** | Sync and index Jira data so you can search it | Let agents do things in Jira |
| **Direction** | One way, Jira into PipesHub | Two ways, read and write |
| **Use it to** | Search issues, projects, and comments | Create issues, update tickets, add comments |
**Example:** use the [connector](/connectors/jira/jira-data-center) to search existing tickets. Use the toolset to let an agent create a new issue or change a ticket's status.
Every agent action runs as a real Jira user. Using your own token means agents can only see and change what you can see and change in Jira, and the history in Jira shows who did it.
***
When searching issues, include a time range, such as "from the last 30 days" or "updated this week". The toolset asks for one so searches stay bounded and results stay accurate.
***
## Usage Tips
**How do I create an issue?**\
Ask your agent to "create a Jira ticket" and give it the project key, the title, and the issue type (Task, Bug, or Story). You can also give an assignee, a priority, and labels.
**Why does the agent ask me extra questions before creating an issue?**\
Many projects require custom fields such as Story Points, Sprint, or Due Date. The agent calls `get_create_issue_fields` first to find out what your project needs, then asks you for anything it does not already know. It will not guess a value for a required field.
**How do I search for issues?**\
Ask to "find Jira issues" with the criteria you want. The agent writes the JQL for you. For example: "show me all in-progress issues in project PA from the last week". For your own tickets, just say "my tickets" — the agent uses `currentUser()` and does not need to look you up first.
**How do I assign issues?**\
You can assign by name or email, such as "assign to John Smith". The agent looks up the matching Jira username for you. Data Center identifies people by username, not by account ID.
**How do I update issue status?**\
Ask to "move issue PA-123 to In Progress" or "mark PA-456 as Done". The agent runs the matching workflow transition in Jira.
**What formatting can I use in descriptions and comments?**\
Plain text and Jira wiki markup. Data Center does not use Atlassian Document Format, so there is nothing to convert.