> ## Documentation Index
> Fetch the complete documentation index at: https://docs.pipeshub.com/llms.txt
> Use this file to discover all available pages before exploring further.
# Outlook Toolset
> Email, calendar, and meeting management integration for AI agents
Outlook Toolset
Email, calendar, and meeting management
Ready
Microsoft 365
## Overview
The Outlook toolset enables AI agents to send, read, and manage emails, calendar events, recurring meetings, and meeting transcripts in Microsoft Outlook via the Microsoft Graph API. It uses delegated OAuth (user-consent) so agents act on behalf of the authenticated user.
### Key Capabilities
* **Email management** - Send, reply, reply-all, forward, and search emails
* **Calendar operations** - Create, update, delete, and search calendar events
* **Recurring events** - List recurring meetings, find series ending soon, and delete specific occurrences
* **Online meetings** - Retrieve Teams meeting transcripts with speaker diarization
***
## Available Tools
### Email Tools
| Tool | Description |
| ---------------------- | ---------------------------------------------------------------------------- |
| `send_email` | Send an email with subject, body, recipients, CC, and BCC |
| `reply_to_message` | Reply to an existing email message |
| `reply_all_to_message` | Reply-all to an email message |
| `forward_message` | Forward an email to one or more recipients |
| `search_messages` | Search or list emails using OData queries (`$search`, `$filter`, `$orderby`) |
| `get_message` | Get the full details of a specific email by message ID |
| `get_mail_folders` | List mail folders (Inbox, Sent Items, Drafts, custom folders) |
### Calendar Tools
| Tool | Description |
| ----------------------------------- | -------------------------------------------------------------------------------------------------- |
| `create_calendar_event` | Create a new calendar event with optional attendees, location, recurrence, and online meeting link |
| `update_calendar_event` | Update an existing event (subject, time, attendees, location, recurrence, etc.) |
| `delete_calendar_event` | Delete a calendar event |
| `get_calendar_events` | Get calendar events within a date/time range |
| `get_calendar_event` | Get details of a specific calendar event by event ID |
| `search_calendar_events` | Search calendar events by keyword (subject, body, location) |
| `get_recurring_events` | Get all recurring event series with their occurrences in a date range |
| `get_recurring_events_ending` | Find recurring events whose series ends within a specified time frame |
| `delete_recurring_event_occurrence` | Delete specific occurrences of a recurring event by date |
| `get_meeting_transcripts` | Retrieve Teams meeting transcripts with speaker names and text |
***
## Configuration Guide
### Step 1: Open App registrations from the Azure portal home
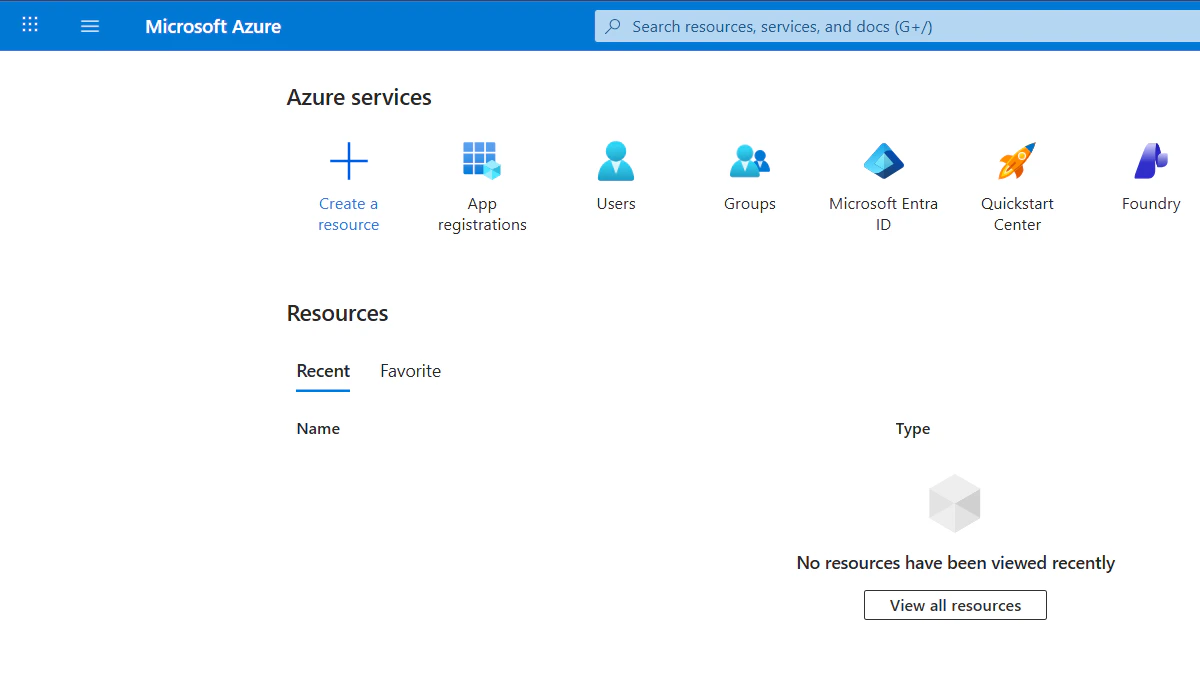
1. Go to [portal.azure.com](https://portal.azure.com) and sign in.
2. On the home page, find **Azure services** and click **App registrations** (grid icon). You can also search the top bar for **App registrations** or open **Microsoft Entra ID** and choose **App registrations** from there.
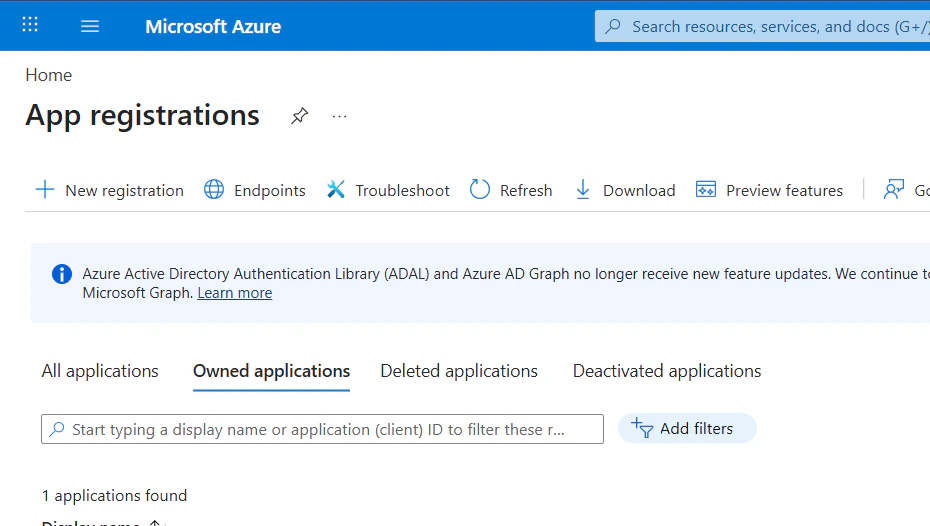
### Step 2: Start a new registration
On the **App registrations** page, click **+ New registration**.
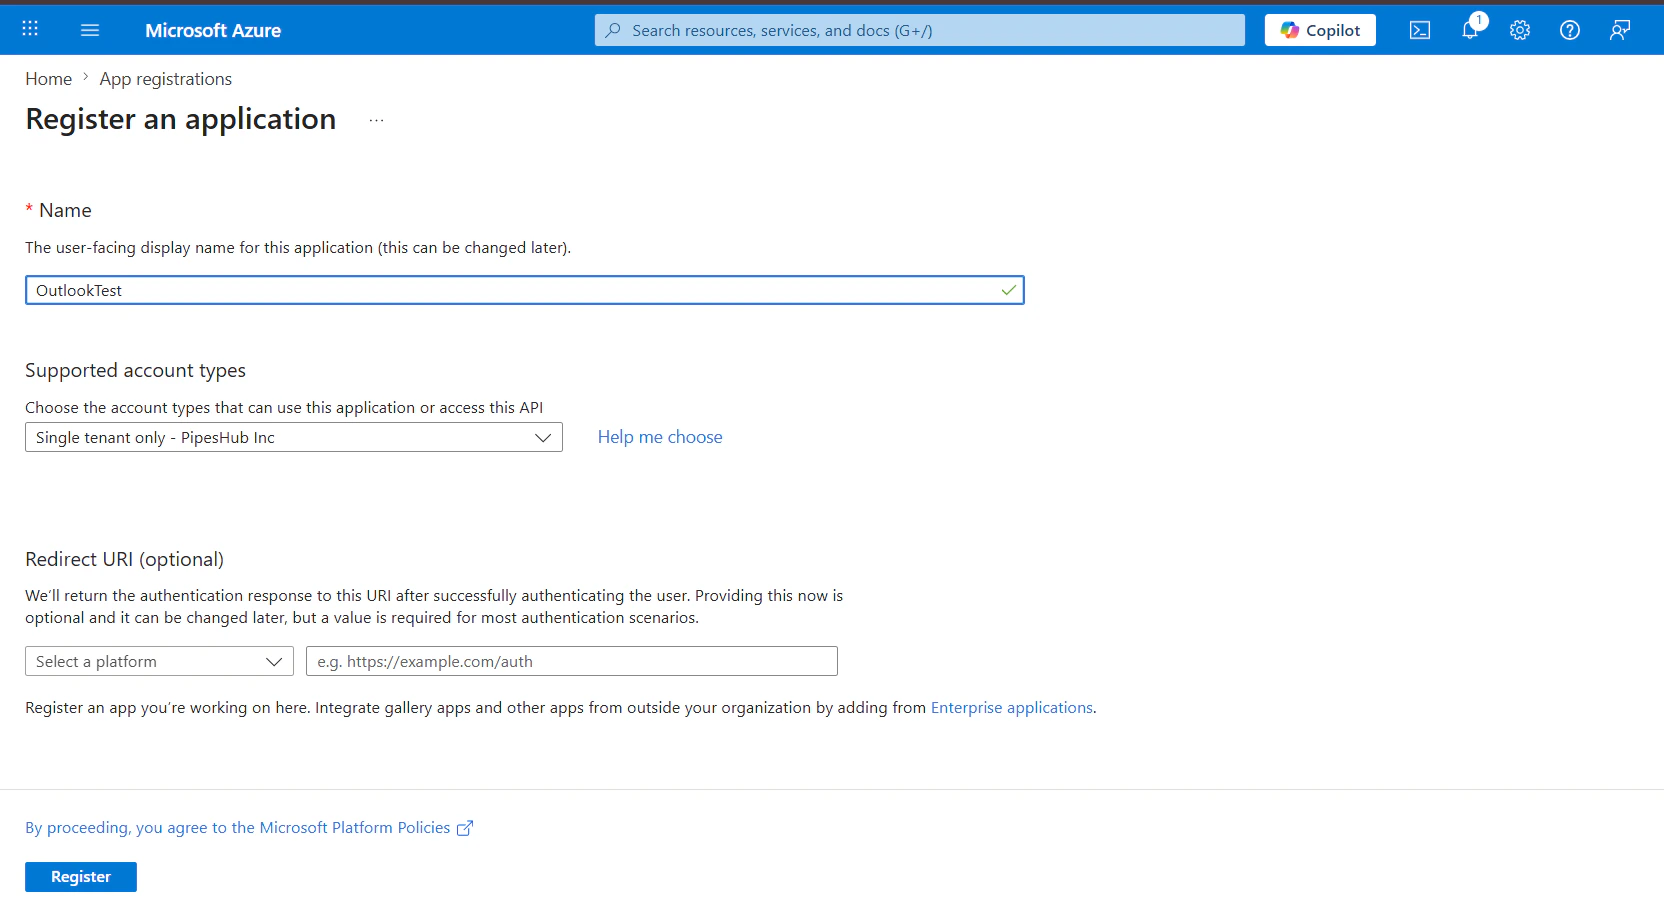
### Step 3: Register the application
1. **Name**: Enter a display name (for example, `PipesHub Outlook Toolset`).
2. **Supported account types**: Choose who can sign in—for example **Accounts in any organizational directory and personal Microsoft accounts** for the broadest support, or a single-tenant option if you only use your organization.
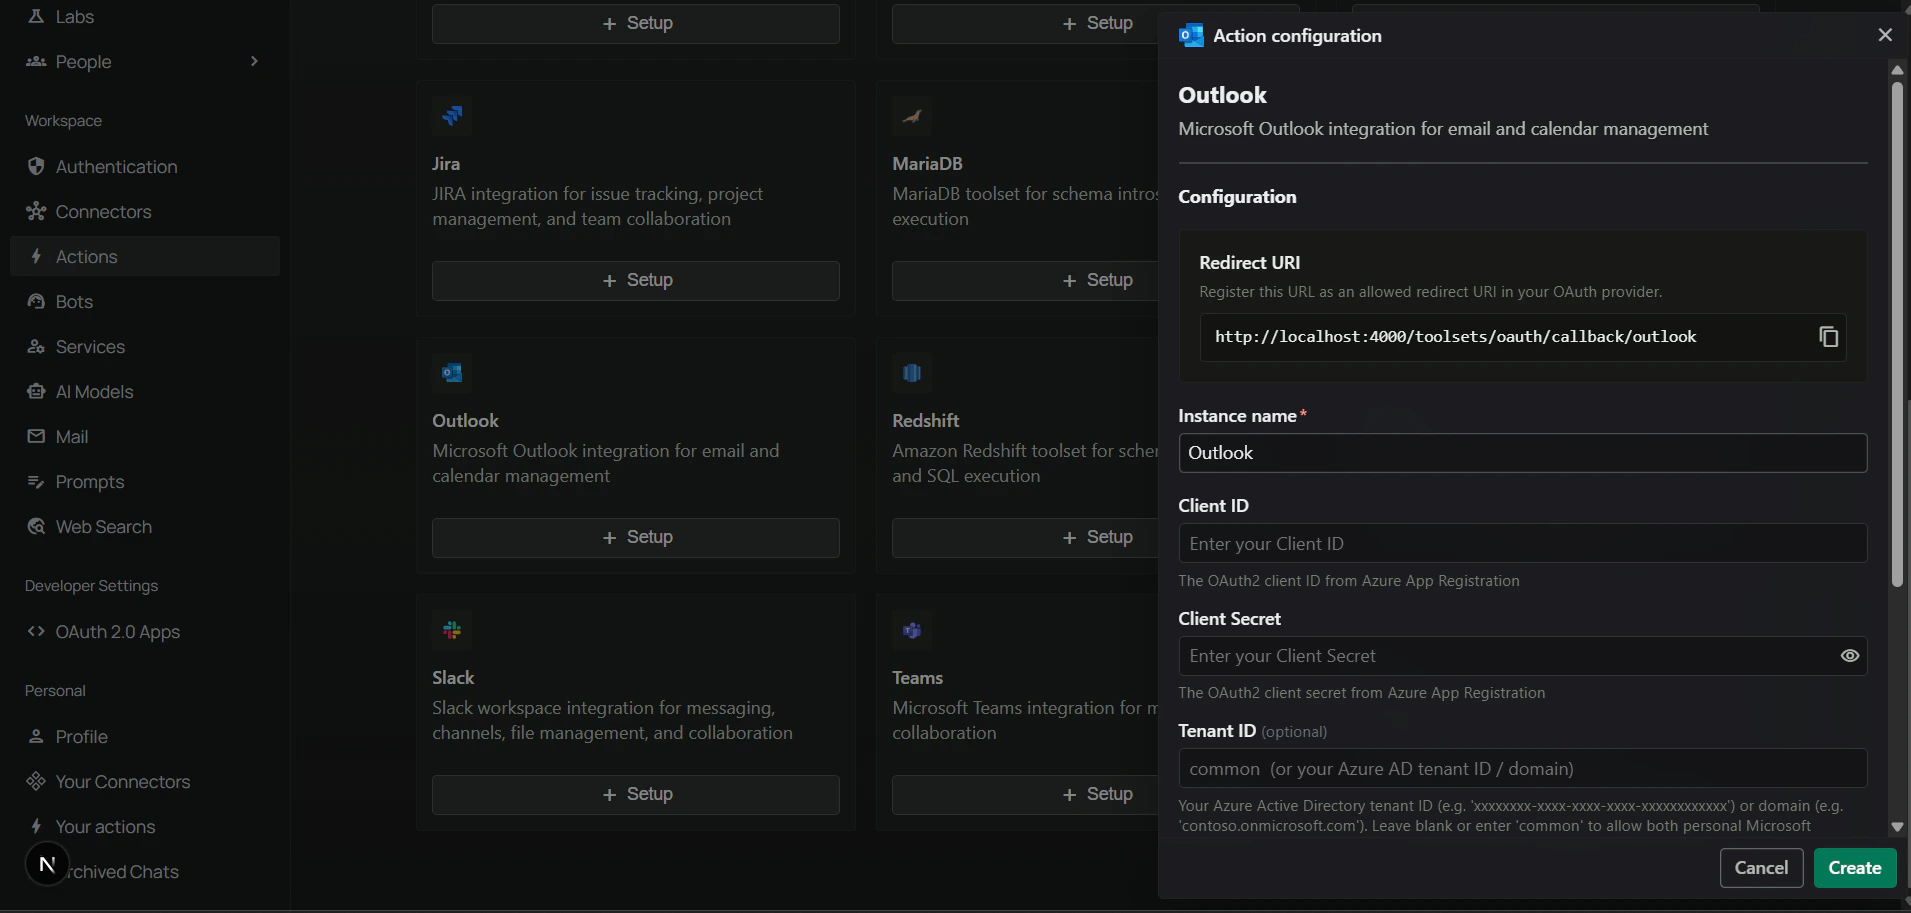
3. **Redirect URI**: Get the Redirect URI from the PipesHub **Configure Outlook** dialog in **connector settings** (where Outlook is set up—for example **Workspace → Actions** and Outlook **+ Setup** / **Configure**).
4. Click **Register**.
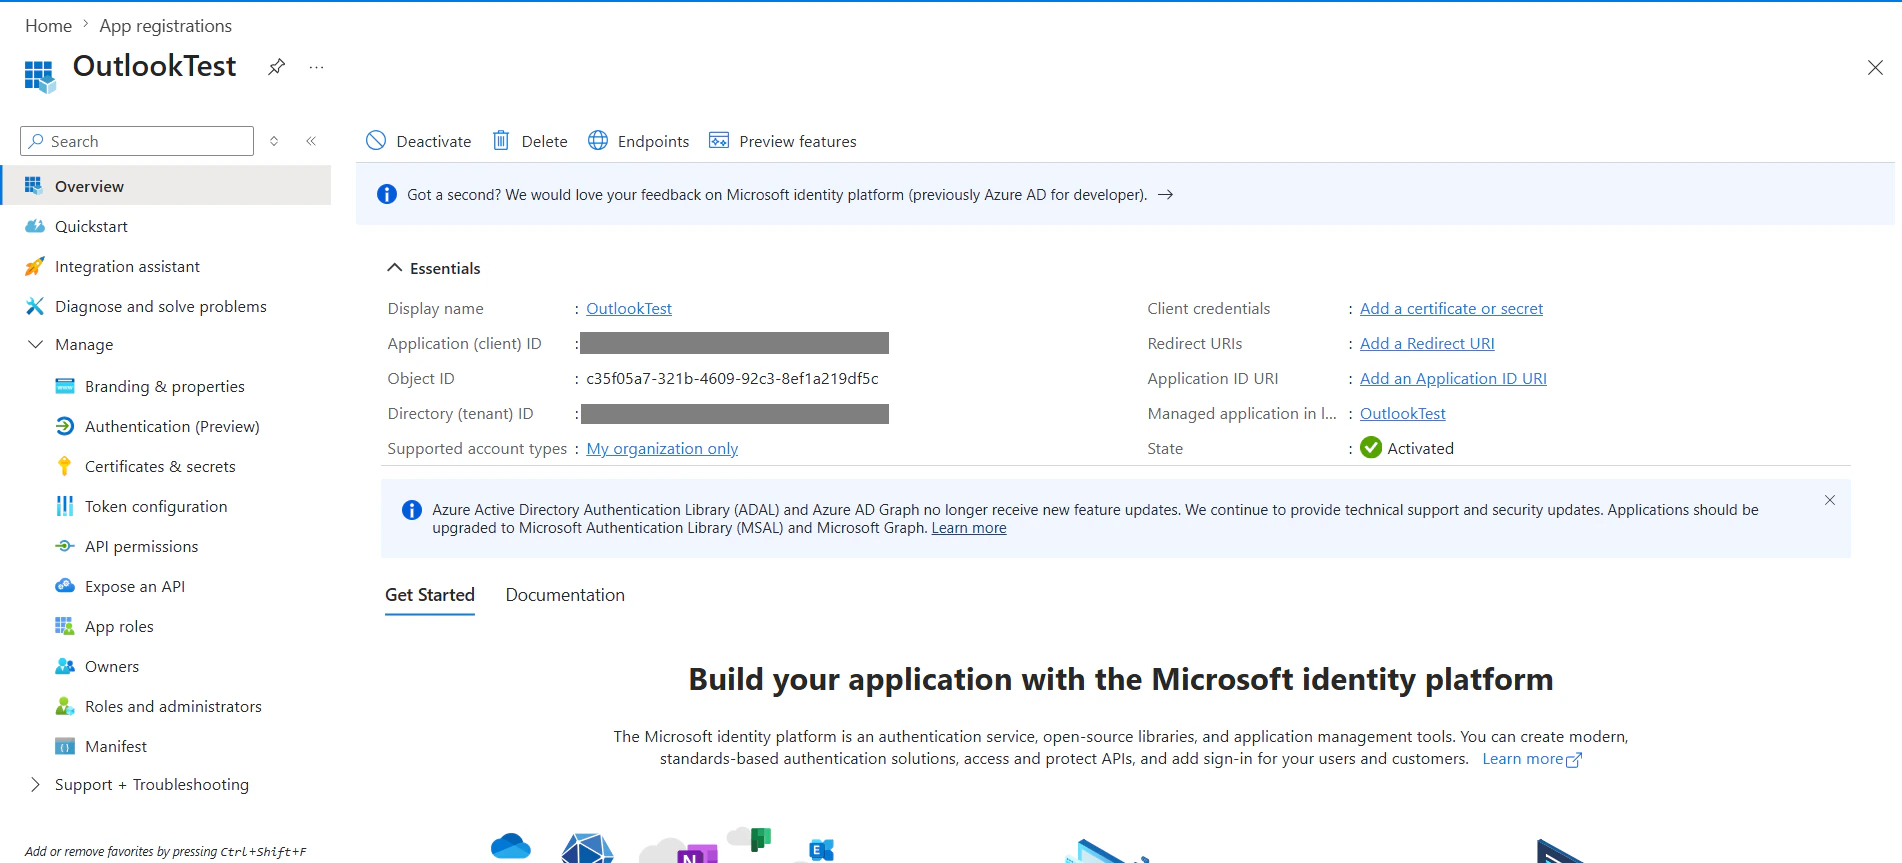
### Step 4: Copy Application (client) ID and Directory (tenant) ID
On the **Overview** page for your app, copy:
* **Application (client) ID** — used as **Client ID** in PipesHub.
* **Directory (tenant) ID** — used as **Tenant ID** in PipesHub (or use `common` / leave blank per the toolset dialog if you want both work/school and personal accounts).
Use the **Application (client) ID**, not the **Object ID**. They are different values.
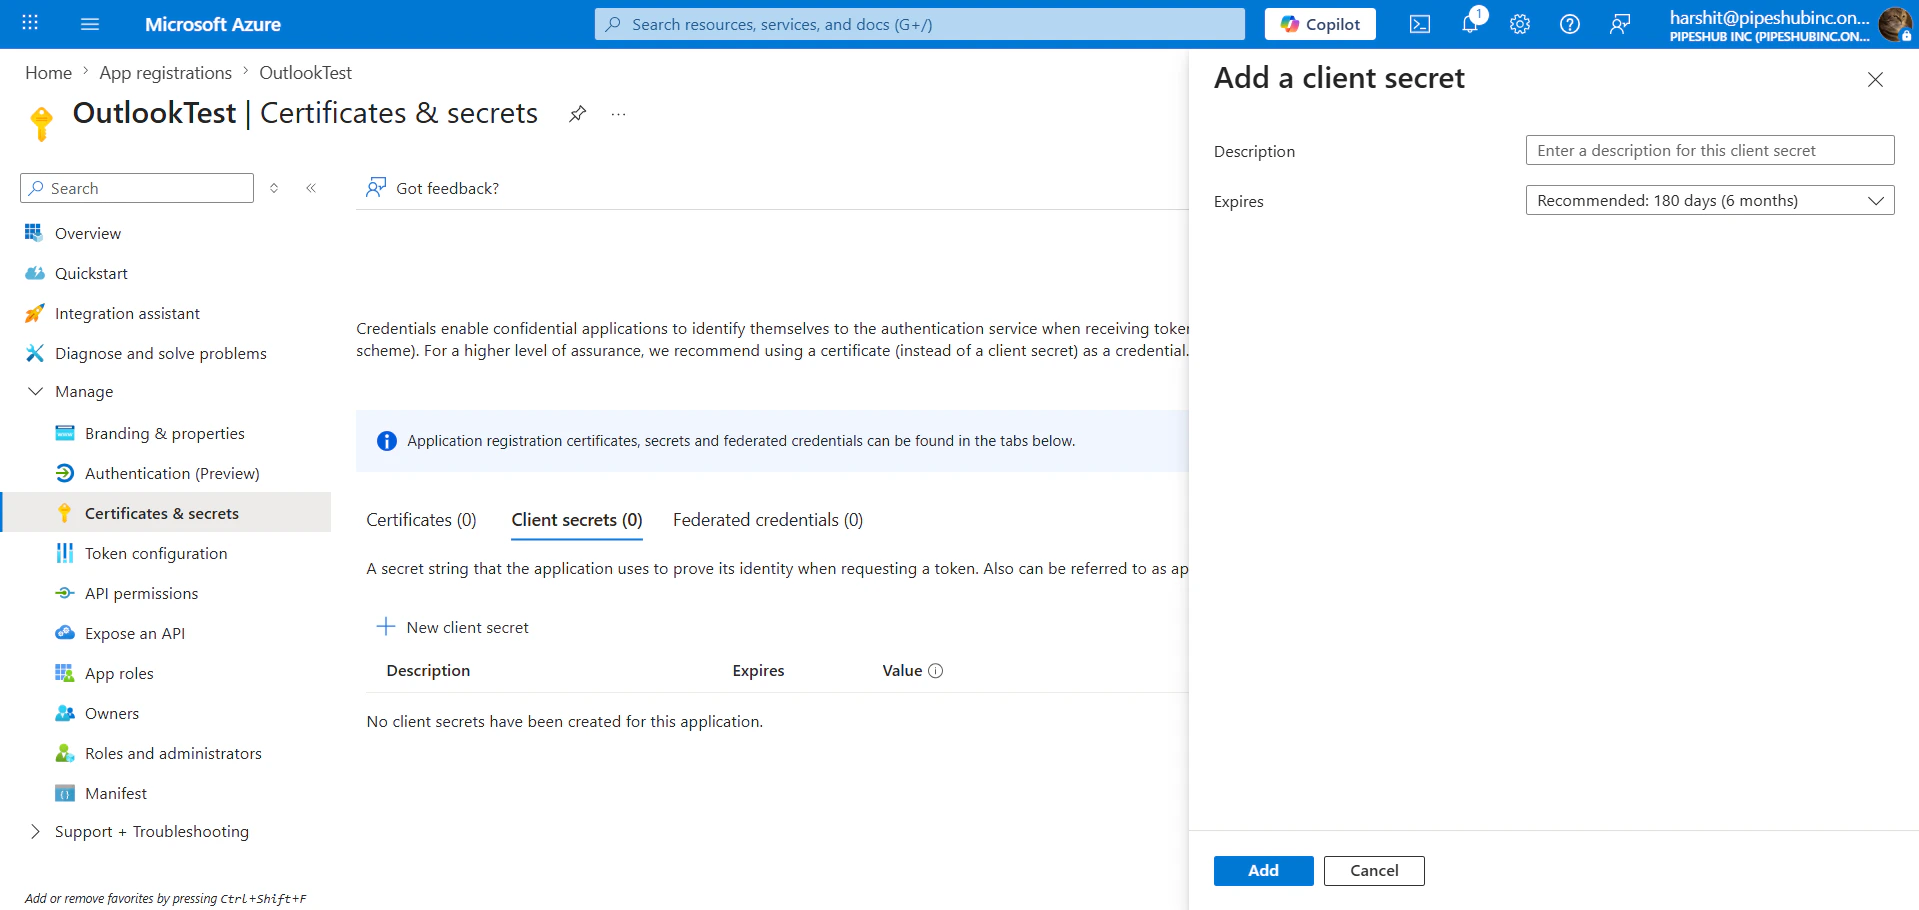
### Step 5: Create a client secret
1. In the left sidebar under **Manage**, open **Certificates & secrets**.
2. On the **Client secrets** tab, click **+ New client secret**.
3. Add a description, choose an expiration, then click **Add**.
4. **Copy the secret value immediately** — it is shown only once.
If you leave this page without copying the secret, you cannot read it again—create a new client secret instead.
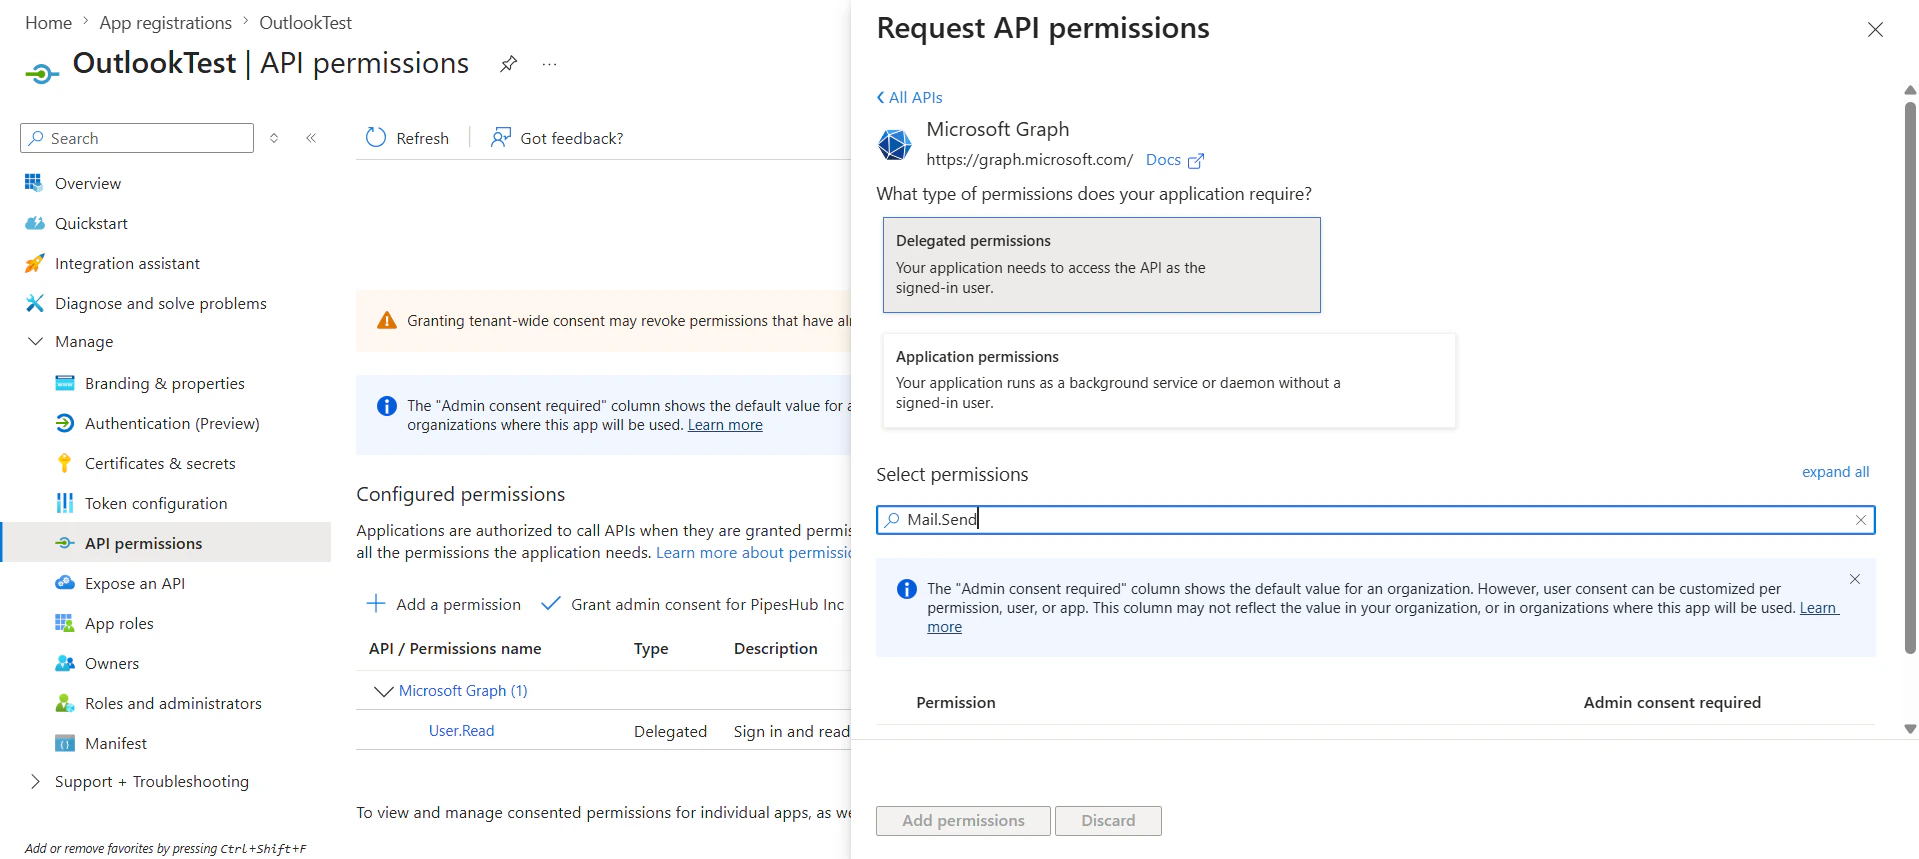
### Step 6: Add Microsoft Graph API permissions
1. In the left sidebar, open **API permissions**.
2. Click **+ Add a permission** → **Microsoft Graph** → **Delegated permissions**.
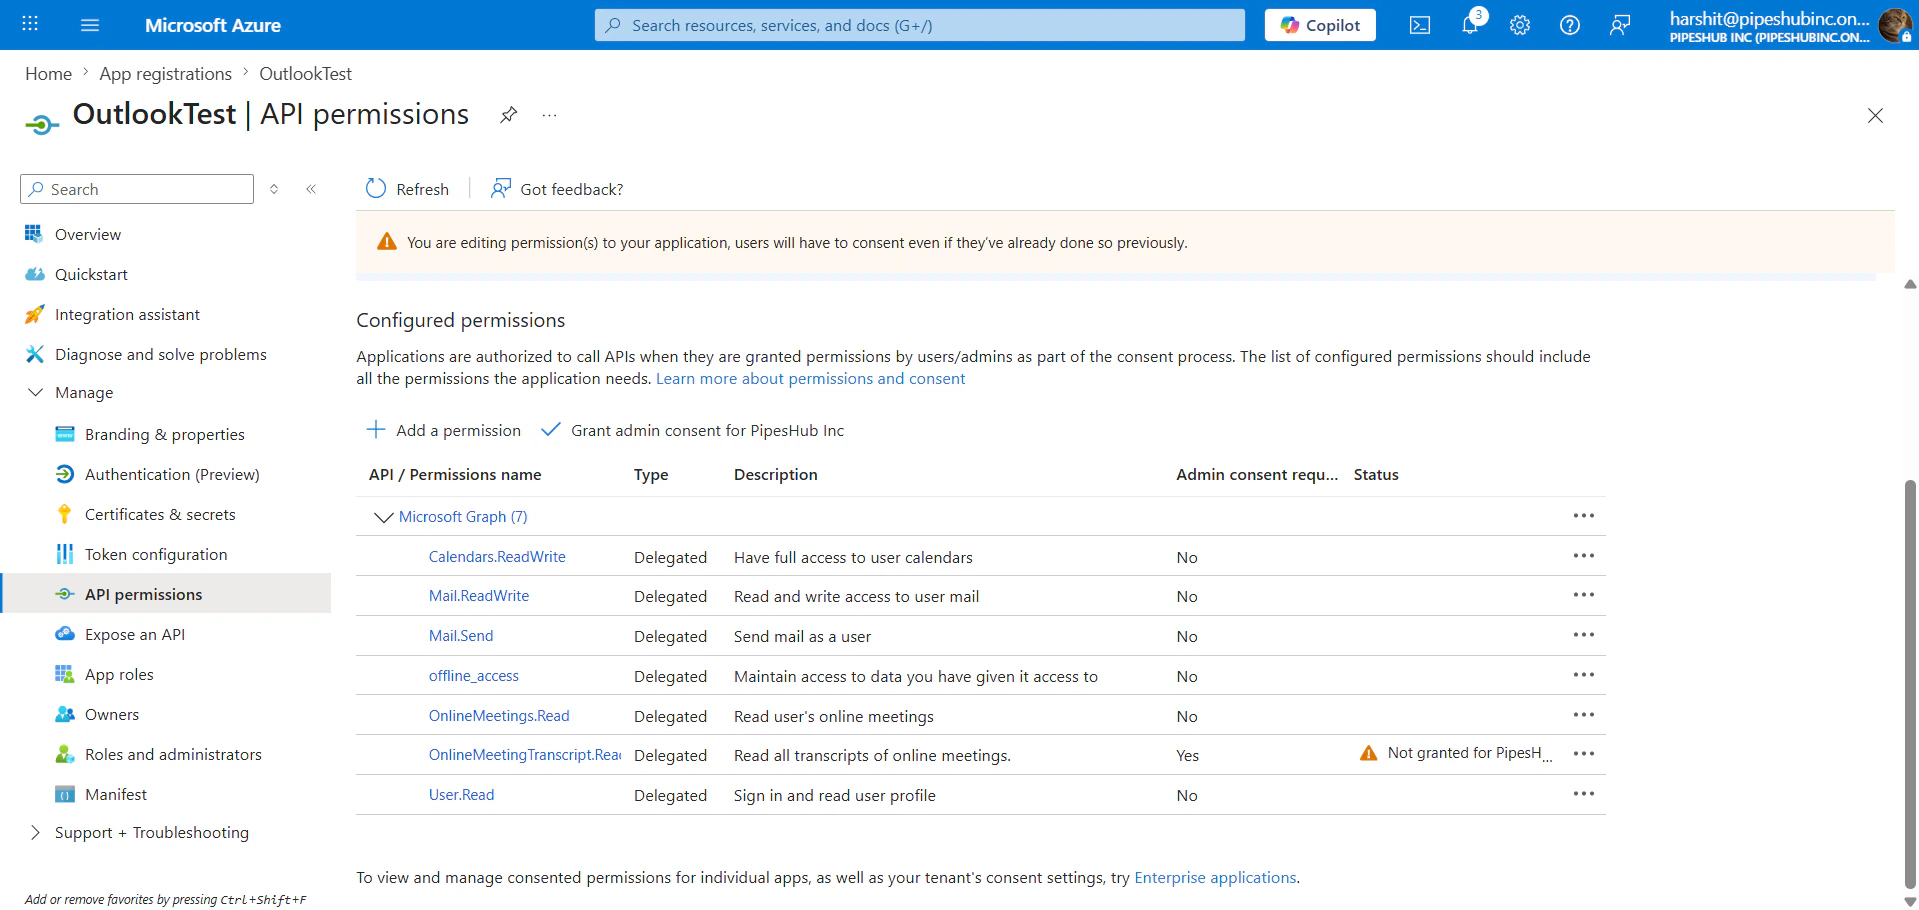
3. Add the permissions your agents need, for example:
| Permission | Description |
| ---------------------------------- | ---------------------------------- |
| `Mail.ReadWrite` | Read and write access to user mail |
| `Mail.Send` | Send mail as the user |
| `Calendars.ReadWrite` | Full access to user calendars |
| `OnlineMeetings.Read` | Read online meeting details |
| `OnlineMeetingTranscript.Read.All` | Read meeting transcripts |
| `User.Read` | Read user profile |
| `offline_access` | Refresh tokens for ongoing access |
The Outlook toolset uses **Delegated** permissions so actions run as the signed-in user, not as the app alone.
### Step 7: Grant admin consent
Click **Grant admin consent for** your organization (the button includes your tenant name) and confirm, so delegated permissions show as granted for the tenant (especially for permissions that require admin approval).
### Step 8: Configure the Outlook toolset in PipesHub
1. In PipesHub, go to **Workspace** → **Actions**.
2. Find **Outlook** and open setup / configuration (**+ Setup** or **Configure**).
3. Confirm the **Redirect URI** in the dialog matches the **Web** redirect URI you registered in Azure **Step 3**.
4. Enter **Client ID**, **Client Secret**, and optionally **Tenant ID** (`common` or your tenant/domain per the form), then create or save the instance.
### Step 9: Authenticate the toolset under Your actions
1. Open **Your actions** (or the equivalent **Your actions** entry under **Personal** in the sidebar).
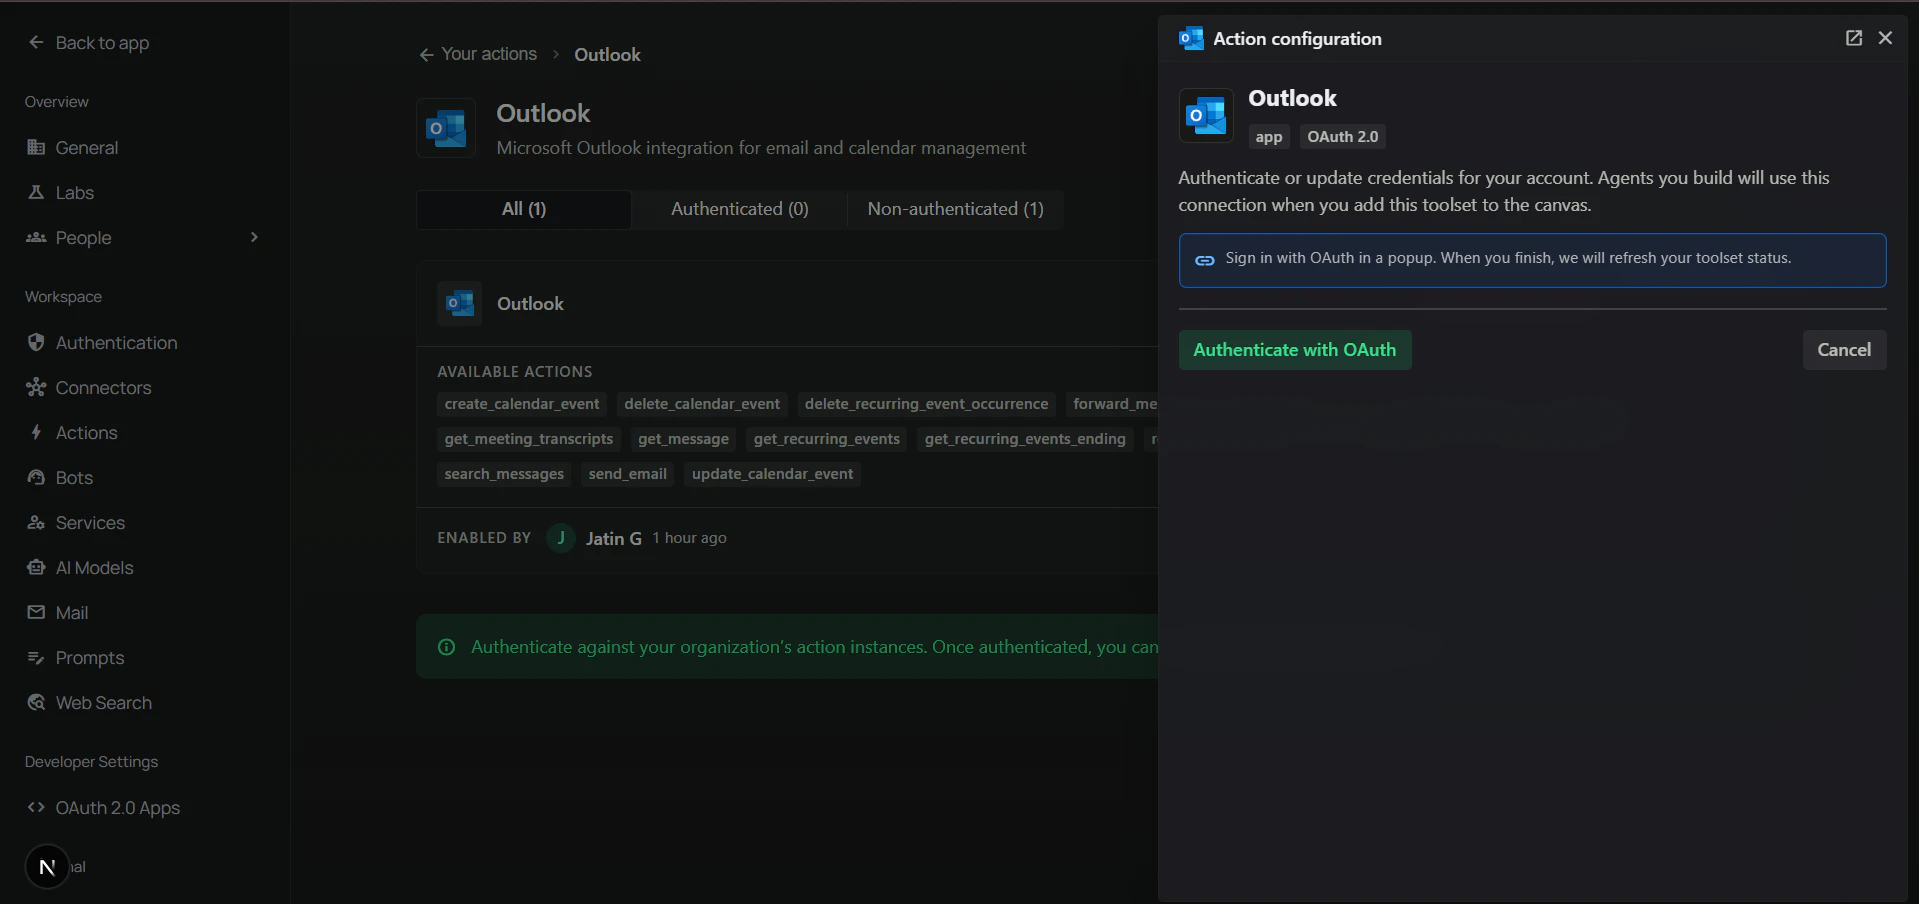
2. Select your **Outlook** instance and complete **Authenticate with OAuth** (popup sign-in to Microsoft, then accept permissions).
### Step 10: Add Outlook to an agent
1. Go to the **Home** page.
2. Next to **Agents**, click **+** to create a new agent.
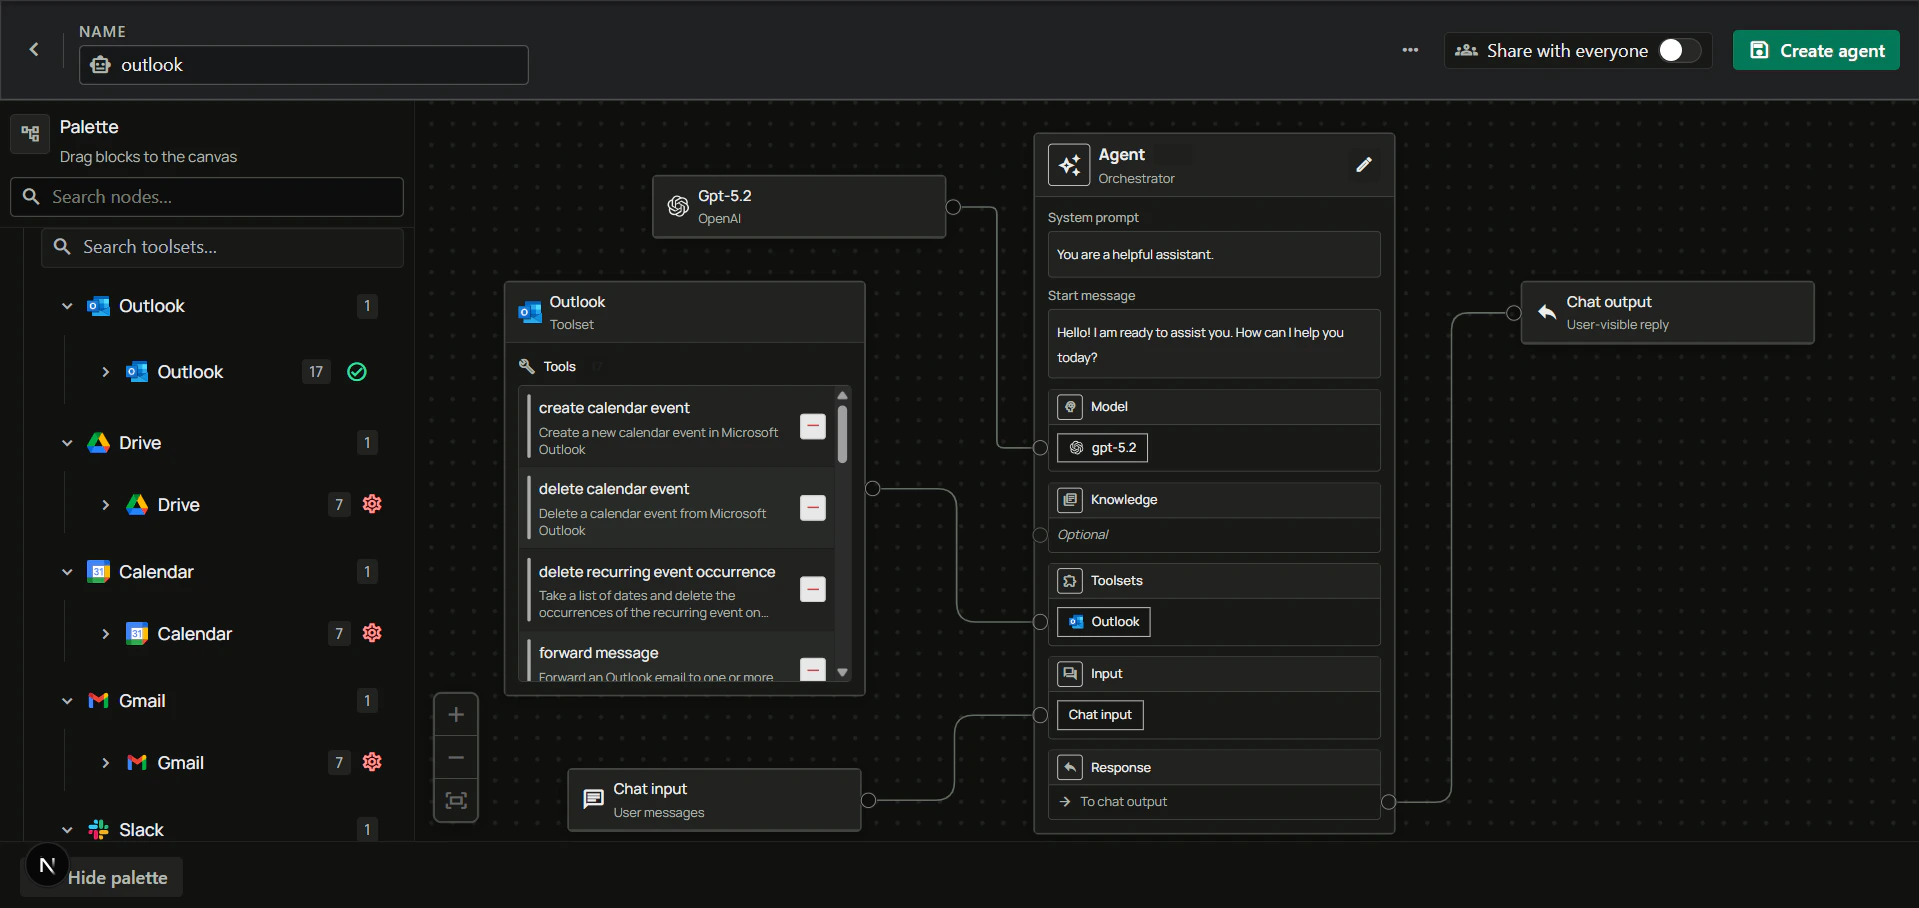
3. Give the agent a name, drag the **Outlook** toolset onto the canvas, connect it to the **Agent** node with your model and chat input/output, then create the agent.
***
## FAQ
| Aspect | Outlook Connector | Outlook Toolset |
| --------------- | -------------------------------------------- | --------------------------------------------------- |
| **Purpose** | Sync and index emails for search | Enable agents to perform email and calendar actions |
| **Data Flow** | One-way (import data into PipesHub) | Two-way (read and write via API) |
| **Auth Type** | Application permissions (admin-consent) | Delegated permissions (user-consent) |
| **When to Use** | Query/search email history and conversations | Send emails, manage calendar, create meetings |
**Example:** Use **Outlook Connector** to search past email conversations across your organization. Use **Outlook Toolset** to let agents send replies, schedule meetings, or manage calendar events on behalf of the user.
***
## Usage Tips
**Example: Send an email with subject and body**\
Ask your agent to send an email to [user@example.com](mailto:user@example.com) with the subject "Project Update" and the message "Hi, just sharing a ..."
**Example: Schedule a meeting with an attendee**\
Ask to create a "bug fixes" meeting tomorrow at 2pm for 1 hour with [john@example.com](mailto:john@example.com)
**Example: Recurring meetings this week**\
Ask to get your recurring meetings this week