> ## Documentation Index
> Fetch the complete documentation index at: https://docs.pipeshub.com/llms.txt
> Use this file to discover all available pages before exploring further.
# Slack Toolset
> Team messaging and communication integration for AI agents
Slack Toolset
Team messaging, channels, and collaboration
Ready
Communication
## Overview
The Slack toolset enables AI agents to interact with your Slack workspace. Send messages, search conversations, manage channels, and collaborate with your team.
### Key Capabilities
* Send messages to channels and direct messages
* Reply to messages and manage threads
* Search messages, files, and channels
* View channel history and members
* Get user and group information
* Add reactions and pin messages
* Update and delete messages
***
## Available Tools
| Tool | Description |
| ----------------------------------- | -------------------------------------------------- |
| `send_message` | Send a message to a channel |
| `send_direct_message` | Send a direct message to a user |
| `send_message_with_mentions` | Send a message with user mentions |
| `send_message_to_multiple_channels` | Send a message to multiple channels |
| `reply_to_message` | Reply to a specific message in a channel |
| `update_message` | Update an existing message in a channel |
| `delete_message` | Delete a message from a channel |
| `schedule_message` | Schedule a message to be sent at a specific time |
| `get_scheduled_messages` | Get scheduled messages |
| `get_channel_history` | Get message history from a channel |
| `get_unread_messages` | Get unread messages from a channel |
| `get_thread_replies` | Get replies in a thread |
| `get_message_permalink` | Get a permalink for a specific message |
| `search_all` | Search messages, files, and channels |
| `search_messages` | Search for messages in Slack |
| `fetch_channels` | Fetch all conversations in the workspace |
| `get_user_conversations` | Get all conversations for the authenticated user |
| `get_user_channels` | Get all conversations that the user is a member of |
| `get_channel_info` | Get information about a channel |
| `get_channel_members` | Get the members of a channel |
| `get_channel_members_by_id` | Get the members of a channel by ID |
| `get_user_info` | Get information about a Slack user |
| `get_users_list` | Get list of all users in the organization |
| `resolve_user` | Resolve a Slack user ID to display name and email |
| `get_user_groups` | Get list of user groups in the organization |
| `get_user_group_info` | Get information about a specific user group |
| `set_user_status` | Set or clear user status |
| `add_reaction` | Add an emoji reaction to a message |
| `remove_reaction` | Remove a reaction from a message |
| `get_reactions` | Get reactions for a specific message |
| `pin_message` | Pin a message to a channel |
| `unpin_message` | Unpin a message from a channel |
| `get_pinned_messages` | Get pinned messages from a channel |
| `check_token_info` | Check Slack token information and available scopes |
***
## Configuration Guide
### Step 1: Create a Slack app
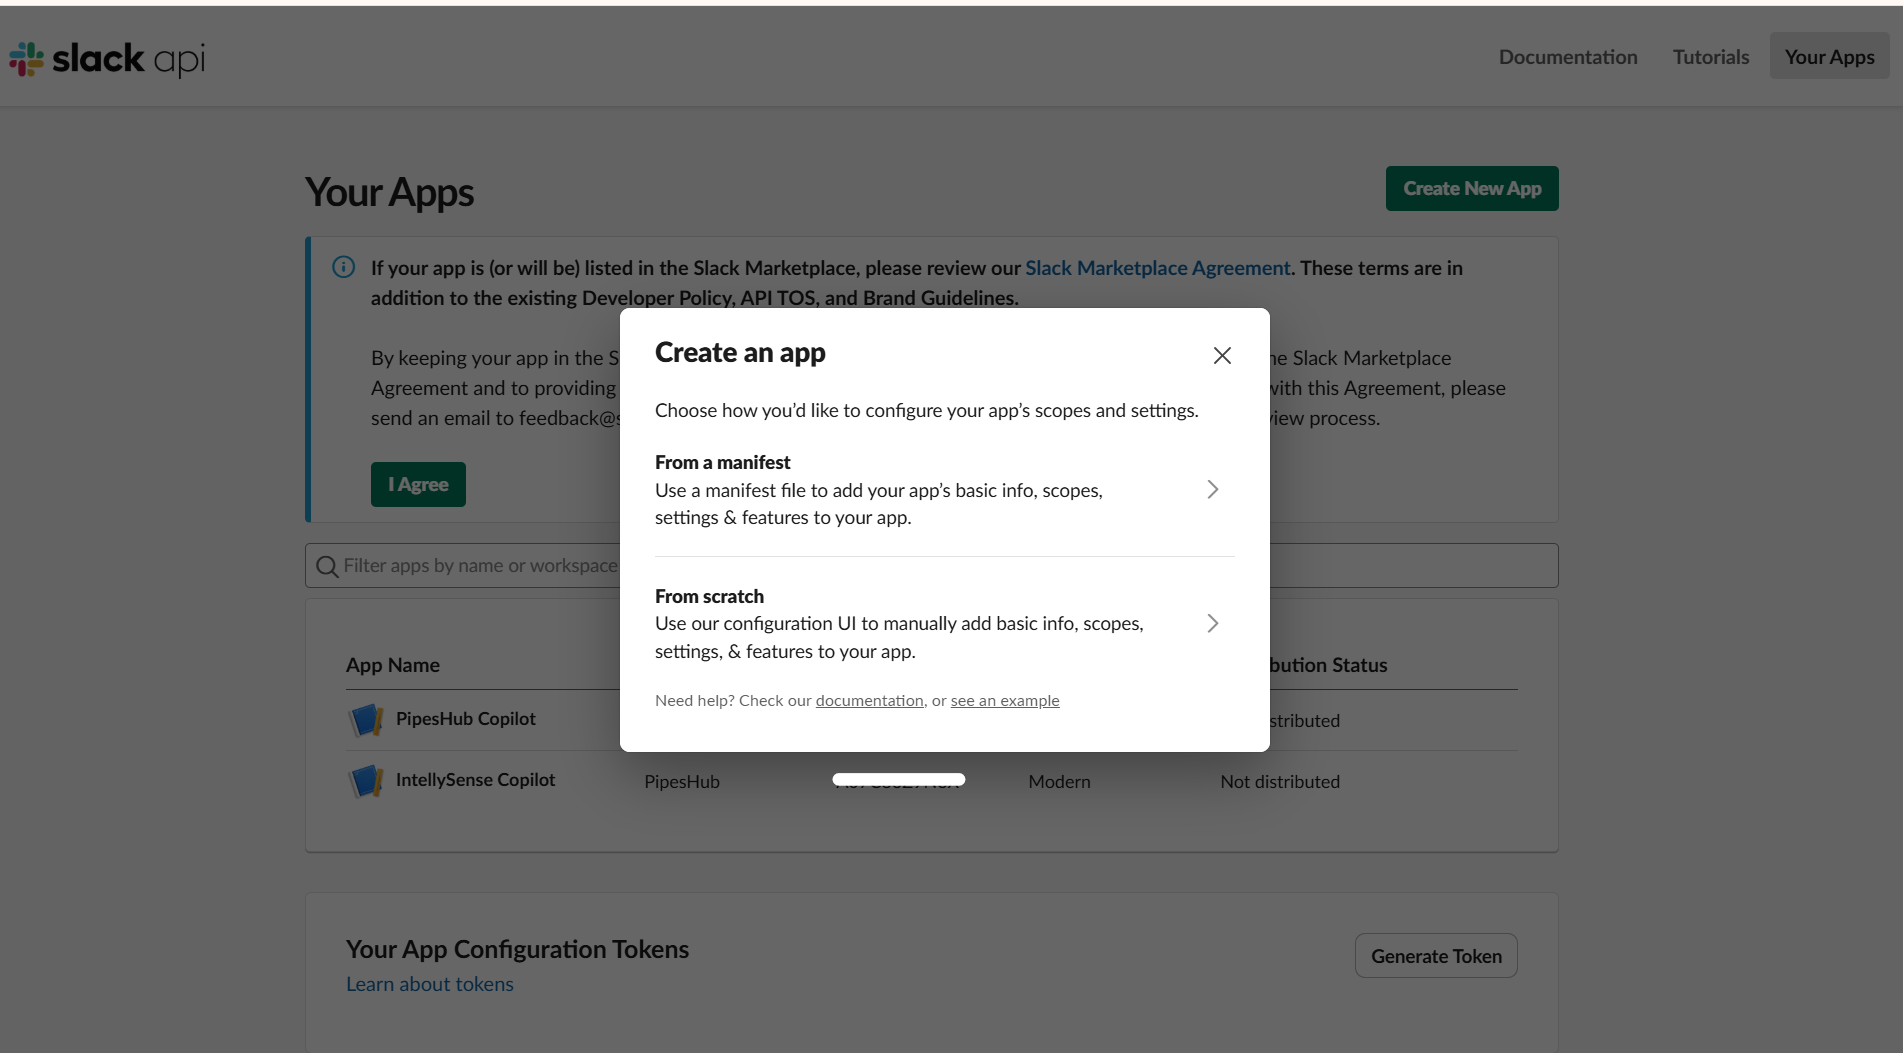
1. Go to [api.slack.com/apps](https://api.slack.com/apps) and sign in.
2. Click **Create New App**.
3. Choose **From a manifest**.
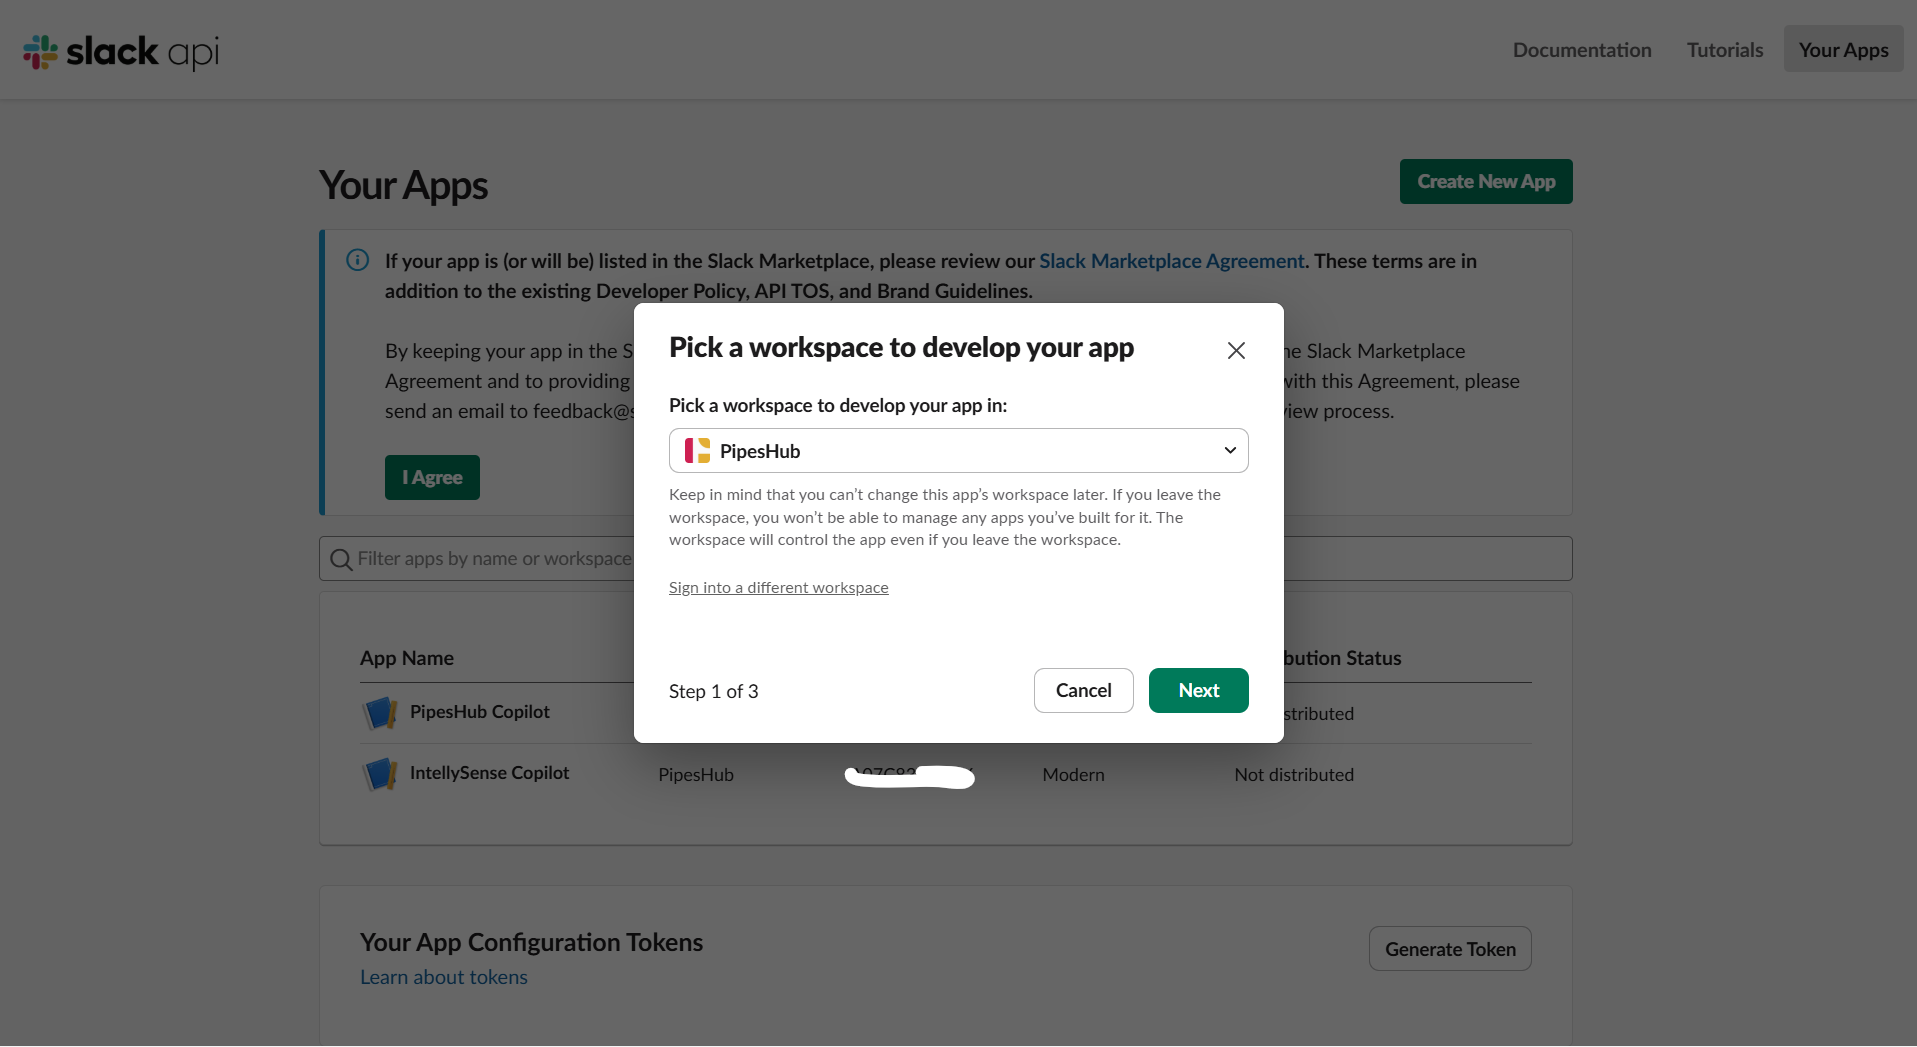
4. Select the workspace where you want to install the app.
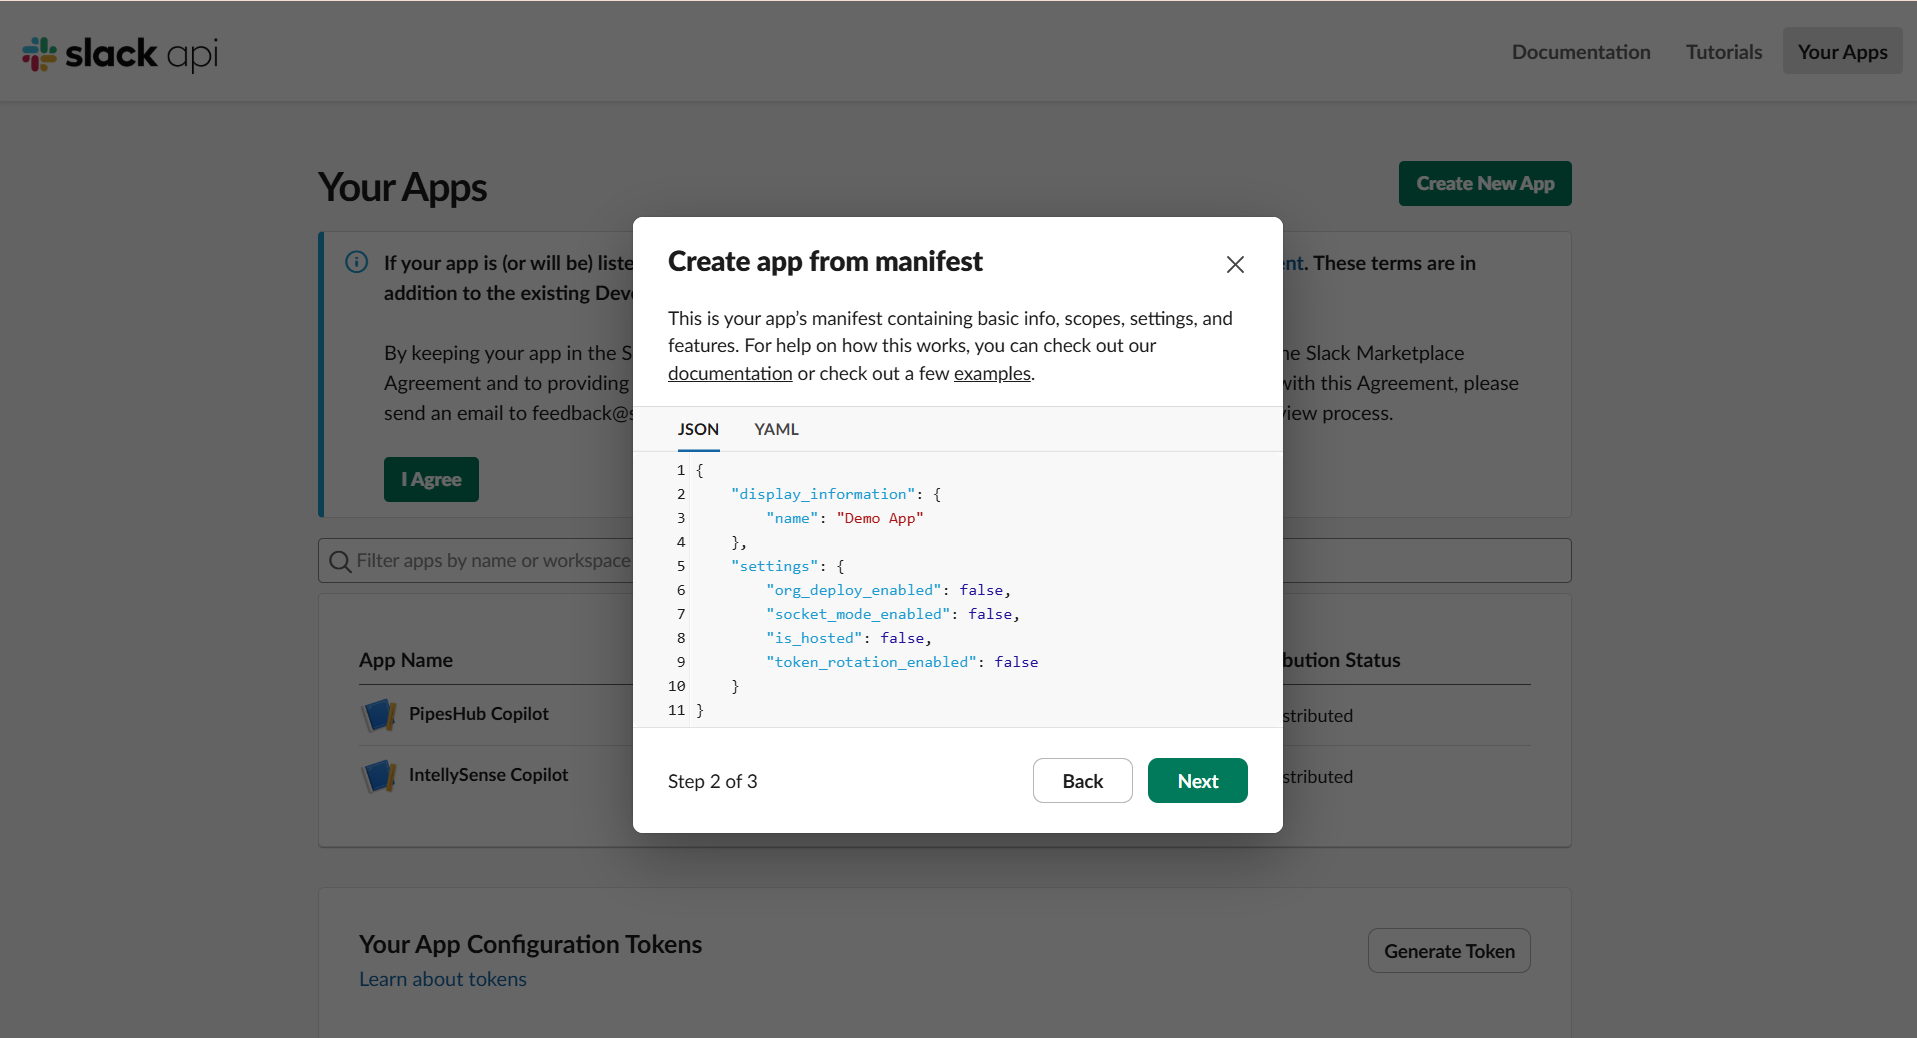
5. The manifest JSON editor opens. Click **Next** to proceed.
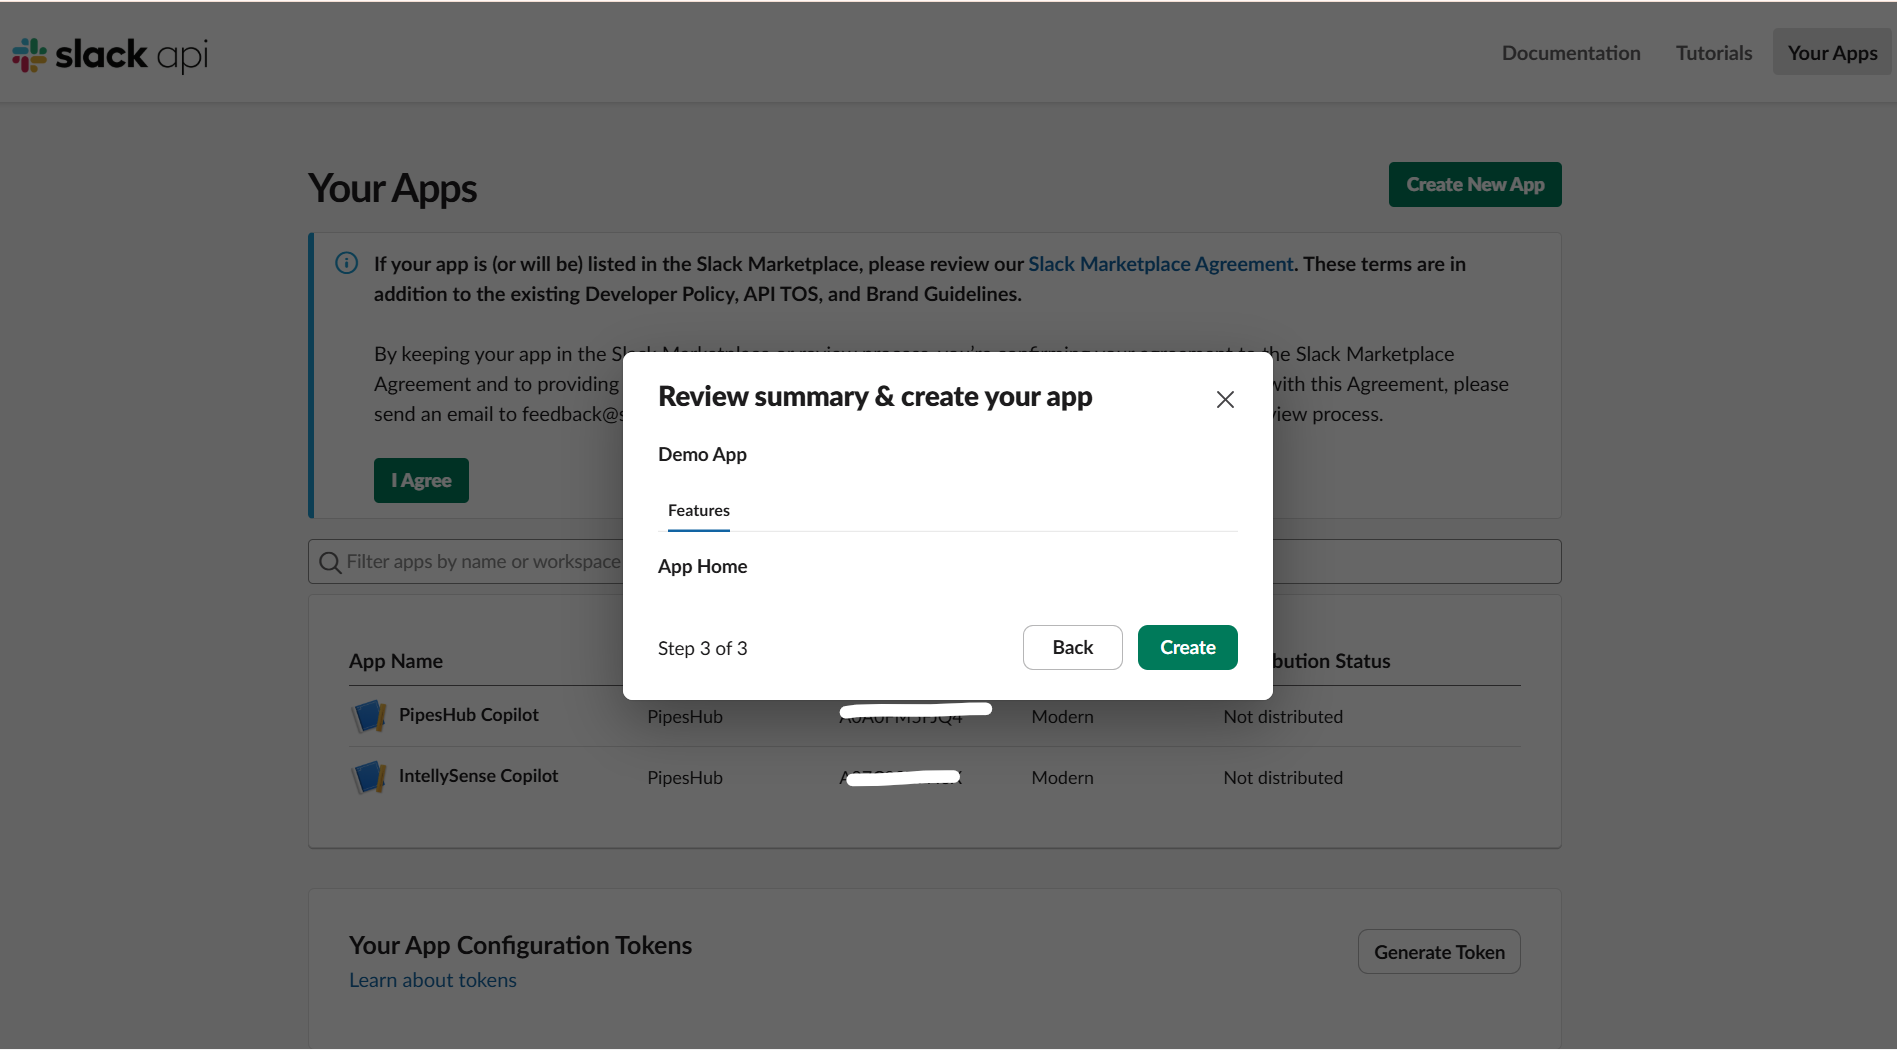
6. Review the app summary and click **Create**.
You need **admin access** to install Slack apps in your workspace, or your workspace must allow members to install apps. If app installation is restricted, ask a workspace admin to approve the app after you create it.
### Step 2: Get the Redirect URI from PipesHub
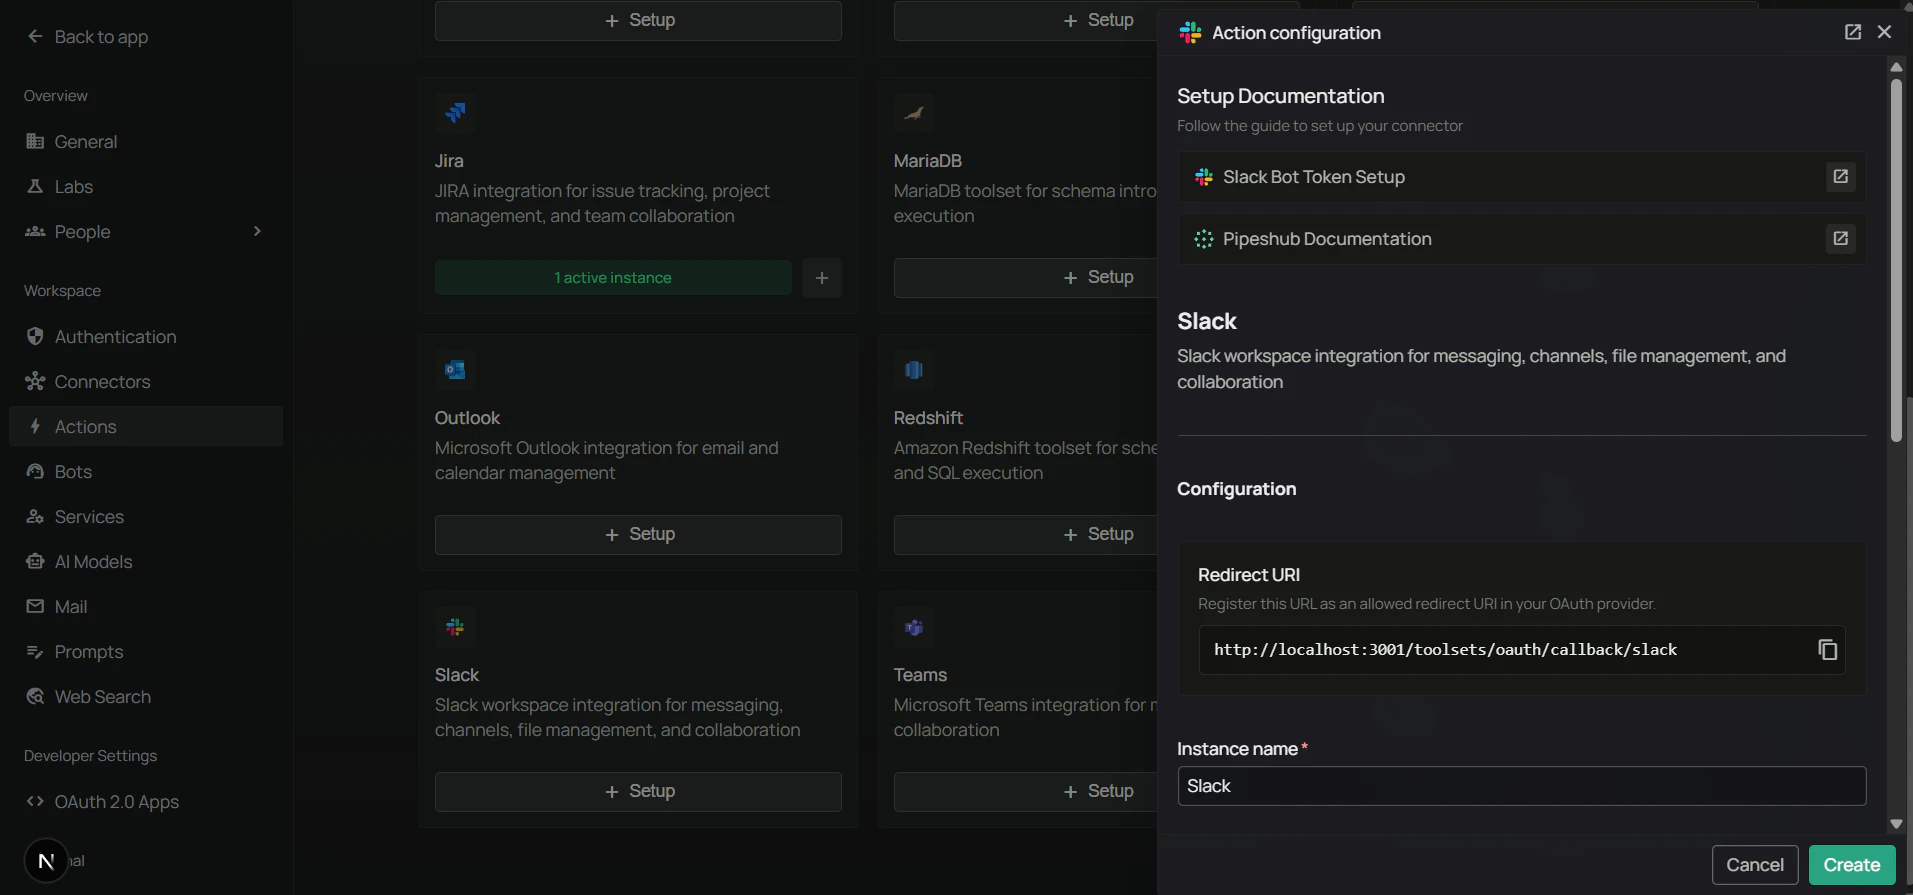
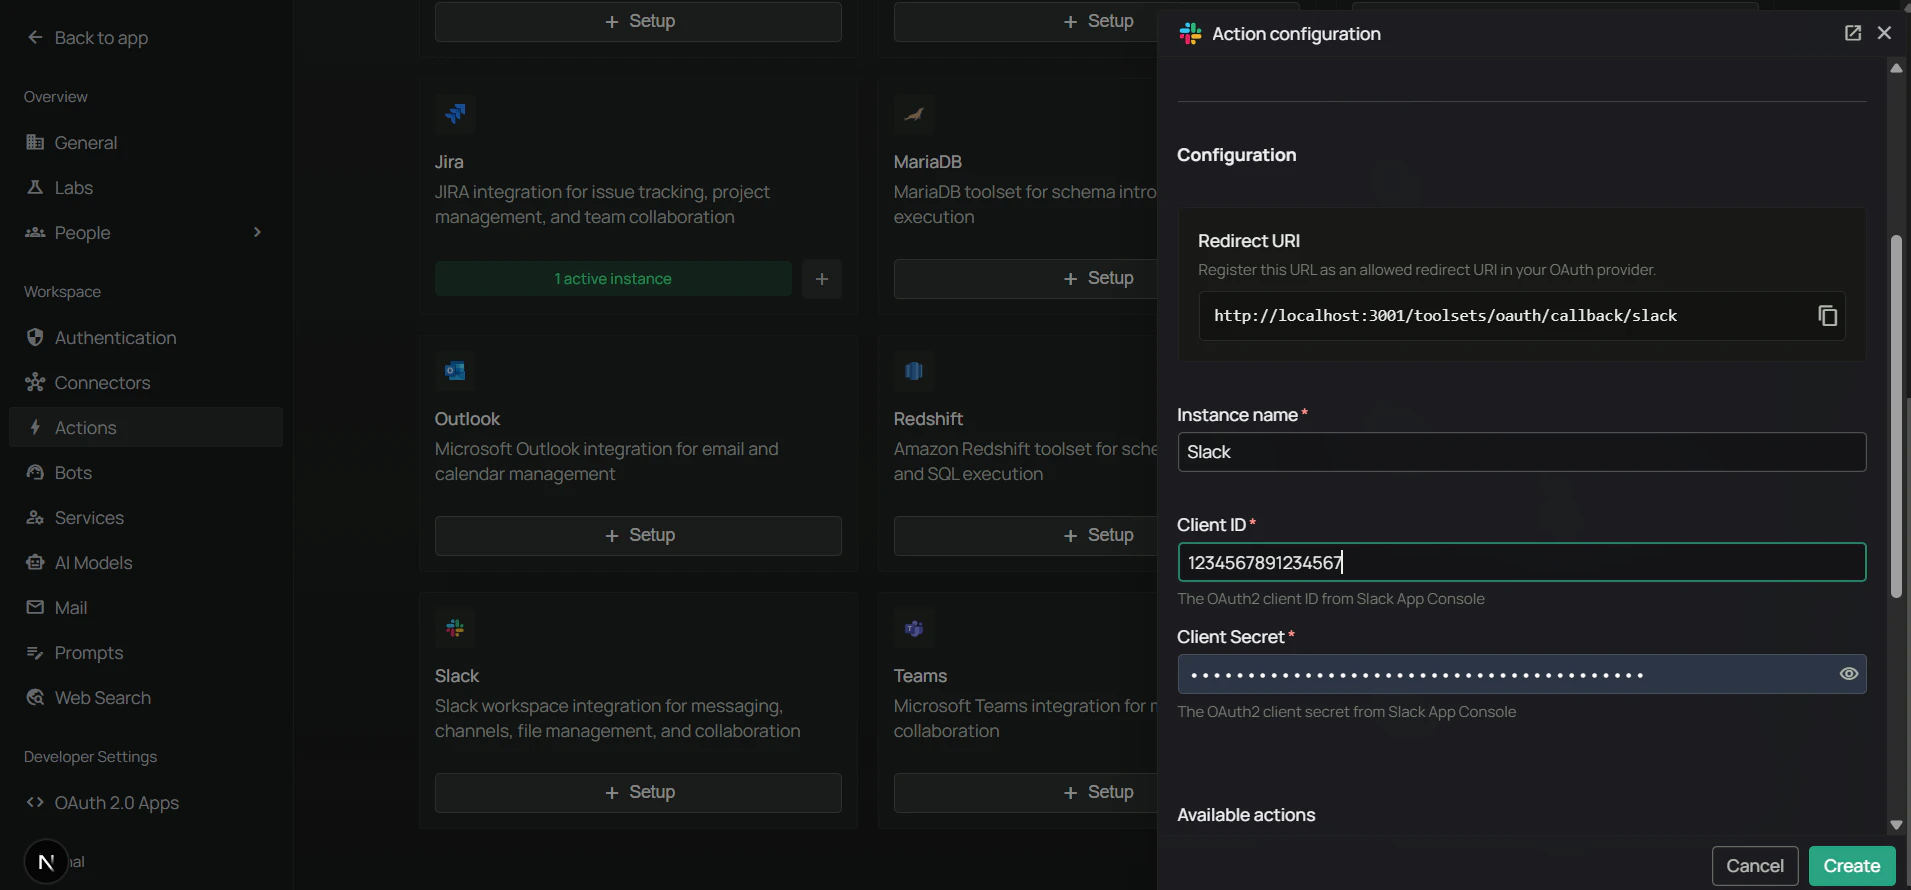
Before configuring the Redirect URL in Slack, copy the Redirect URI from PipesHub so the values match exactly.
1. In PipesHub, go to **Workspace Settings** → **Actions**.
2. Find **Slack** in the list and click **+ Setup** (or **Configure**).
3. Copy the **Redirect URI** shown in the dialog.
### Step 3: Configure the Redirect URL in Slack
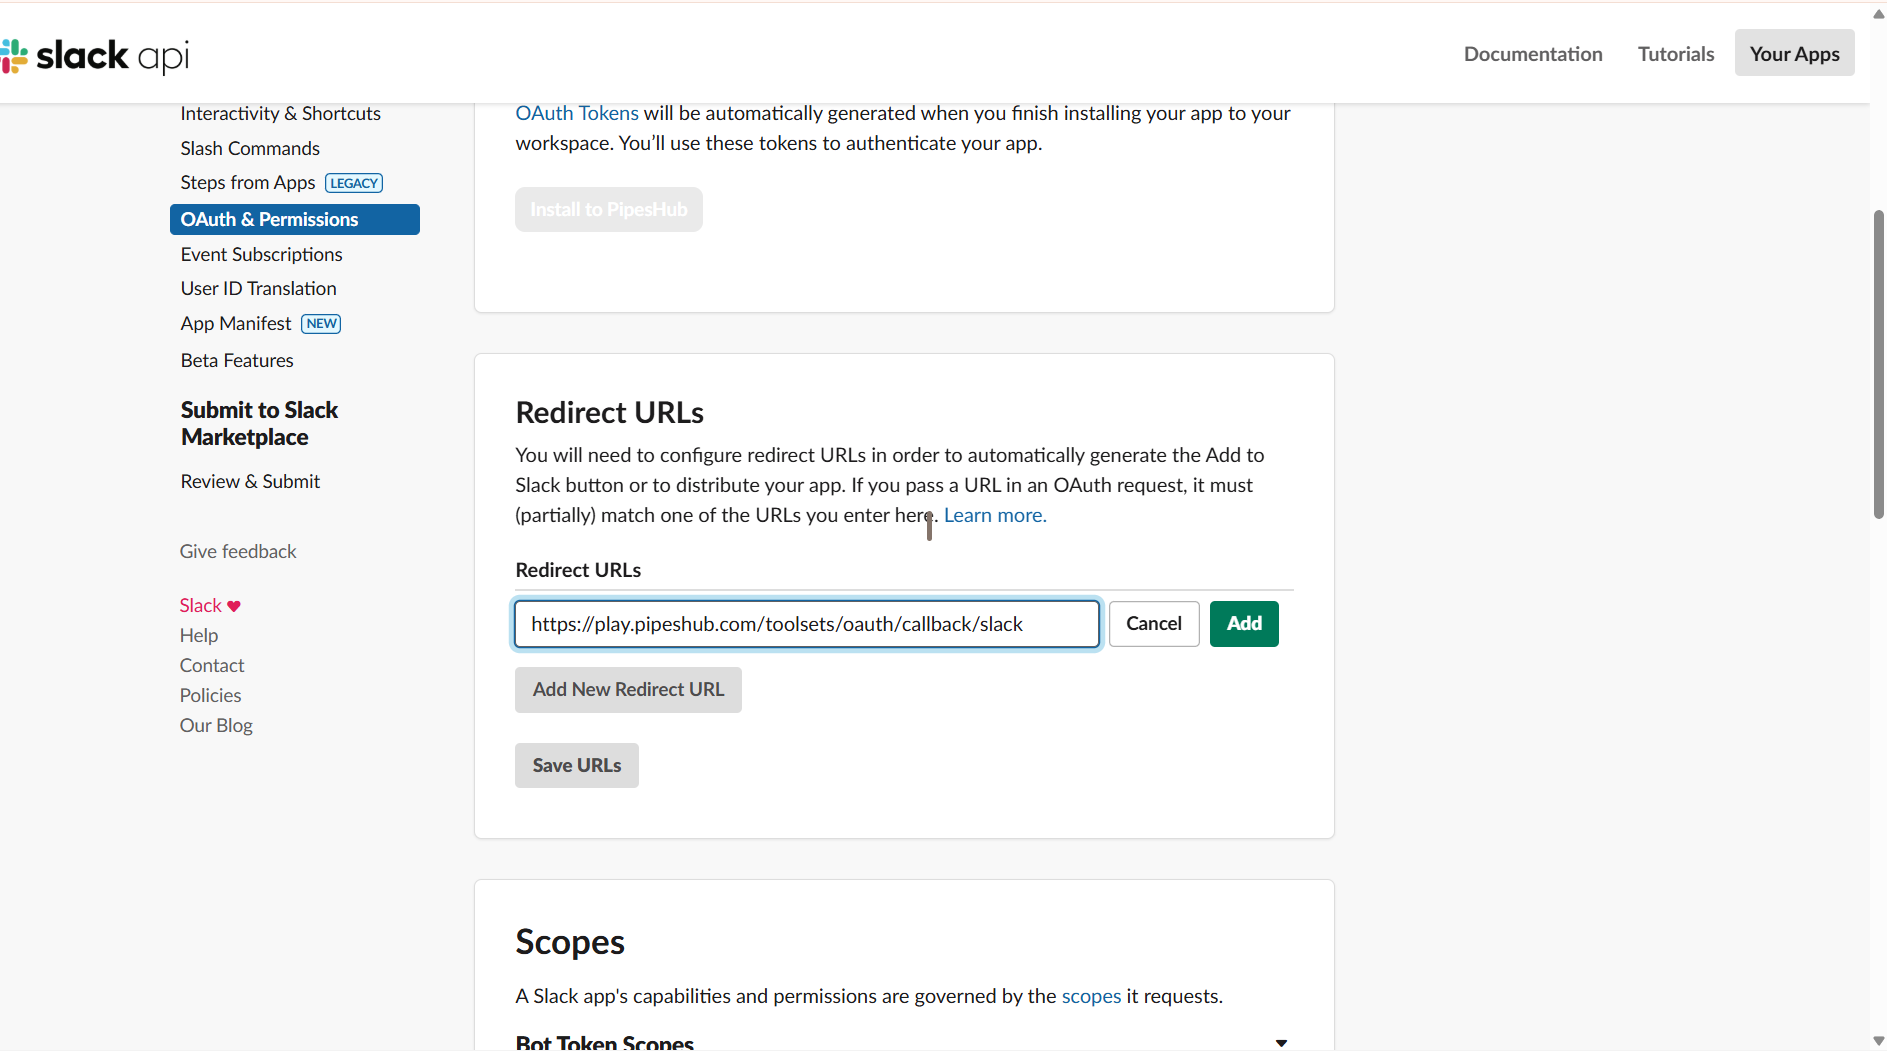
1. In your Slack app settings, open **OAuth & Permissions** in the left sidebar.
2. Under **Redirect URLs**, click **Add New Redirect URL**.
3. Paste the Redirect URI you copied from PipesHub.
4. Click **Add**, then **Save URLs**.
The Redirect URL must match exactly between Slack and PipesHub — protocol, host, path, and trailing slash. Any mismatch causes authentication to fail.
### Step 4: Add required scopes
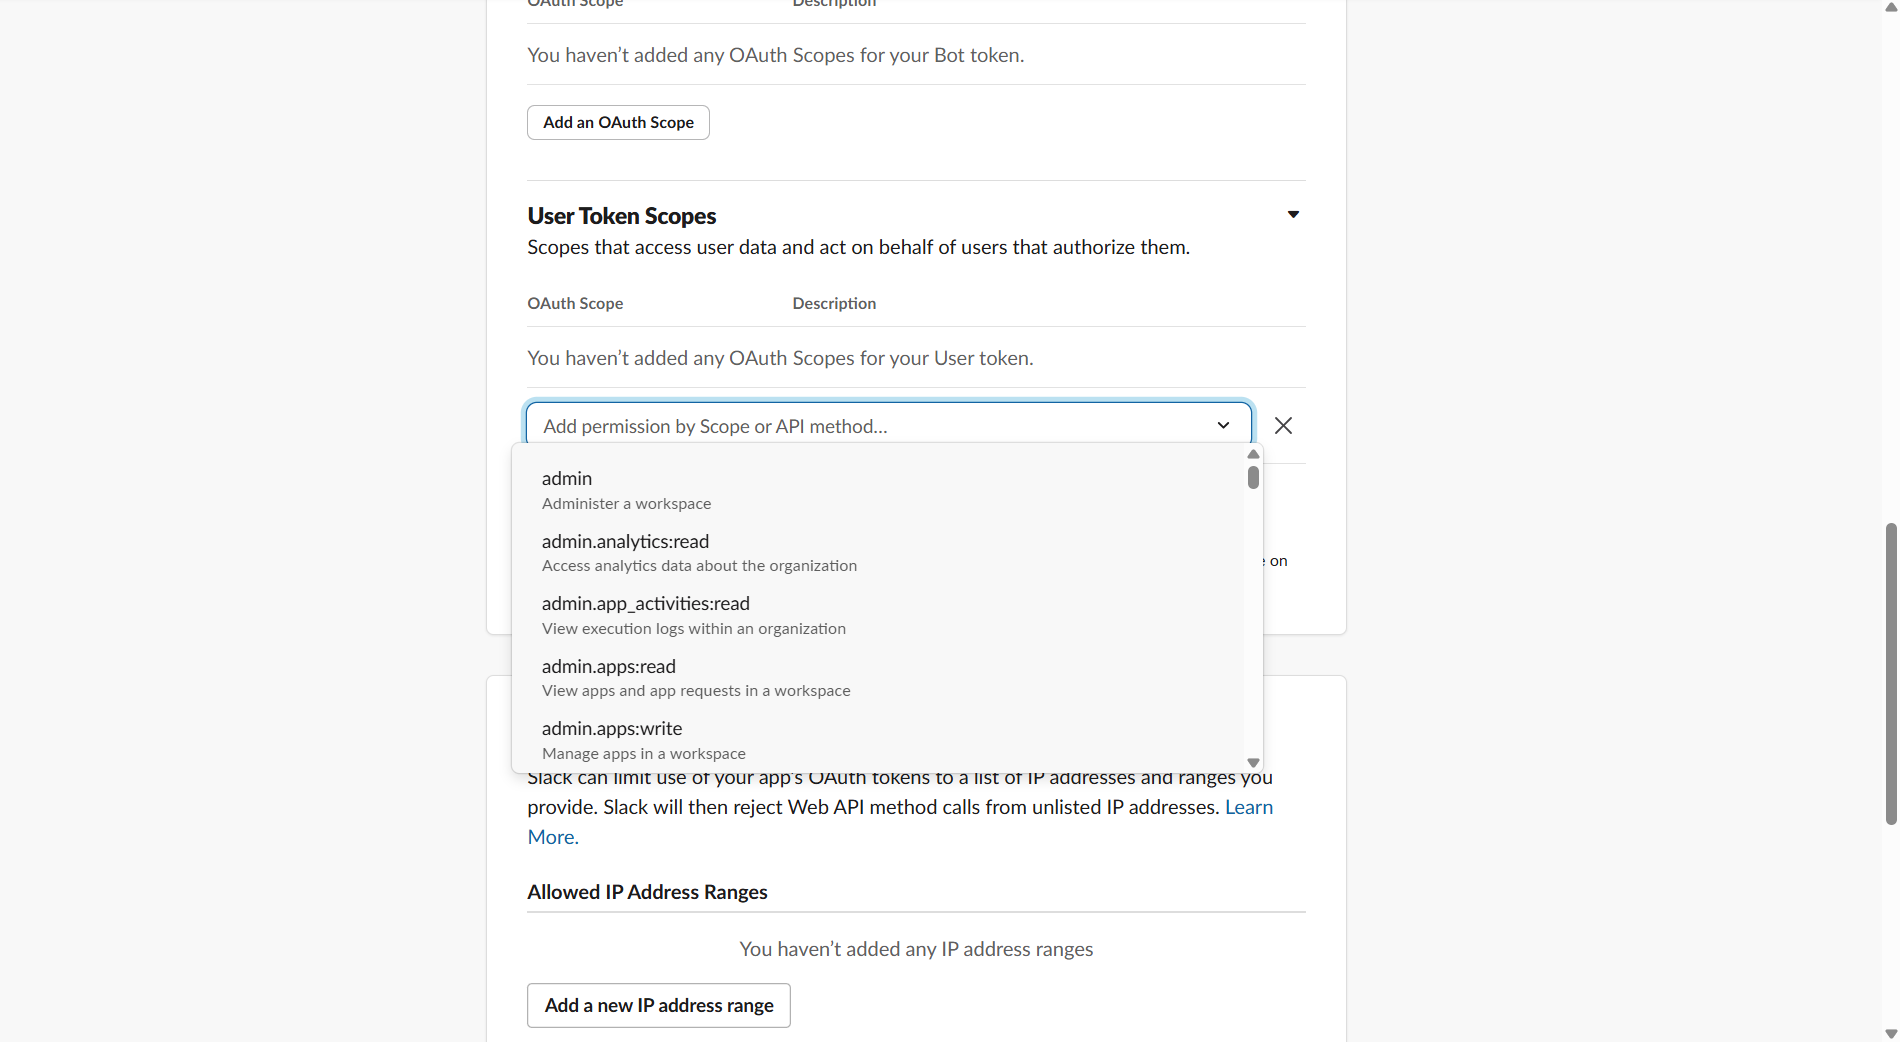
In **OAuth & Permissions**, scroll to **Scopes**. Slack splits scopes into two sections — **Bot Token Scopes** and **User Token Scopes** — and you'll need to add some in each.
#### Bot Token Scopes
Add these under the **Bot Token Scopes** section.
**Messaging**
| Scope | Purpose |
| ------------ | ------------------------------------------- |
| `chat:write` | Send, update, delete, and schedule messages |
**Channels**
| Scope | Purpose |
| ------------------ | --------------------------------------------------- |
| `channels:read` | View basic channel info, list channels |
| `channels:history` | Read channel message history |
| `channels:write` | Create, archive, rename channels, set topic/purpose |
| `groups:read` | View private channel info |
| `groups:history` | Read private channel history |
| `groups:write` | Create, archive, rename private channels |
| `mpim:read` | View group DM info |
| `mpim:history` | Read group DM history |
| `mpim:write` | Create group DMs |
| `im:read` | View DM info |
| `im:history` | Read DM history |
| `im:write` | Open and send DMs |
**Users**
| Scope | Purpose |
| -------------------- | -------------------------- |
| `users:read` | View user info, list users |
| `users:read.email` | Look up users by email |
| `users.profile:read` | Read user profiles |
**Files, reactions, pins, user groups**
| Scope | Purpose |
| ----------------- | -------------------- |
| `files:write` | Upload files |
| `files:read` | Read file info |
| `reactions:read` | View reactions |
| `reactions:write` | Add/remove reactions |
| `pins:read` | View pinned messages |
| `pins:write` | Pin/unpin messages |
| `usergroups:read` | View user groups |
#### User Token Scopes
Scroll further down on the same page to the **User Token Scopes** section and add these. They are not available as Bot Token Scopes — you must add them here for the corresponding tools to work.
| Scope | Purpose |
| --------------------- | --------------------------------------------------------------------- |
| `search:read` | Search messages and files (powers `search_all` and `search_messages`) |
| `users.profile:write` | Set user status on behalf of the user (powers `set_user_status`) |
If you change scopes after the toolset is already authenticated, existing users must re-authorize to pick up the new scopes.
### Step 5: Copy Client ID and Client Secret
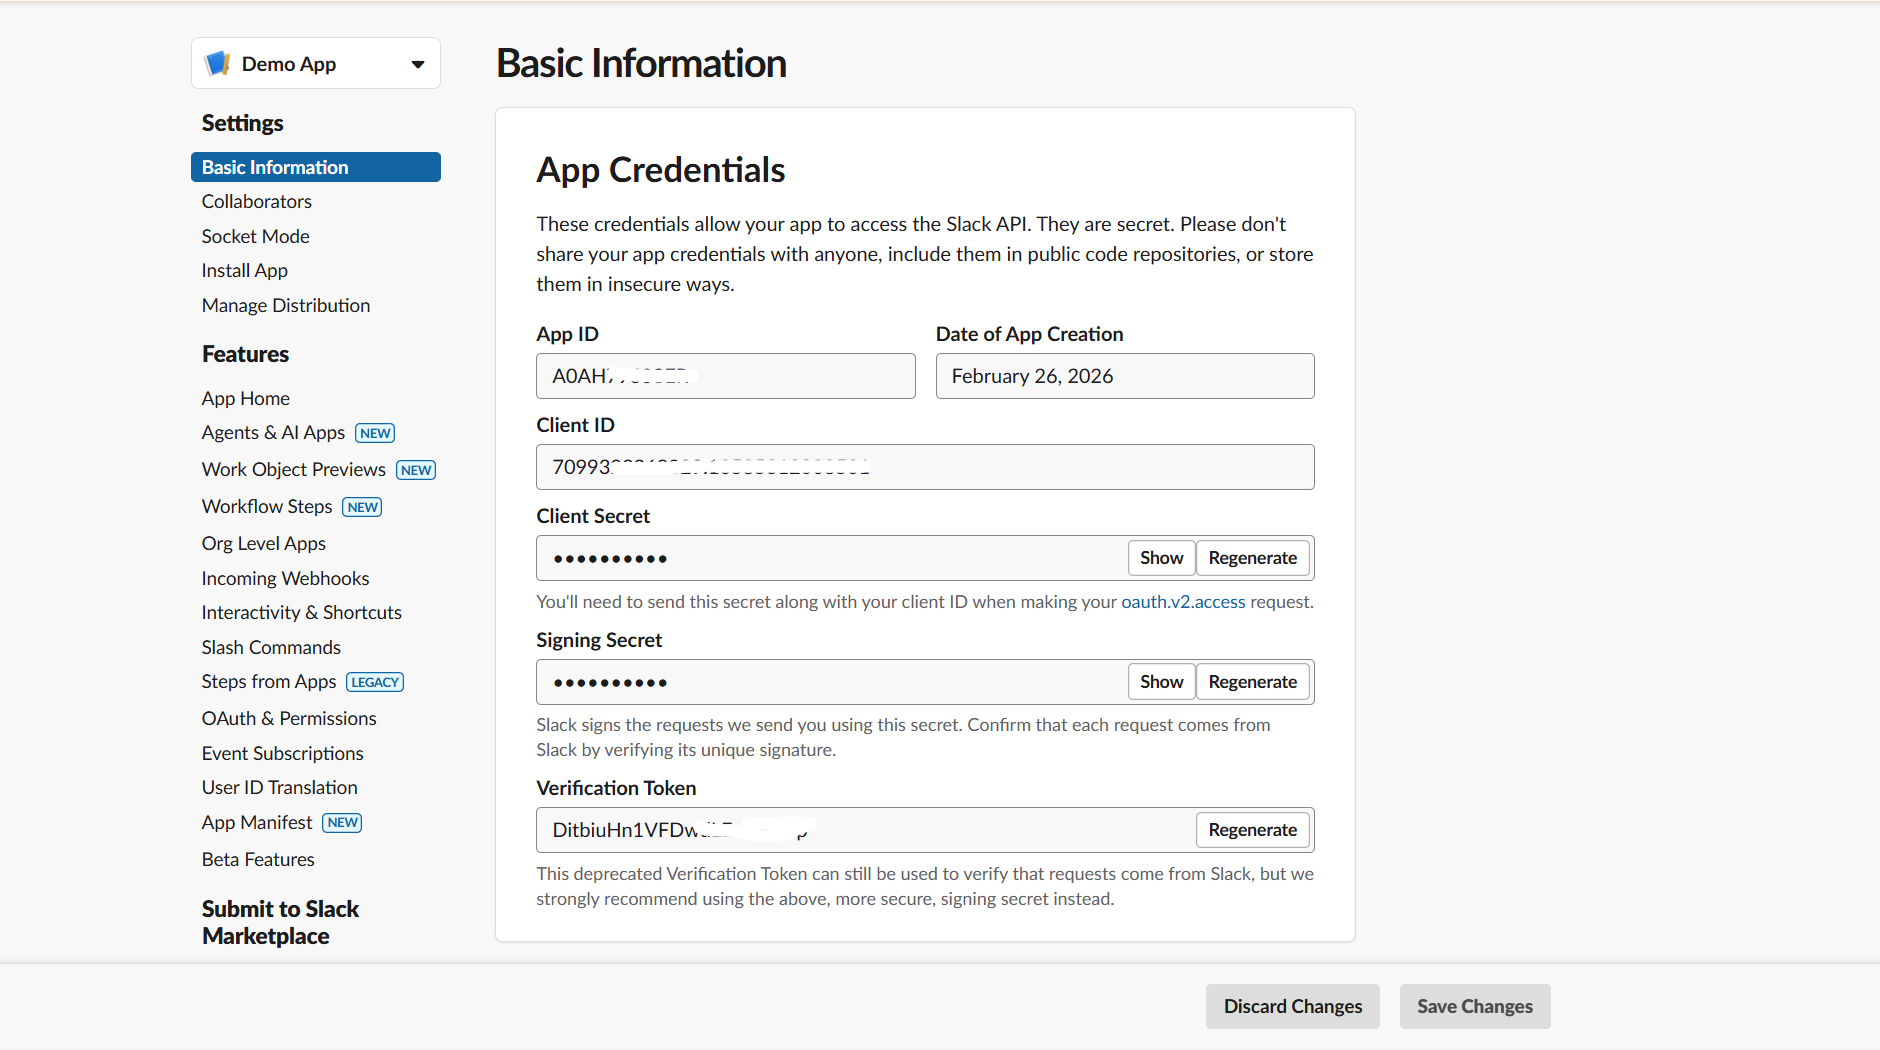
1. In Slack app settings, open **Basic Information**.
2. Scroll to **App Credentials**.
3. Copy:
* **Client ID** — used as **Client ID** in PipesHub.
* **Client Secret** — click **Show** to reveal, then copy. Used as **Client Secret** in PipesHub.
Store the Client Secret securely. It can be regenerated if needed, but you'll have to update your PipesHub configuration with the new value and re-authorize.
### Step 6: Configure the Slack toolset in PipesHub
1. In PipesHub, return to **Workspace Settings** → **Actions**.
2. Find **Slack** and reopen the setup dialog.
3. Confirm the **Redirect URI** matches the Redirect URL you saved in Slack in Step 3.
4. Paste your **Client ID** and **Client Secret**, then save the instance.
### Step 7: Authenticate the Slack toolset
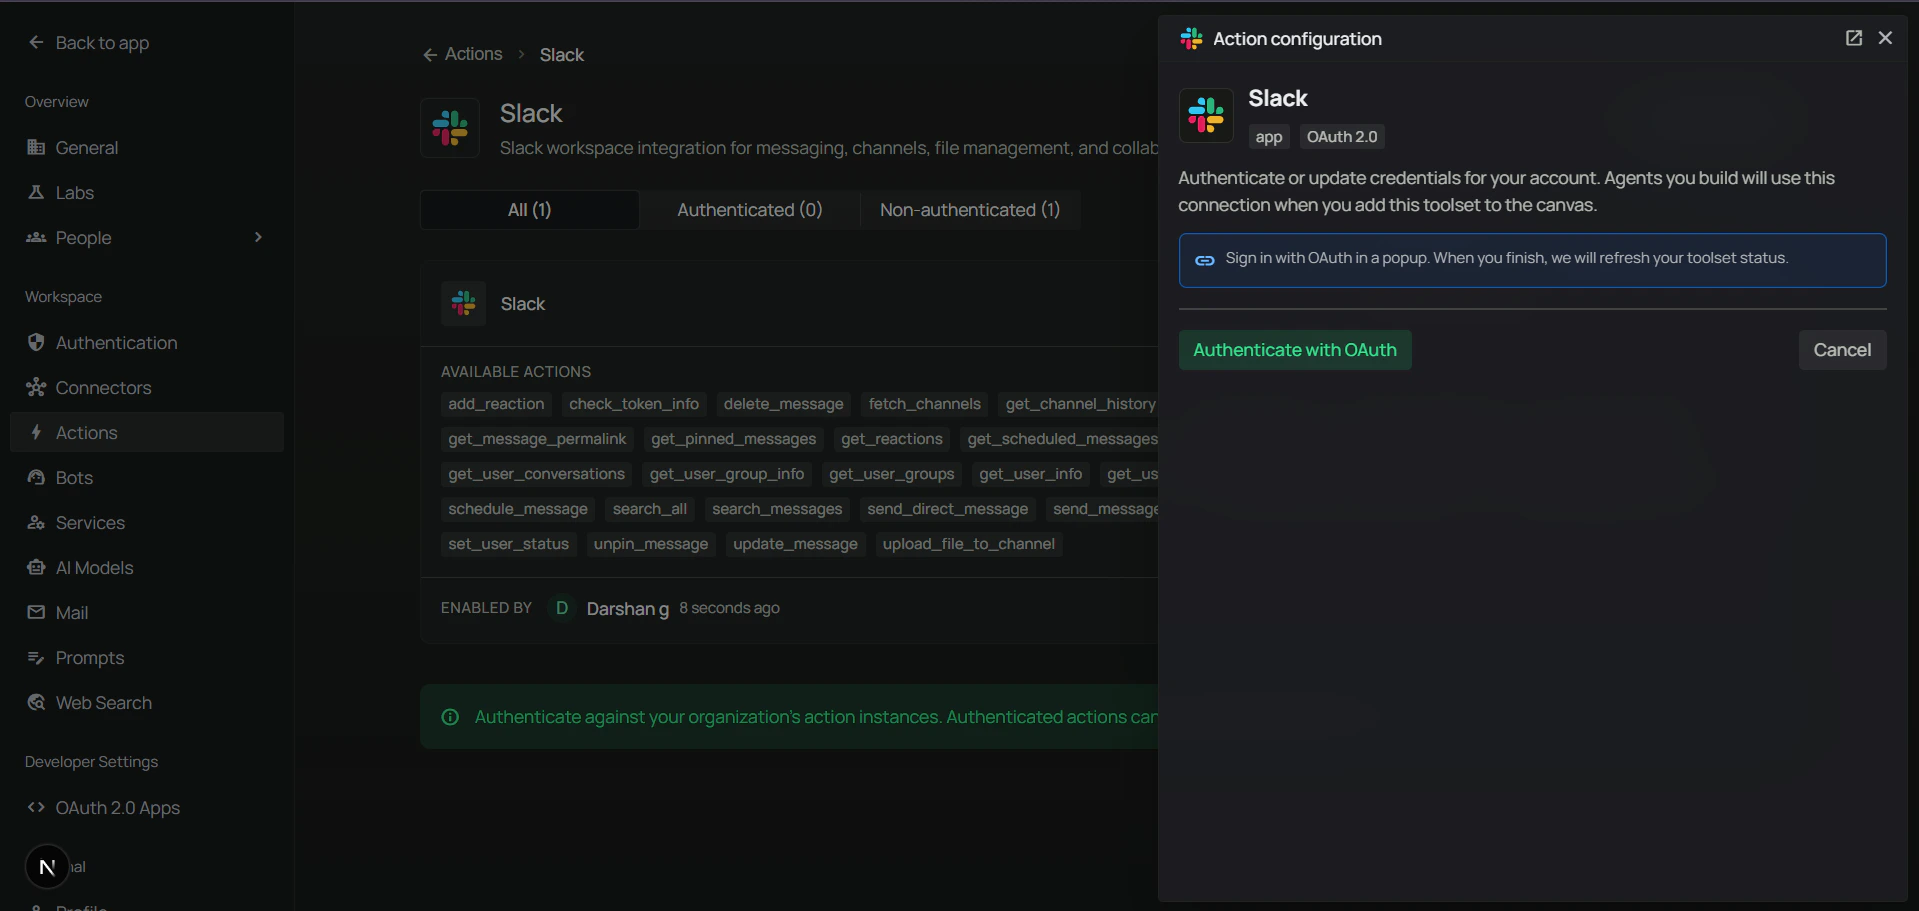
Authentication uses the same OAuth flow in either location:
* **Admins** can authenticate the shared instance directly under **Workspace Settings → Actions**.
* **Users** can authenticate their own personal instance under **Your actions** (in the **Personal** section of the sidebar).
1. On the Slack tile (in **Actions** or **Your actions**), click **Authenticate with OAuth**.
2. A popup opens to Slack's authorization page — select your workspace, review the requested scopes, and click **Allow**.
3. The popup closes and the Slack tile shows **Authenticated** status.
**Authorize using the same email as your PipesHub account.** Using a different email causes permission issues on the PipesHub platform.
### Step 8: Add Slack to an agent
1. Go to the **Home** page.
2. Next to **Agents**, click **+** to create a new agent.
3. Give the agent a name, drag the **Slack** toolset onto the canvas, connect it to the **Agent Core** node with your model and chat input/output, then create the agent.
***
## FAQ
| Aspect | Slack Connector | Slack Toolset |
| --------------- | --------------------------------------- | --------------------------------------------- |
| **Purpose** | Sync and index messages for search | Enable agents to perform Slack actions |
| **Data Flow** | One-way (import data into PipesHub) | Two-way (read and write via API) |
| **When to Use** | Query/search messages and conversations | Send messages, add reactions, manage channels |
**Example:** Use **Slack Connector** to search past message history. Use **Slack Toolset** to let agents send messages or post updates.
***
## Usage Tips
**How do I send a message to a channel?**\
Ask your agent to "send a message to #marketing" with your content.
**How do I send a direct message?**\
Ask to "send a DM to John about the meeting" or "directly message [sarah@company.com](mailto:sarah@company.com)". The agent can send private messages to any user.
**How do I reply to a message?**\
Ask to "reply to that message in thread" or "respond to the latest message in #engineering". The agent can reply in threads to keep conversations organized.
**How do I search for messages?**\
Ask to "search Slack for \[keyword]" or "find messages about the project launch". The agent searches across messages, files, and channels.
**How do I add reactions?**\
Ask to "add a ✅ reaction to that message" or "react with 👍 to John's message". The agent can add emoji reactions to any message.
**How do I get channel history?**\
Ask to "show me recent messages in #support" or "get the last 10 messages from #engineering". The agent can retrieve message history from any channel.