> ## Documentation Index
> Fetch the complete documentation index at: https://docs.pipeshub.com/llms.txt
> Use this file to discover all available pages before exploring further.
# Teams
> Create and manage teams so members can collaborate, share resources, and work together
## Overview
Teams let workspace members group themselves around a shared purpose — a project, a product area, or any collaboration unit. Unlike user groups (which administrators use to manage access), teams are available to every workspace member. A user can belong to any number of teams, and within each team members are assigned a role that determines what they can do with team resources.
## Team Member Roles
Every member of a team has one of three roles:
| Role | Description |
| ---------- | ----------------------------------------------------------------------------------------------------------- |
| **Owner** | Full control over the team and its resources. Can add or remove members, change roles, and delete the team. |
| **Writer** | Can view and edit team resources. |
| **Reader** | Can view team resources. |
## Navigating to Teams
1. Sign in to your PipesHub account
2. Open the user menu and click **Workspace Settings**
3. In the workspace sidebar, expand the **People** section and select **Teams**
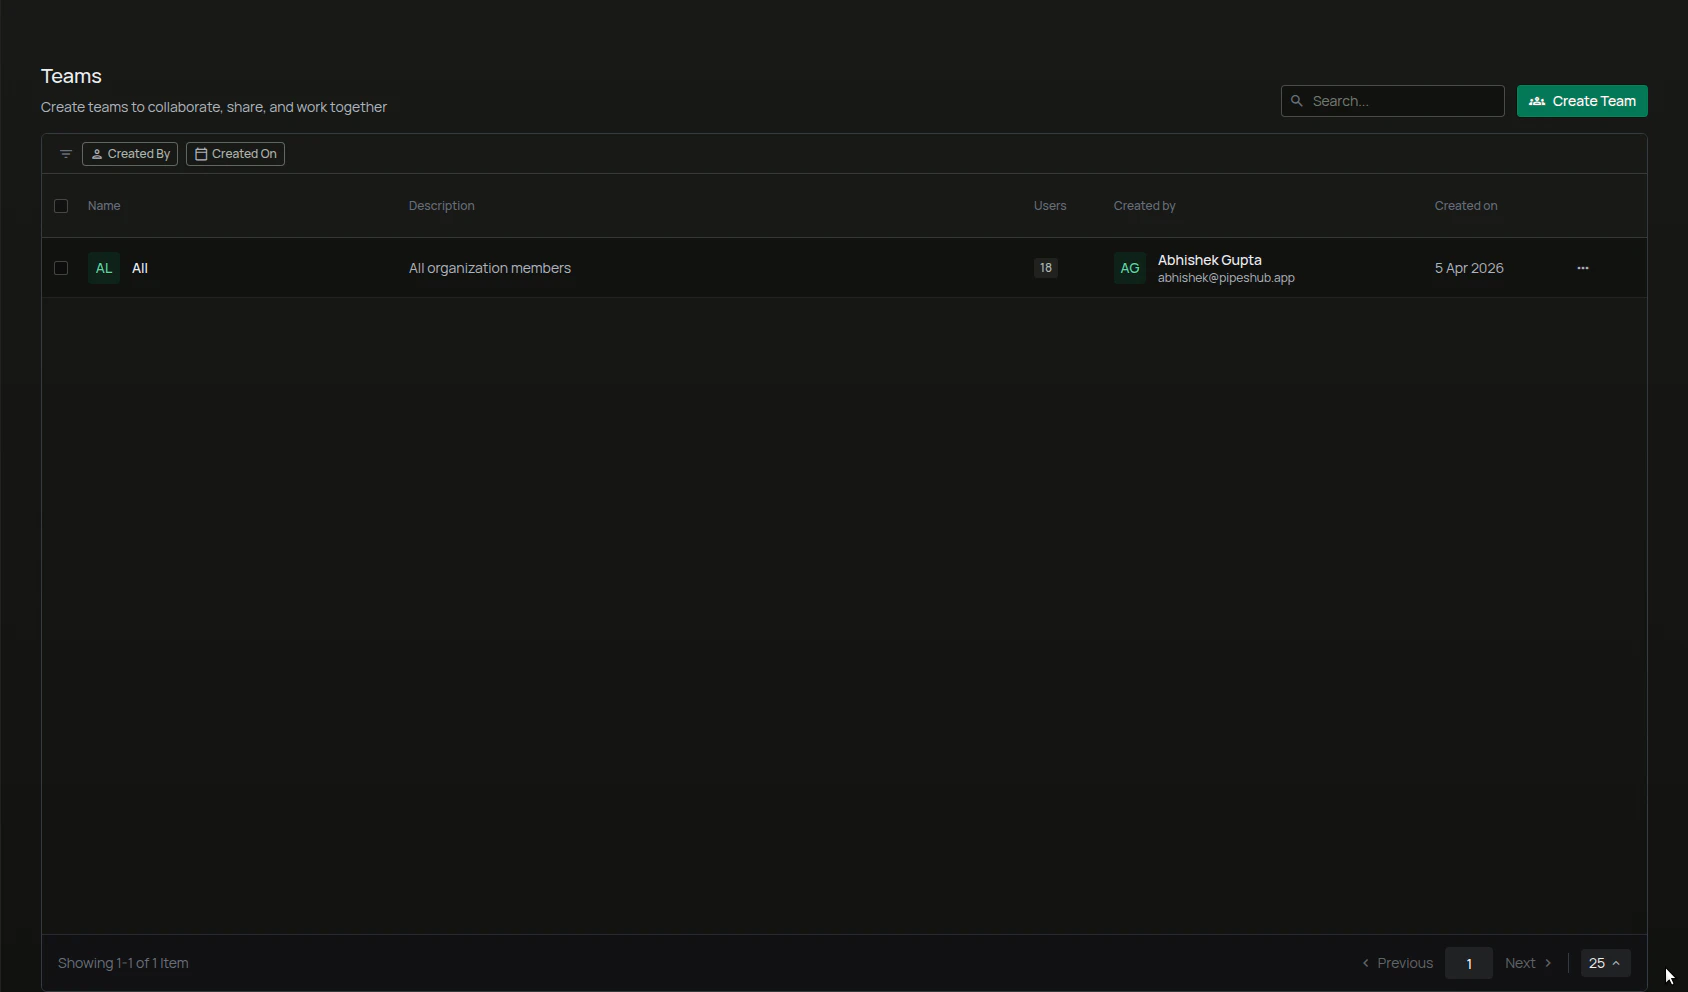
The page shows a table of all teams you can see, with columns for **Name**, **Description**, **Members** (count), **Created By**, and **Created On**. Use the **search** field to look up teams by name and the **Created By** and **Created On** filters to narrow the list. Clicking any row opens that team's detail panel on the right.
## Creating a Team
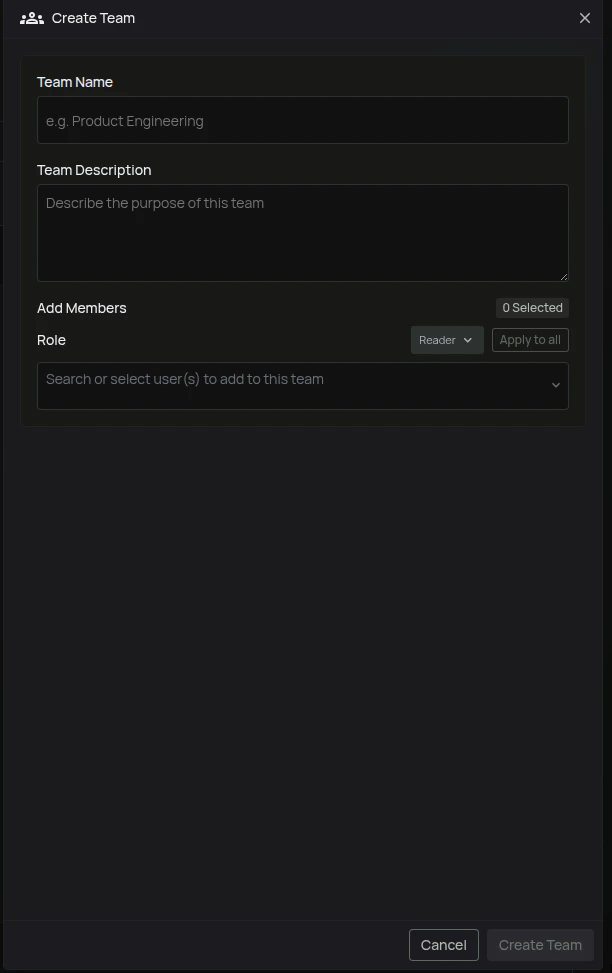
1. From the **Teams** page, click **Create Team** in the top-right corner
2. The **Create Team** panel opens on the right
3. Enter the **Team Name** (required) — for example, `Product Engineering`
4. (Optional) Enter a **Team Description** describing the team's purpose
5. (Optional) Under **Add Members**, choose a **Default Role** (`Reader`, `Writer`, or `Owner`) for the members you're about to select
6. Search for and select the users to add to the team
7. To change a specific member's role after adding them, use the role dropdown next to their name in the **Member Roles** list. Click **Apply to all** to reset every selected member to the default role
8. Click **Create Team**
**Access Permissions** for teams are shown as *Coming Soon* in the current UI — team membership and role assignment cover the access model today.
## Viewing a Team
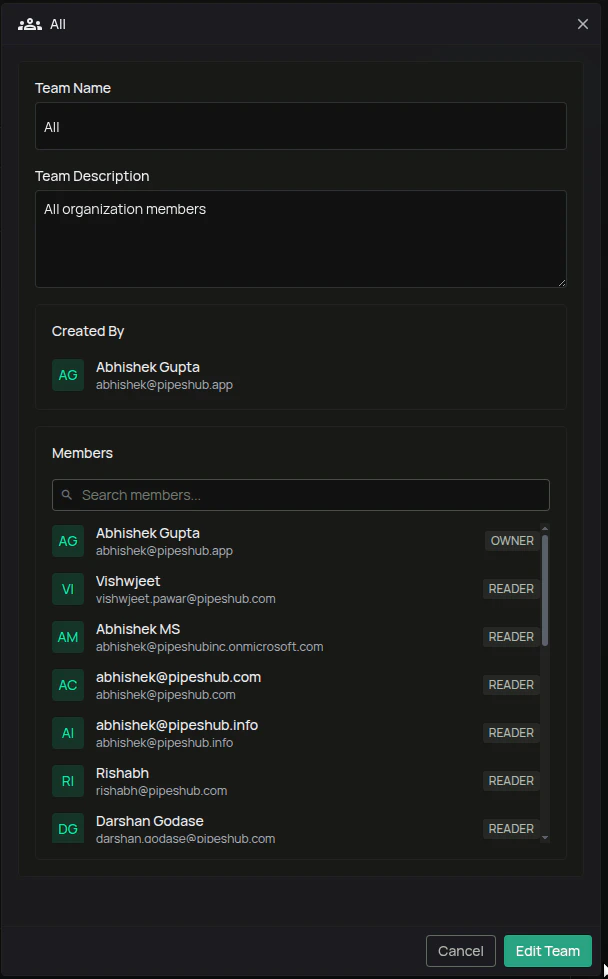
Click a team's row on the **Teams** page — or choose **View Team** from the row actions menu (**⋯**) — to open the detail panel. The panel shows:
* The team's **Name** and **Description**
* **Created By** — the user who created the team
* **Members** — a paginated list of members with their roles
## Editing a Team
1. Open the team detail panel
2. Click **Edit Team**
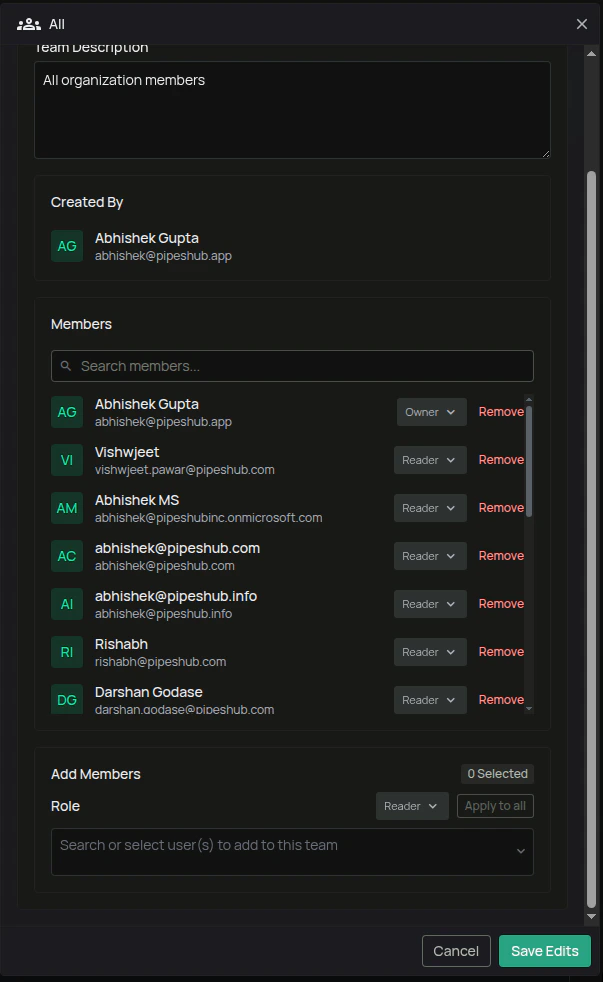
3. Update any of the following, then click **Save Edits**:
* **Team Name** or **Team Description**
* **Add Members** — search and select additional users, with an optional default role and per-user role overrides
* Member roles — change a current member's role using the role dropdown next to their name
* Remove members — click **Remove** next to a member; click **Undo** before saving to cancel the removal
Role changes, additions, and removals are applied together when you click **Save Edits**.
## Deleting a Team
Teams can be deleted only by users who have permission to do so (typically team owners). If the option is available:
1. Open the team's detail panel, or open the row actions menu (**⋯**) on the Teams page
2. Click **Delete Team** (or **Delete** from the row actions menu)
3. Confirm the action
Deleting a team is irreversible. The team and its membership are removed, though individual users remain in the workspace.
## Teams vs. User Groups
| | **Teams** | **User Groups** |
| ------------------ | ------------------------------------------- | ----------------------------------------------------- |
| **Who can create** | Any workspace member | Administrators only |
| **Purpose** | Collaboration and shared work among members | Permission and access management across the workspace |
| **Member roles** | Owner, Writer, Reader | Inherited workspace permissions |
Use **teams** to organize the people doing work together, and **user groups** to control what members of the workspace can access.