Overview
User groups let administrators organize workspace members into logical collections for permission management. Users can belong to multiple groups, and every group can contain multiple users. Group membership is inherited during invitation and can be updated at any time.
User Groups Functionality
- Grouping Users: Organize users into collections that reflect their team, function, or access needs.
- Multiple Users per Group: A single group can contain any number of members.
- Multiple Groups per User: A user can belong to any number of groups.
- Permissions Inheritance: Users inherit permissions assigned to each of their groups.
- Custom Groups: Create your own groups alongside the built-in system groups. System groups (for example, the everyone group) cannot be deleted.
Navigating to Groups
- Sign in to your PipesHub account with administrator credentials
- Open the user menu and click Workspace Settings
- In the workspace sidebar, expand the People section and select Groups
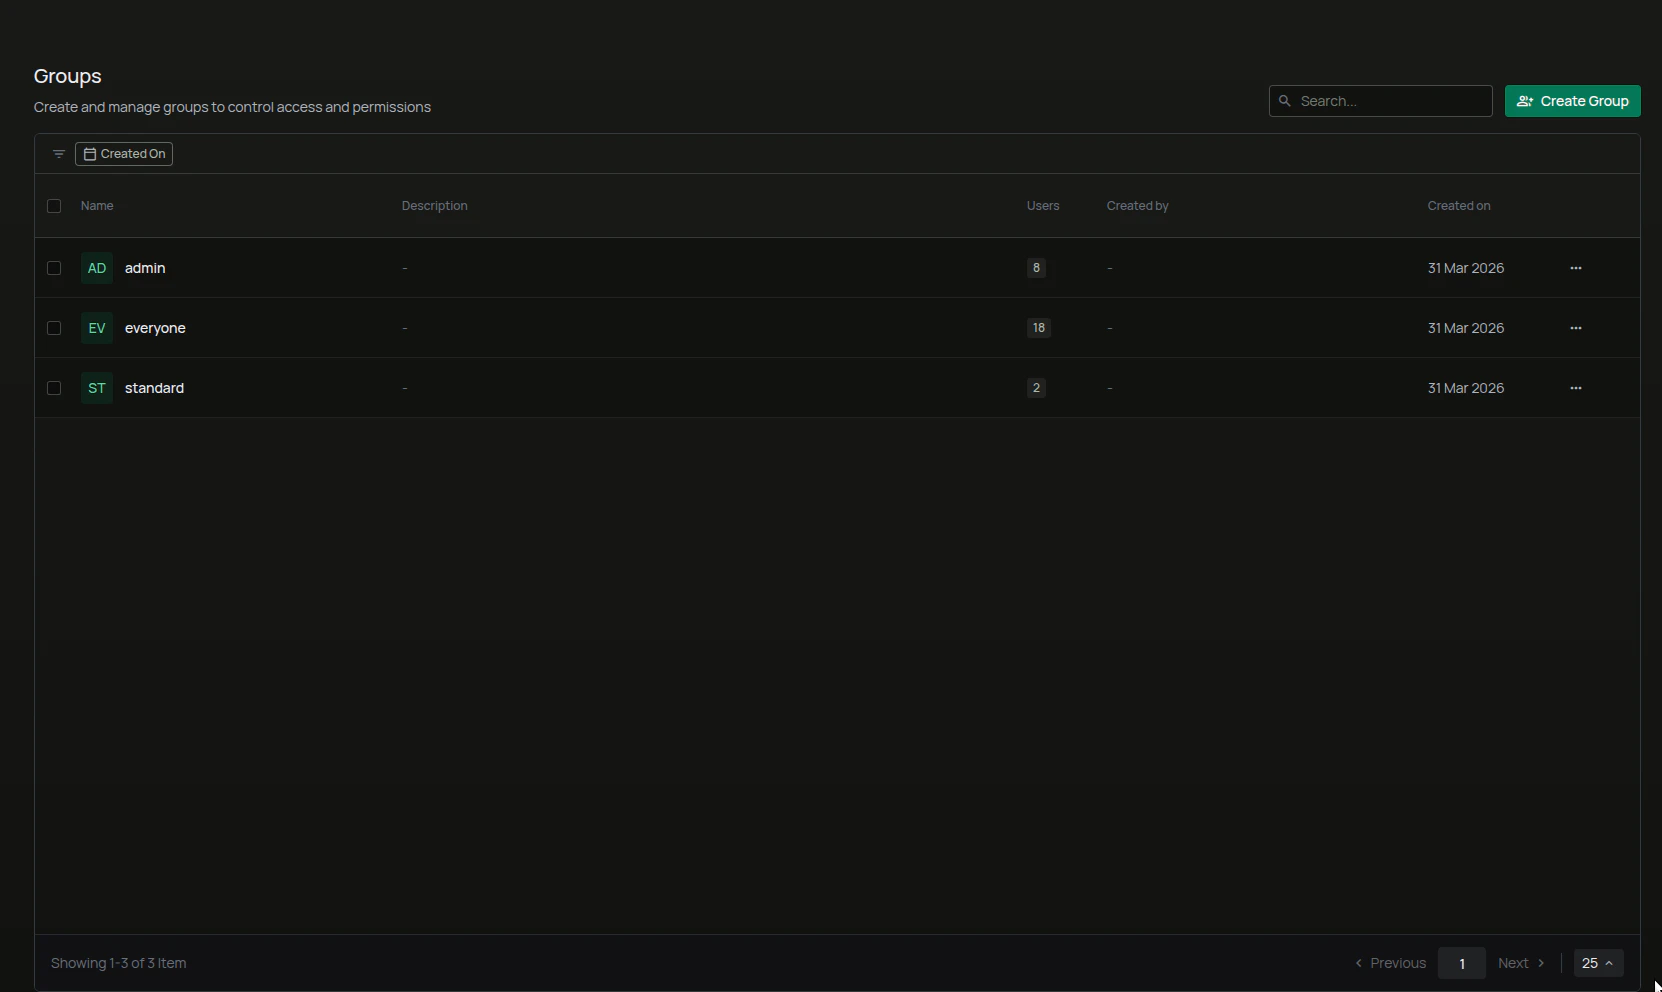
The page shows a table of all groups with columns for Name, Description, Users (member count), Created By, and Created On. Use the search field to find groups by name, the Created On filter to narrow by date, and click any row to open the group’s detail panel on the right.
Managing Groups
Creating a Group
- From the Groups page, click Create Group in the top-right corner
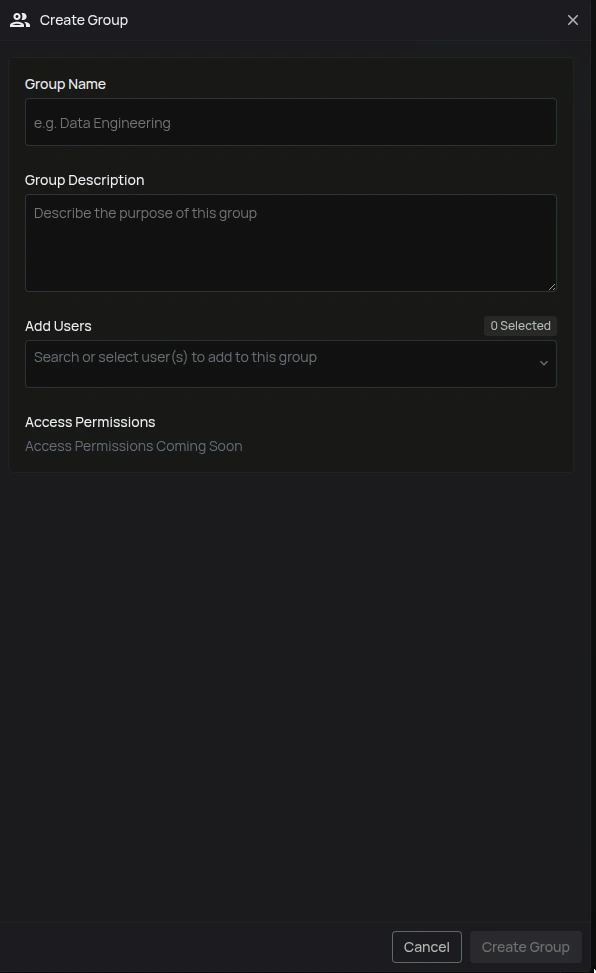
- The Create Group panel opens on the right
- Enter the Group Name (required) — for example,
Data Engineering
- (Optional) Enter a Group Description that explains the group’s purpose
- (Optional) Under Add Users, search for and select members to add to the group on creation
- Click Create Group
Access Permissions for groups are shown as Coming Soon in the current UI — group membership itself controls access today.
Adding Users to Groups
Option 1 — During User Invitation
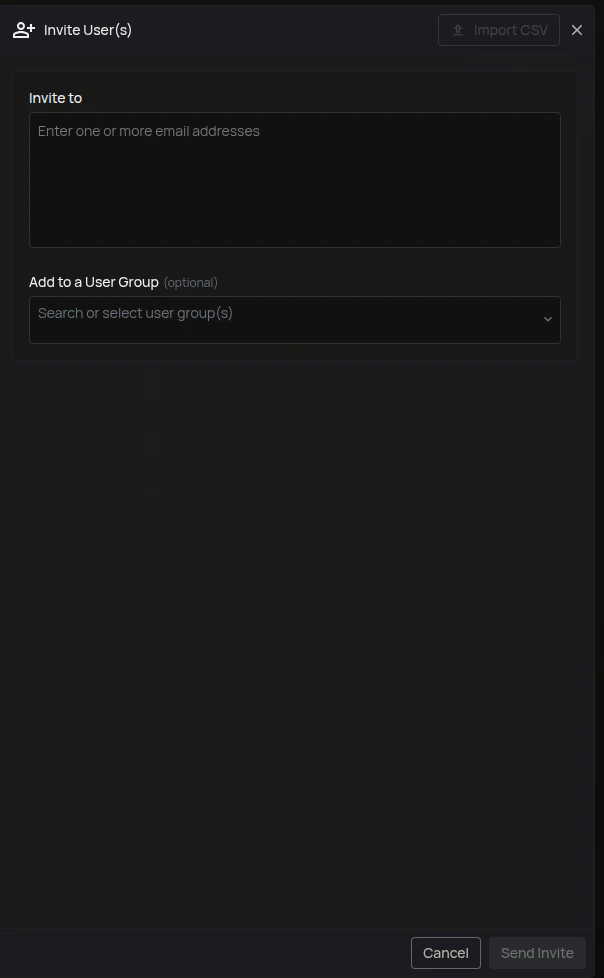
While inviting a user from the Users page, use the Add to a User Group field in the invite panel to assign one or more groups. New users inherit permissions from the groups you select.
Option 2 — From the Group Detail Panel
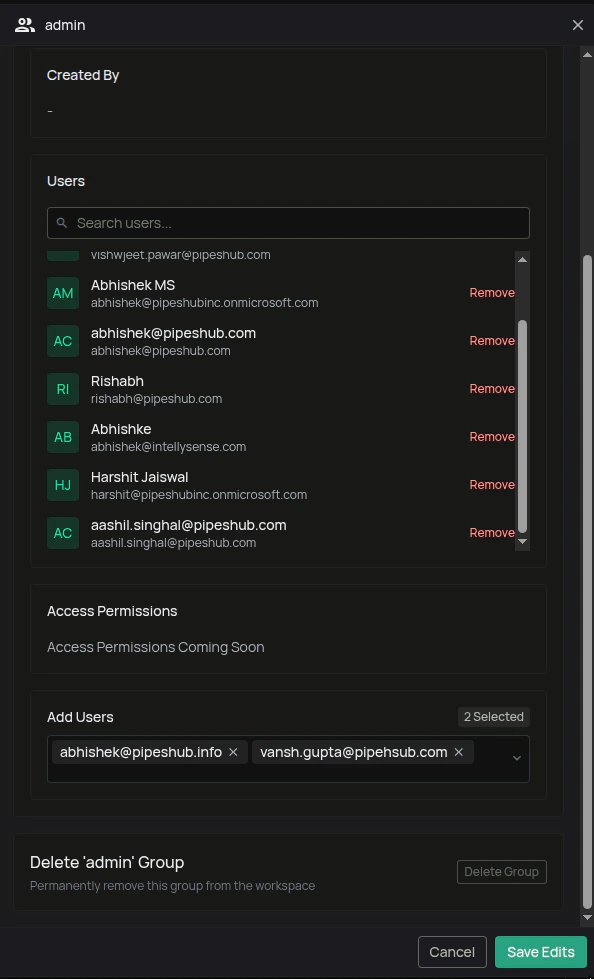
- Navigate to the Groups page and click the group’s row to open its detail panel
- Click Edit Group
- Under Add Users, search and select the members to add
- Click Save Edits
Removing Users from a Group
- Open the group’s detail panel from the Groups page
- Click Edit Group
- In the Users list, click Remove next to each user you want to remove. Click Undo to cancel a pending removal before saving
- Click Save Edits to apply the changes
Editing a Group’s Name or Description
- Open the group’s detail panel
- Click Edit Group
- Update the Group Name or Group Description
- Click Save Edits
Deleting a Group
- Open the group’s detail panel
- Click Delete Group at the bottom of the panel, or use the Delete option in the row actions menu (⋯) on the Groups page
- Confirm the action
Deleting a group is irreversible. Members of the group are not deleted, but they lose any permissions that were inherited from it. System groups cannot be deleted.
Conclusion
User groups simplify workspace management by letting you organize members around teams, functions, or access needs. Assign users to groups during invitation or from the group detail panel, and use the built-in filters on the Users page to find everyone in a specific group quickly.