
Navigating to Users
- Sign in to your PipesHub account with administrator credentials
- Open the user menu and click Workspace Settings
- In the workspace sidebar, expand the People section and select Users
Use the search field in the header to look up users by name or email, and the filters above the table to narrow results by group, status, last active date, or date joined. Clicking any row opens that user’s profile panel on the right.
Inviting Users
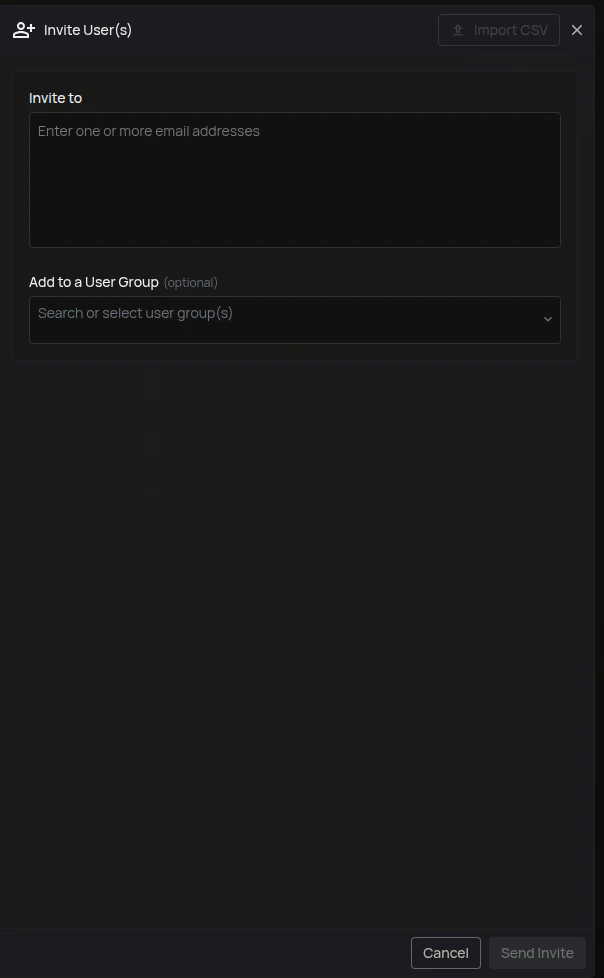
- On the Users page, click the Invite button in the top-right corner
- The Invite User(s) panel opens on the right
- In the Invite to field, type or paste one or more email addresses (separated by comma, space, or Enter). Invalid addresses are flagged inline
- (Optional) In Add to a User Group, search and select one or more groups. New users inherit access from the groups they are added to
- Click Send Invite
Managing Pending Invites
Click the row actions menu (⋯) next to a user with status Pending to access invite-specific actions:- Resend Invite — Sends a fresh invitation email to the same address.
- Cancel Invite — Revokes the outstanding invitation.

Bulk Actions
Select one or more rows using the checkboxes. A floating action bar appears at the bottom of the table:- If every selected row is a Pending invite: Resend Invite or Cancel Invite.
- Otherwise: Remove from Workplace (disabled when the selection contains any Admin).
Managing Active Users
For an active (non-admin) user, the row actions menu offers:- View Profile — Opens the user’s profile panel on the right
- Deactivate — Temporarily disables the account (coming soon)
- Remove from Workplace — Permanently removes the user. A confirmation dialog asks you to confirm.
Unblocking Users
If a user is Blocked, open the row actions menu and choose Unblock. A confirmation dialog asks you to type the user’s display name before the action is applied.Removing a User
- Open the row actions menu (⋯) for the user
- Click Remove from Workplace
- In the confirmation dialog, click Remove