Configuring SAML SSO
Step 1 — Register PipesHub in Your Identity Provider
Before configuring SAML in PipesHub, you need to add PipesHub as an application in your IdP.- Log in to your IdP’s admin console (e.g. Okta, Azure AD, OneLogin, Google Workspace)
- Create a new SAML application (often called “Add Application” or “Create App Integration”)
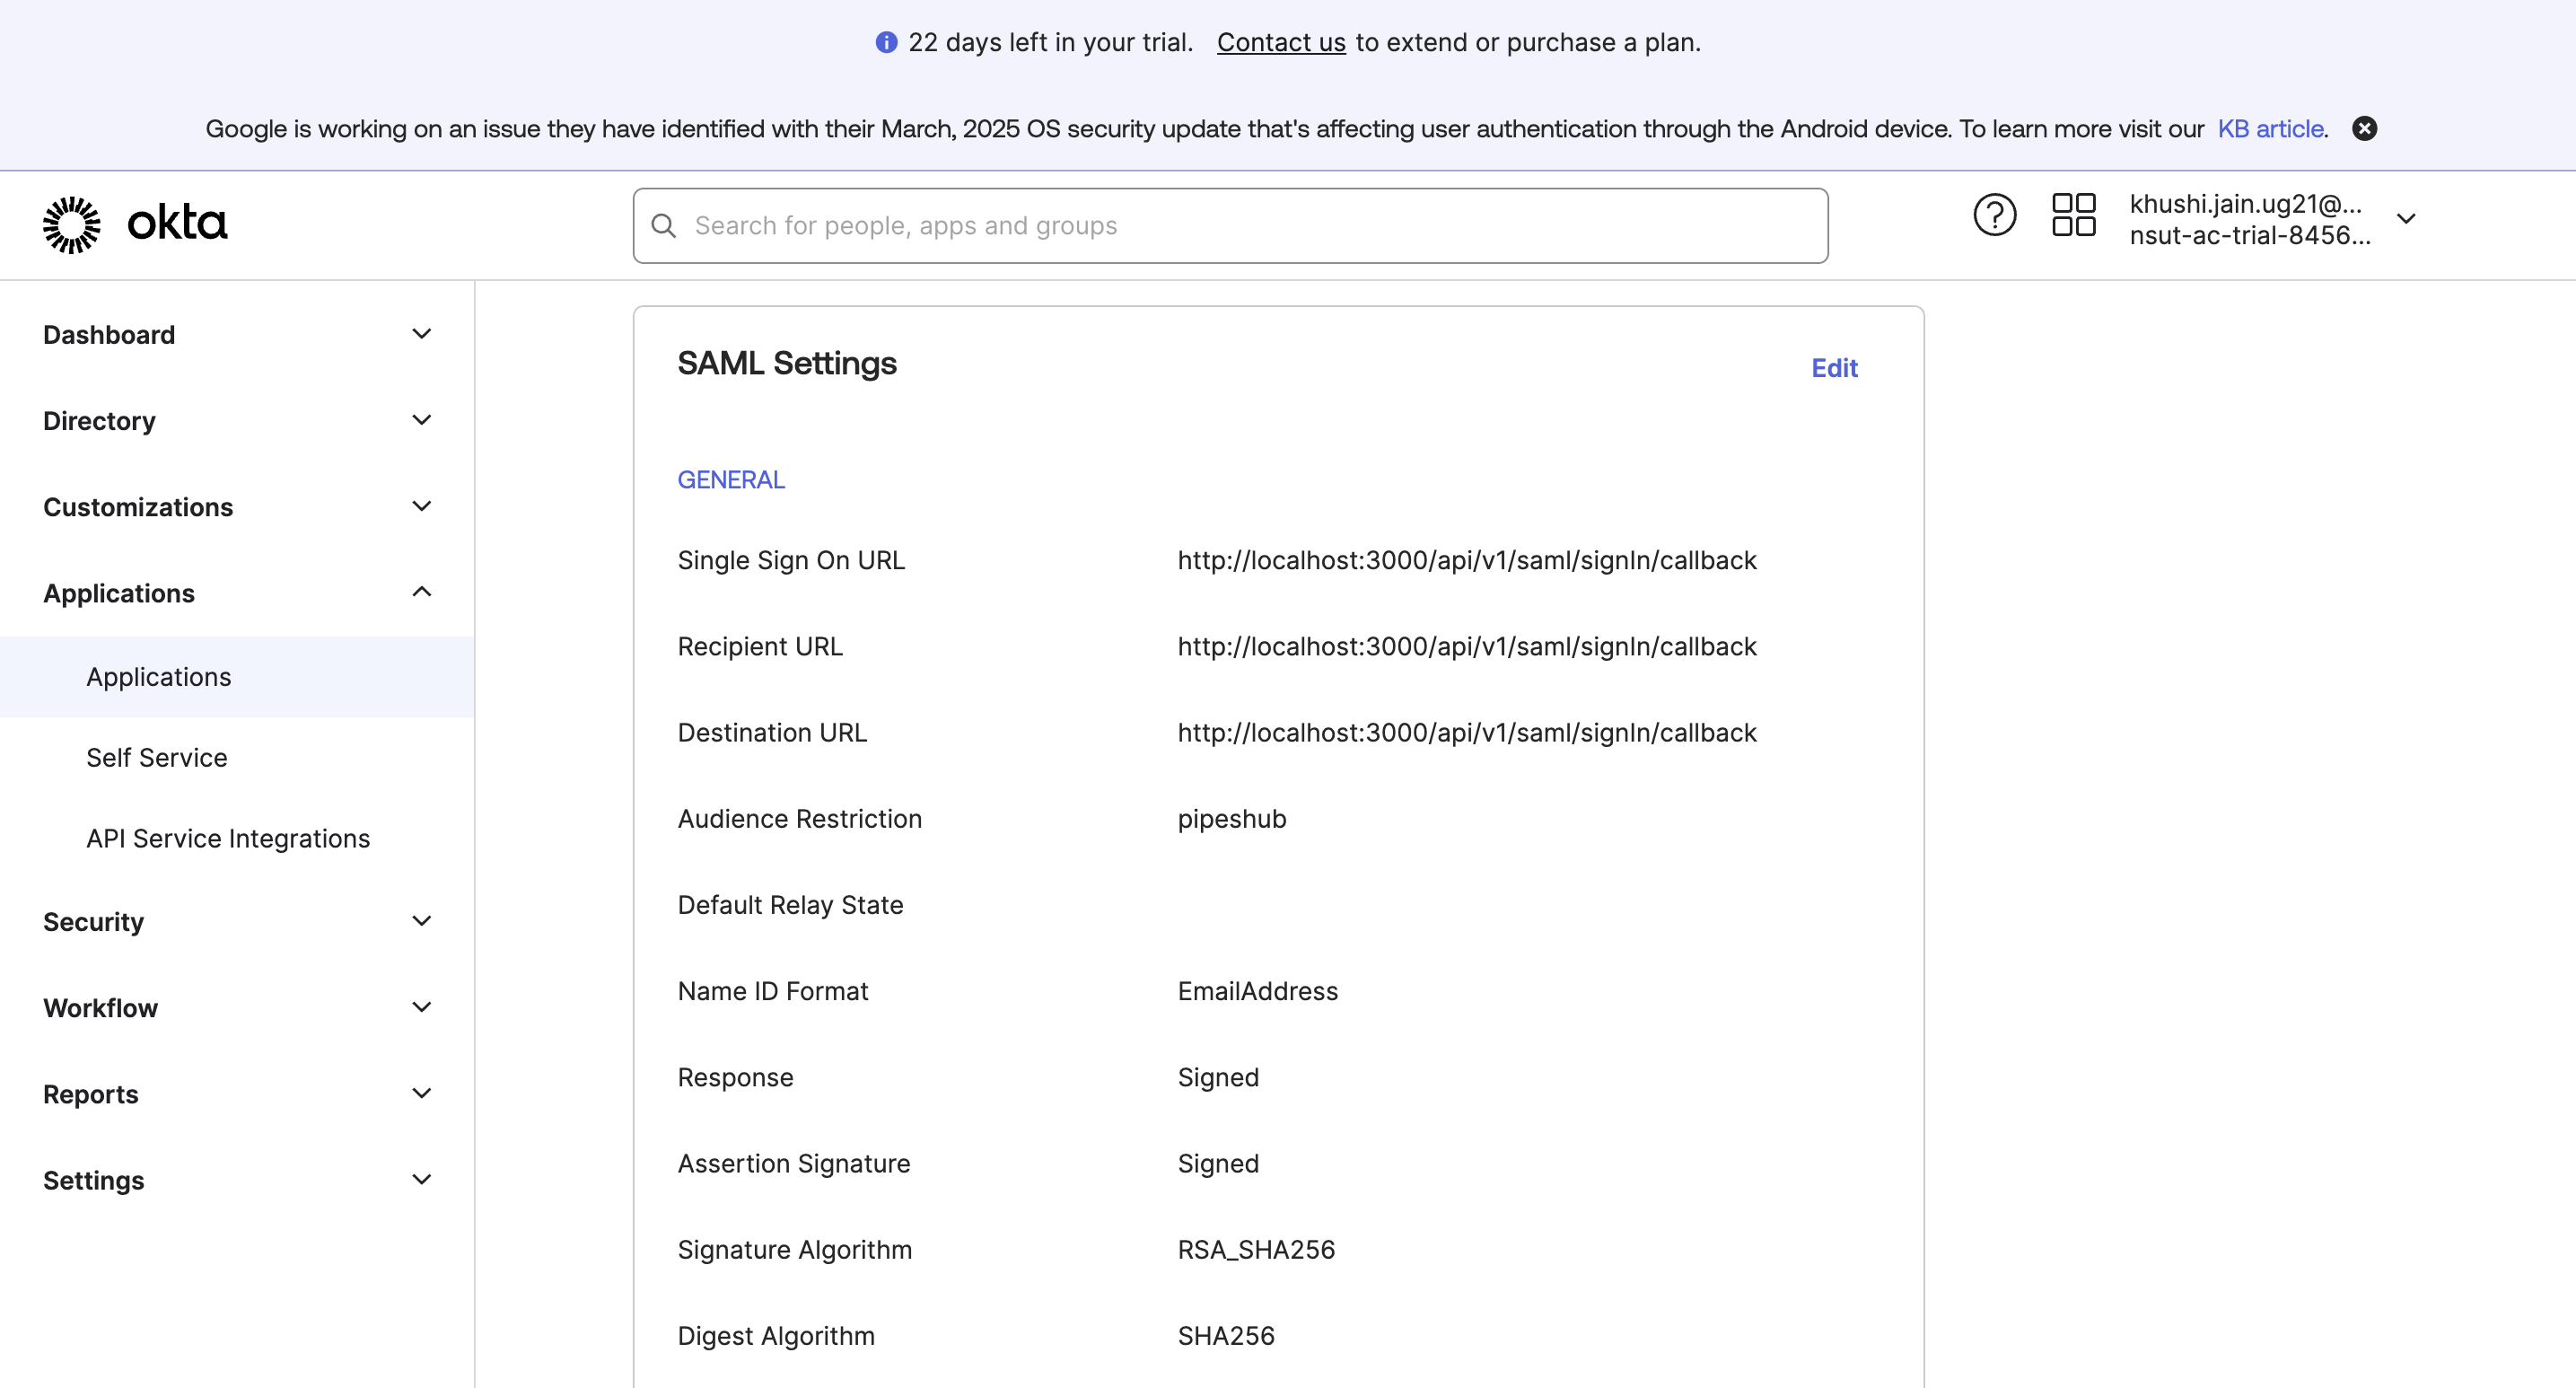
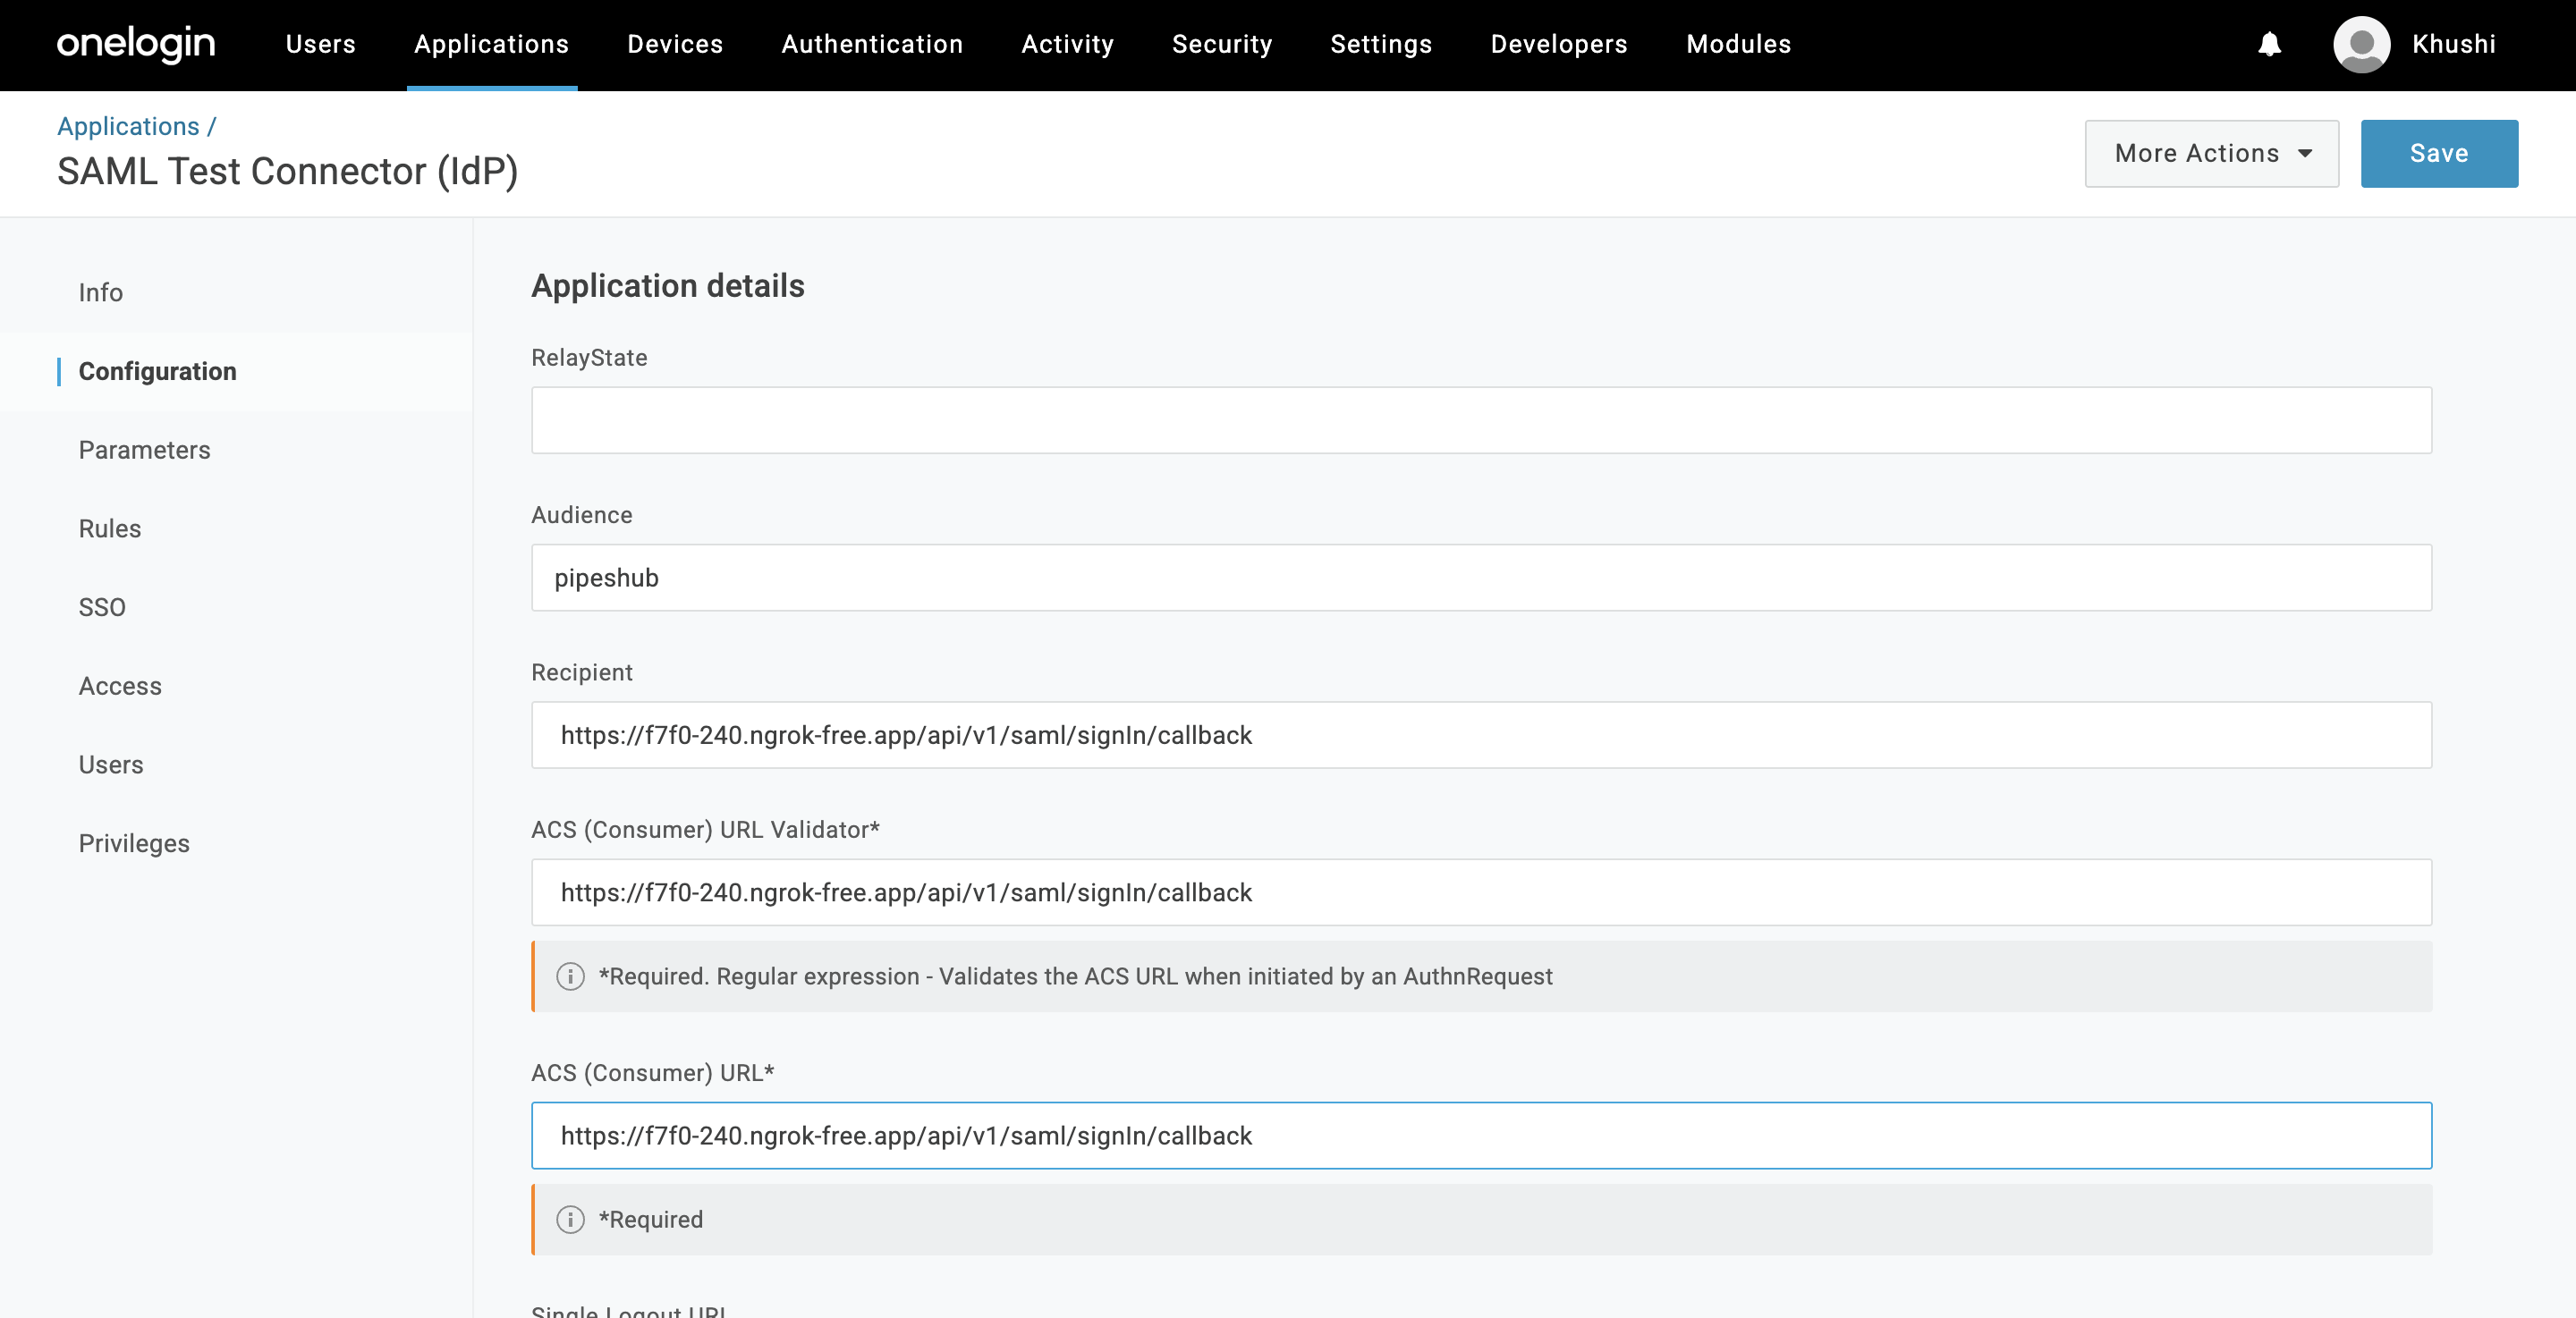
- Set the Single Sign-On URL (ACS URL) — copy this value from the PipesHub SAML configuration panel
- Set the Audience (Entity ID) — copy this from the PipesHub configuration panel as well
- Configure attribute mappings to include the user’s email address in the SAML response
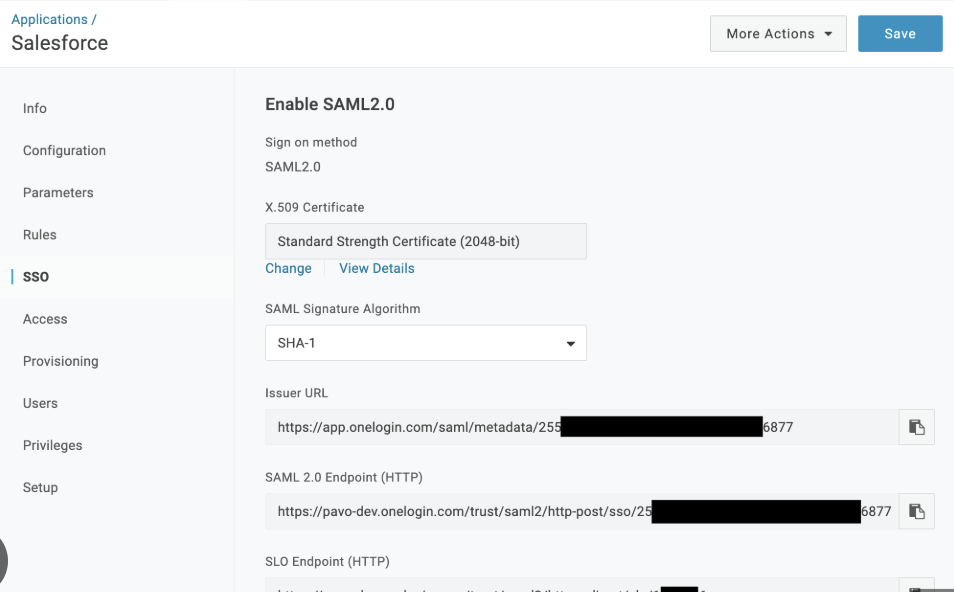
- Save the application and note the following — you’ll need them in Step 3:
- SSO Entry Point URL (your IdP’s login URL)
- X.509 Certificate (your IdP’s signing certificate)
- IdP Metadata XML (optional — can be uploaded to auto-fill the fields above)
Step 2 — Find Your Email Attribute Key
Your IdP includes the user’s email in the SAML response, but different providers use different attribute names for it. You need to enter the correct name in PipesHub so it can identify your users. Option A: Check your IdP settings- Log in to your IdP admin console
- Open the SAML app you created and go to Attribute Mapping or Claims
- Note the attribute name used for the user’s email
- Install SAML Tracer (Chrome/Firefox extension)
- Perform a test login and capture the SAML response
- Look for the attribute containing the email address
Step 3 — Configure SAML SSO in PipesHub
- Go to Workspace → Authentication
Only workspace admins can access Authentication Settings.
- Find the SAML SSO row and click the gear icon to open the configuration panel
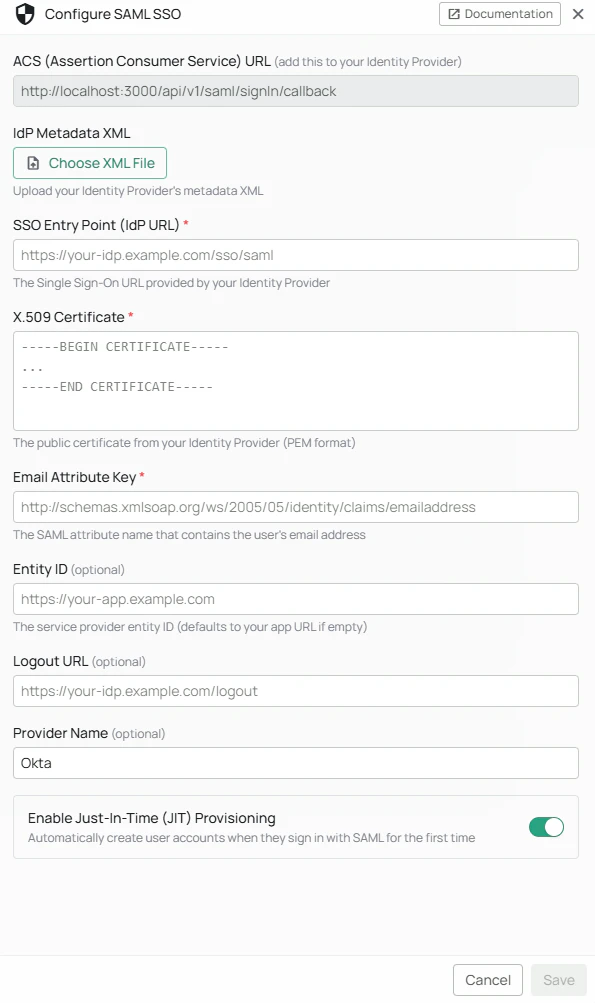
- Fill in the configuration fields:
The Save button stays disabled until all three required fields are filled in.
- Click Save
- Click Edit on the Authentication Settings page, toggle SAML SSO on, and click Save to activate it
Logging In with SAML SSO
Once SAML SSO is enabled, users can log in as follows:- Go to the PipesHub login page
- Click Sign in with SSO (or Continue with [Provider Name] if a provider name was configured)
- You’ll be redirected to your organization’s IdP login page
- Enter your corporate credentials
- You’ll be automatically redirected back to PipesHub and logged in