Microsoft SharePoint
Document management and collaboration platform
✅ Ready📝 Documentation Available
Overview
SharePoint is a web-based collaborative platform developed by Microsoft. It’s primarily used for document management and storage, acting as a secure place where teams can store, organize, share, and access information from almost any device.Key Functions of SharePoint
- Intranets & Team Sites: Serves as a centralized intranet and a secure digital space for team collaboration and internal communication.
- Document Management: Offers secure storage, version control, and organization for all documents and files.
- Content & Data Tracking: Allows users to create custom lists (e.g., tasks, contacts, issues) and manage company data.
- Workflow Automation: Enables the building of simple custom applications and forms to automate business processes.
Configuration Setup
Setup Guide
Setup Guide
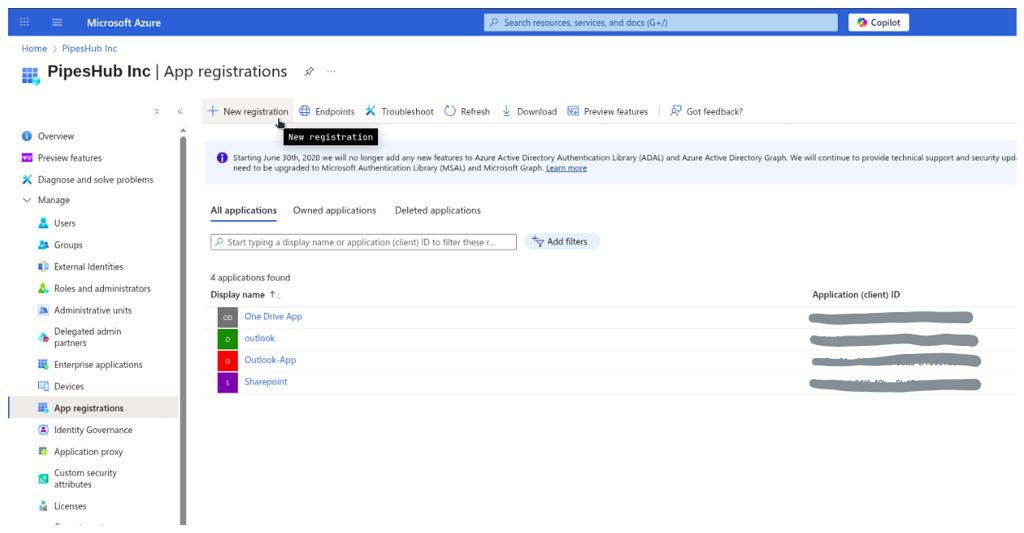
Step 1: Register Application in Azure Portal
Sign in to Azure Portal:- Navigate to portal.azure.com and sign in with your Microsoft 365 administrator account
- Search for “App registrations” in the top search bar
- Or navigate to Microsoft Entra ID → App registrations
- Enter application details:
- Name: Enter app name (e.g., “PipesHub Connector”)
- Supported account types: Select “Accounts in this organizational directory only (Single tenant)”
- Select a platform: Web
- Redirect URI: Leave blank
- Click “Register”
Single-tenant configuration ensures the application only works within your organization for better security.
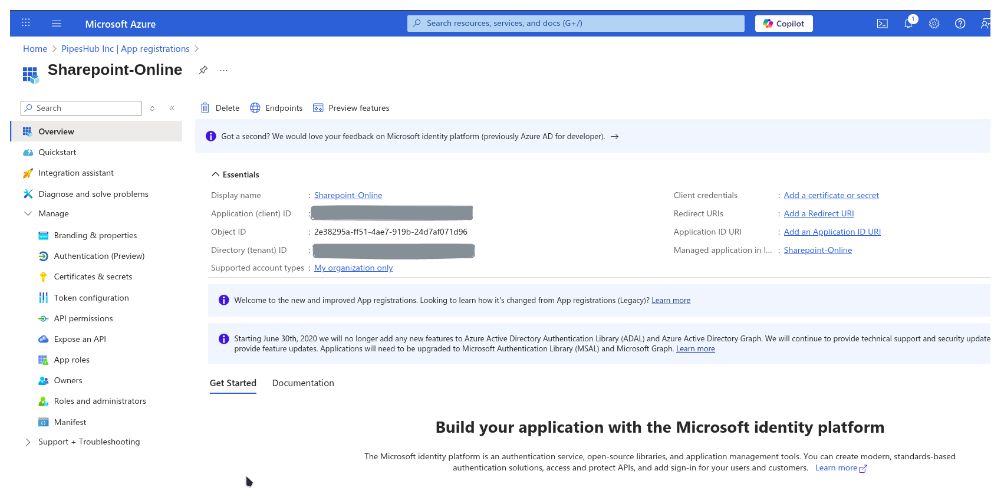
Step 2: Copy Application Credentials
After registration, you’ll see the Overview page. Copy the following values (you’ll need these later):- Application (client) ID: Found under “Essentials” section
- Directory (tenant) ID: Found under “Essentials” section
Step 3: Configure API Permissions
Configure Microsoft Graph Permissions:- On the overview page, click on Manage > API Permissions
- Click Add a permission
- Select Microsoft Graph
- Choose Application permissions (not Delegated permissions) and add the following:
User.Read.AllGroupMember.Read.AllGroup.Read.AllFiles.ReadWrite.AllReports.Read.AllSites.FullControl.AllMember.Read.Hidden
- Click Add a permission and select SharePoint
- Choose Application permissions and add the following:
Sites.FullControl.All
- Click Add permissions
Permission Requirements:
Sites.FullControl.Allis strictly required by the SharePoint API to fetch granular site group permissions.Files.ReadWrite.Allis required by the Microsoft Graph API to establish and renew webhook subscriptions for document libraries.
Step 4: Grant Admin Consent
- On the API permissions page, click “Grant admin consent for [Your Organization]”
- Confirm by clicking “Yes”
- Wait for the status to show green checkmarks
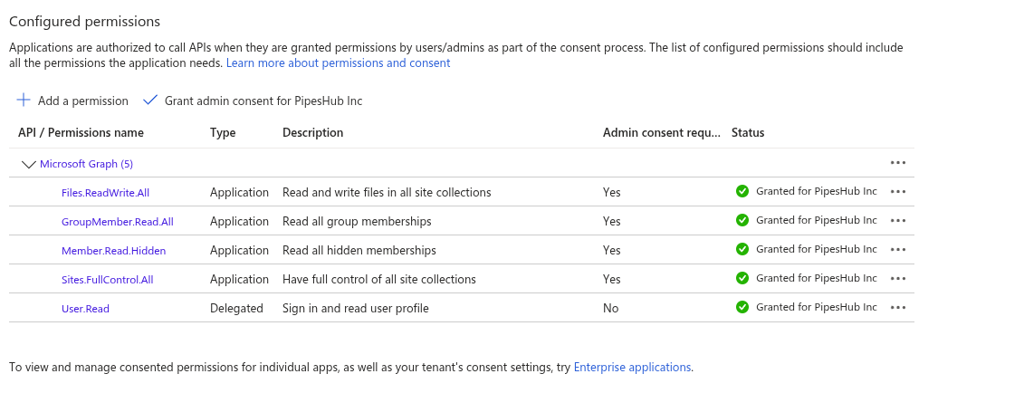
Admin consent is required for application permissions. Only Global Administrators or Application Administrators can grant this consent.
Step 5: Setup Certificate & Secret
Install OpenSSL:OpenSSL is installed by default on Linux and OS X terminals. If you are using Windows, follow these instructions:- Download the relevant OpenSSL installation manager for your version of Windows. OpenSSL offers a list of third-party binary distributions, with Shining Light Productions as an option.
- During the installation process, select the option to copy the OpenSSL binaries into the
/bindirectory. - Open a new PowerShell instance. In PowerShell, you can run the following command to make use of OpenSSL binaries:
certificate.crt and privatekey.key exist. Open each file, and ensure the files conform to the following formats:- The certificate file must start with
BEGIN CERTIFICATEand end withEND CERTIFICATE - The private key should begin with
BEGIN PRIVATE KEYand end withEND PRIVATE KEY. It must not include RSA in the headers, nor be encrypted.
- Upload the
certificate.crtin PipesHub under Client Certificate - Upload the
privatekey.keyin PipesHub under Private Key
- Navigate back to Microsoft Entra ID > Manage > App registrations and click on the app you created earlier
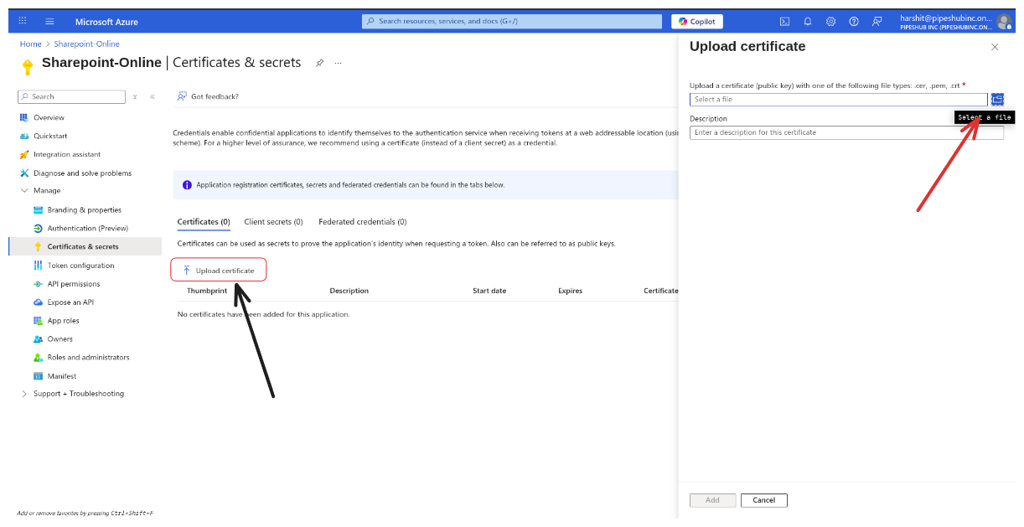
- Click Manage > Certificates & secrets
- Click the Certificates section and Upload certificate
- Upload the
certificate.crtfile that you generated - After uploading, the application must now list the new certificate
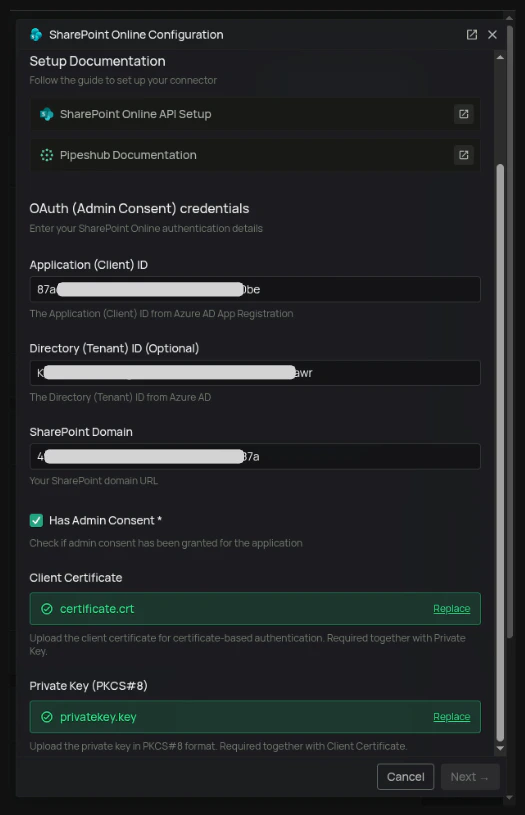
Step 6: Configure Connector in PipesHub
- Navigate to Workspace Settings > Connectors in your application.

- Find the SharePoint connector and click “Setup”
- Enter the following details:
- Enter a name for your connector Instance
- Application (Client) ID: From Step 2
- Directory (Tenant) ID: From Step 2
- SharePoint Domain: The domain of your SharePoint site (e.g.,
https://yourcompany.sharepoint.com) - Check the “Has Admin Consent” checkbox
- Upload the Client Certificate and Private Key that you generated in Step 5
- Click “Save”
Configure Settings
Configure Settings
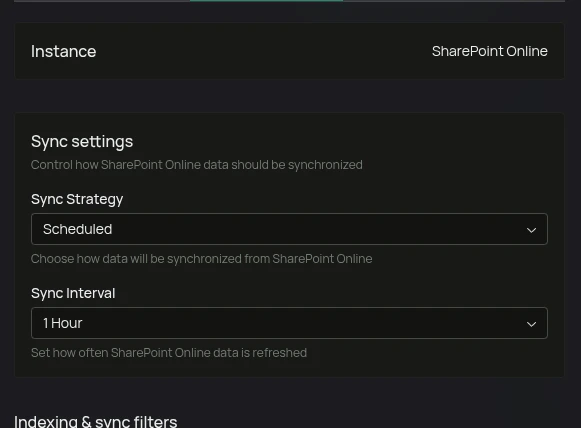
Sync Settings
Sync settings allow you to control how the connector syncs data from SharePoint.Sync Strategy:- Scheduled - The connector will automatically sync data from SharePoint at the scheduled interval.
- Manual - The connector will sync data from SharePoint only when Admin manually triggers the sync from the connector settings page.
Filters
Filters let you control exactly what PipesHub syncs and indexes from your SharePoint environment. They are split into two categories:- Sync filters — applied during the sync phase. They determine which sites, libraries, files, and content are fetched from SharePoint.
- Indexing filters — applied after content is fetched. They determine which content types are actually indexed and made searchable.
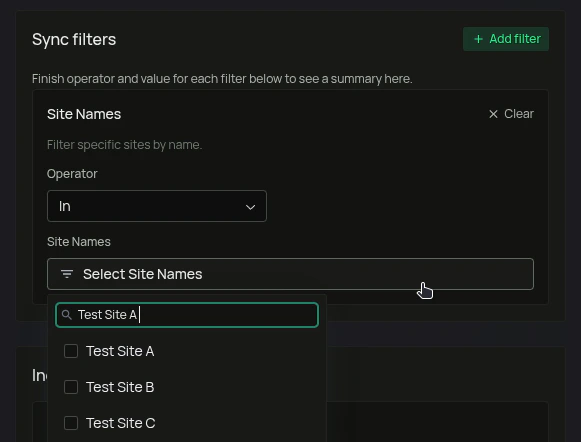
Sync Filters
These filters run before any data is pulled from SharePoint. Content that doesn’t pass a sync filter is never fetched, saving time and API quota, also helps exclude unwanted content.| Filter | Default | What it does |
|---|---|---|
| Site Names | All sites | Choose from a searchable dropdown list of all your SharePoint sites. Choose whether to Include or Exclude the selected sites from the sync process. If left empty, all sites are synced. |
| Document Library Names | All libraries | Choose from a searchable dropdown list of all your SharePoint document libraries. Choose whether to Include or Exclude the selected libraries from the sync process. If left empty, all libraries are synced. |
| File Extensions | All extensions | Filters files by their extension. Supports Include (only sync files with the listed extensions) and Exclude (sync everything except files with those extensions). e.g., Exclude: jpg, mp4 |
| Modified Date | No restriction | Filters files and pages by their last modified date. You can set a start date, an end date, or both. Items modified outside the configured range are skipped. |
| Created Date | No restriction | Filters files and pages by their creation date. You can set a start date, an end date, or both. Items created outside the range are skipped. |
Indexing Filters
These filters run after content has been fetched. They control which content types are passed to the indexing pipeline automatically and made available for search and AI queries.| Filter | Default | What it does |
|---|---|---|
| Enable Manual Indexing | Off | When enabled, none of the records will be indexed automatically. You can then go to All Records section to index the records manually. |
| Index Pages | Enabled | When disabled, SharePoint pages are fetched during sync but not indexed. You can go to All Records section to index the pages manually. |
| Index Documents | Enabled | When disabled, files (Word docs, PDFs etc.) are fetched but not indexed. You can go to All Records section to index the documents manually. |
Once your settings are configured, click Save Configuration. PipesHub confirms the instance is ready with a final dialog — “Instance is configured and ready to sync” — offering two choices: I’ll do it later or Start syncing now.
FAQ
Queries not returning results. What could be wrong?
Queries not returning results. What could be wrong?
There are three common causes:
-
Email mismatch - The email used during connector authentication doesn’t match your PipesHub account email. This causes permission issues preventing you from accessing synced data.
- Fix: Reconfigure the connector and authenticate using the same email as your PipesHub account.
-
Records show in “All Records” but not in search - Documents display in the All Records section but don’t appear in search query results.
- Fix: Verify sync filters in the connector settings and ensure indexing has completed. Check that the data matches your search query criteria.
-
Data not yet indexed - The connector is still syncing or hasn’t completed the initial indexing process.
- Fix: Go to Settings > Connectors, check the sync status, and wait for indexing to complete.
Is it possible to sync data from specific SharePoint sites?
Is it possible to sync data from specific SharePoint sites?
Is it possible to index only specific subfolders within a SharePoint site?
Is it possible to index only specific subfolders within a SharePoint site?