Configuration Guide
Setup
Setup
Overview
The ServiceNow connector provides access to your organization’s Knowledge Base articles through OAuth 2.0 authentication. It syncs users, groups, knowledge bases, categories, and articles with their attachments.Authentication
The ServiceNow connector uses OAuth 2.0 authentication with user impersonation. This allows a single admin account to access Knowledge Base articles on behalf of all users, ensuring each user sees only the content they have permission to view.How to configure and enable the ServiceNow Connector
Step 1: Create OAuth Application in ServiceNow
-
Sign in to ServiceNow:
Navigate to your ServiceNow instance (e.g.,https://dev12345.service-now.com) and sign in with administrator credentials. -
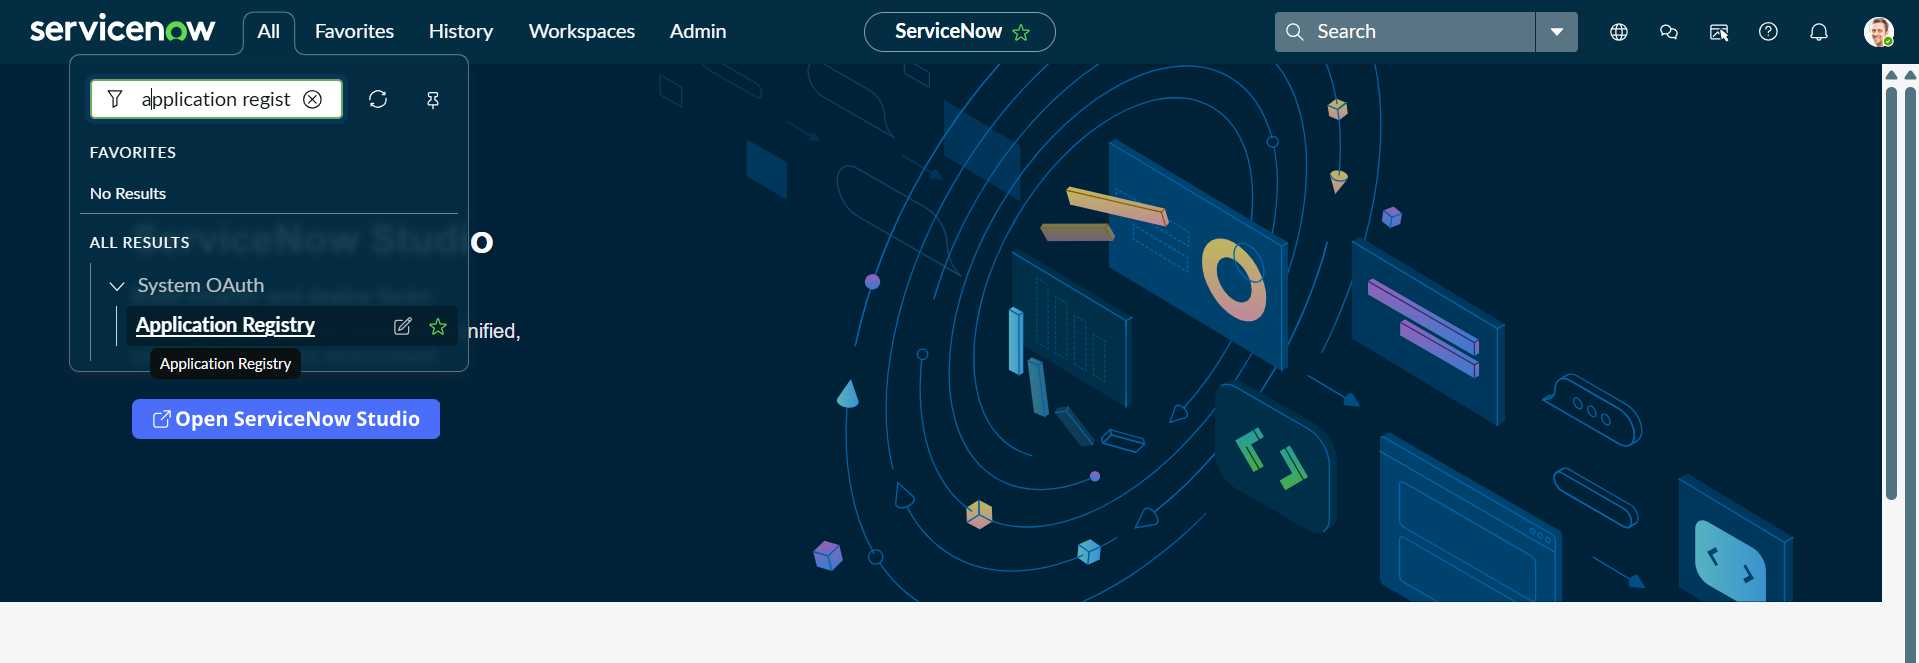
Access Application Registry:
- In the navigation filter, search for “Application Registry”
- Or navigate to System OAuth → Application Registry
-
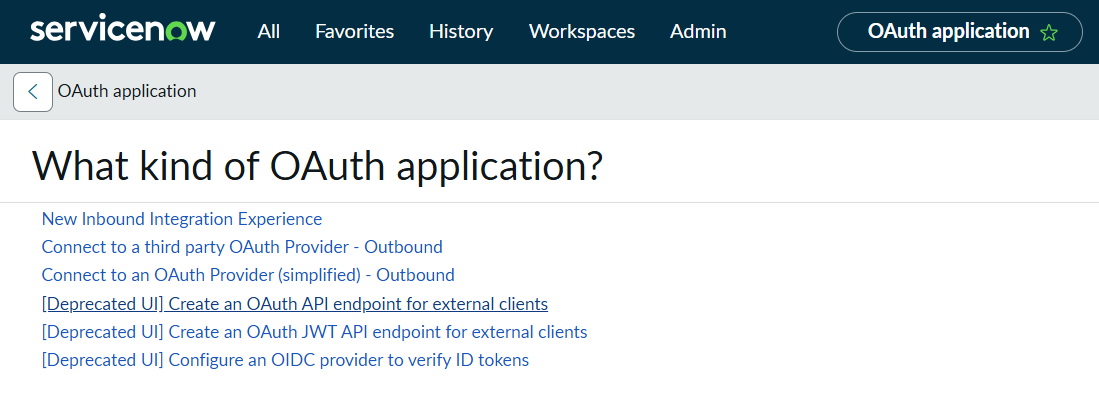
Create New OAuth Application:
- Click “New”

- Select “Create an OAuth API endpoint for external clients”
-
Configure OAuth Application:
Fill in the following details:
- Name:
PipesHub KB Connector(or any meaningful name) - Client ID: Auto-generated (copy this value)
- Client Secret: Auto-generated (copy this value)
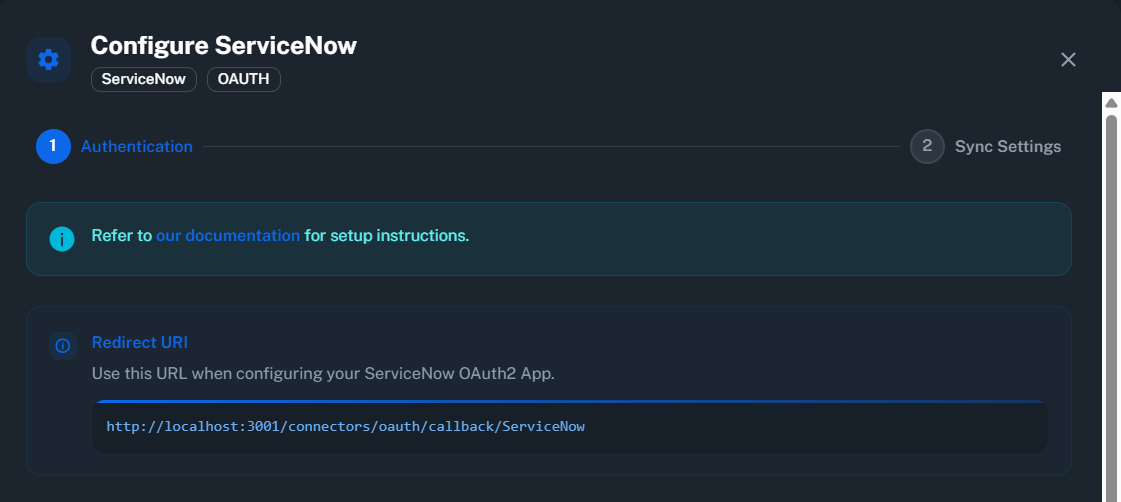
- Redirect URL: (Get the redirect uri from pipeshub configure servicenow dialog in connector settings)
- For production:
https://your-domain.com/connectors/oauth/callback/ServiceNow
- For production:
- Accessible from:
All application scopes - Refresh Token Lifespan:
8640000seconds (100 days recommended)
- Name:
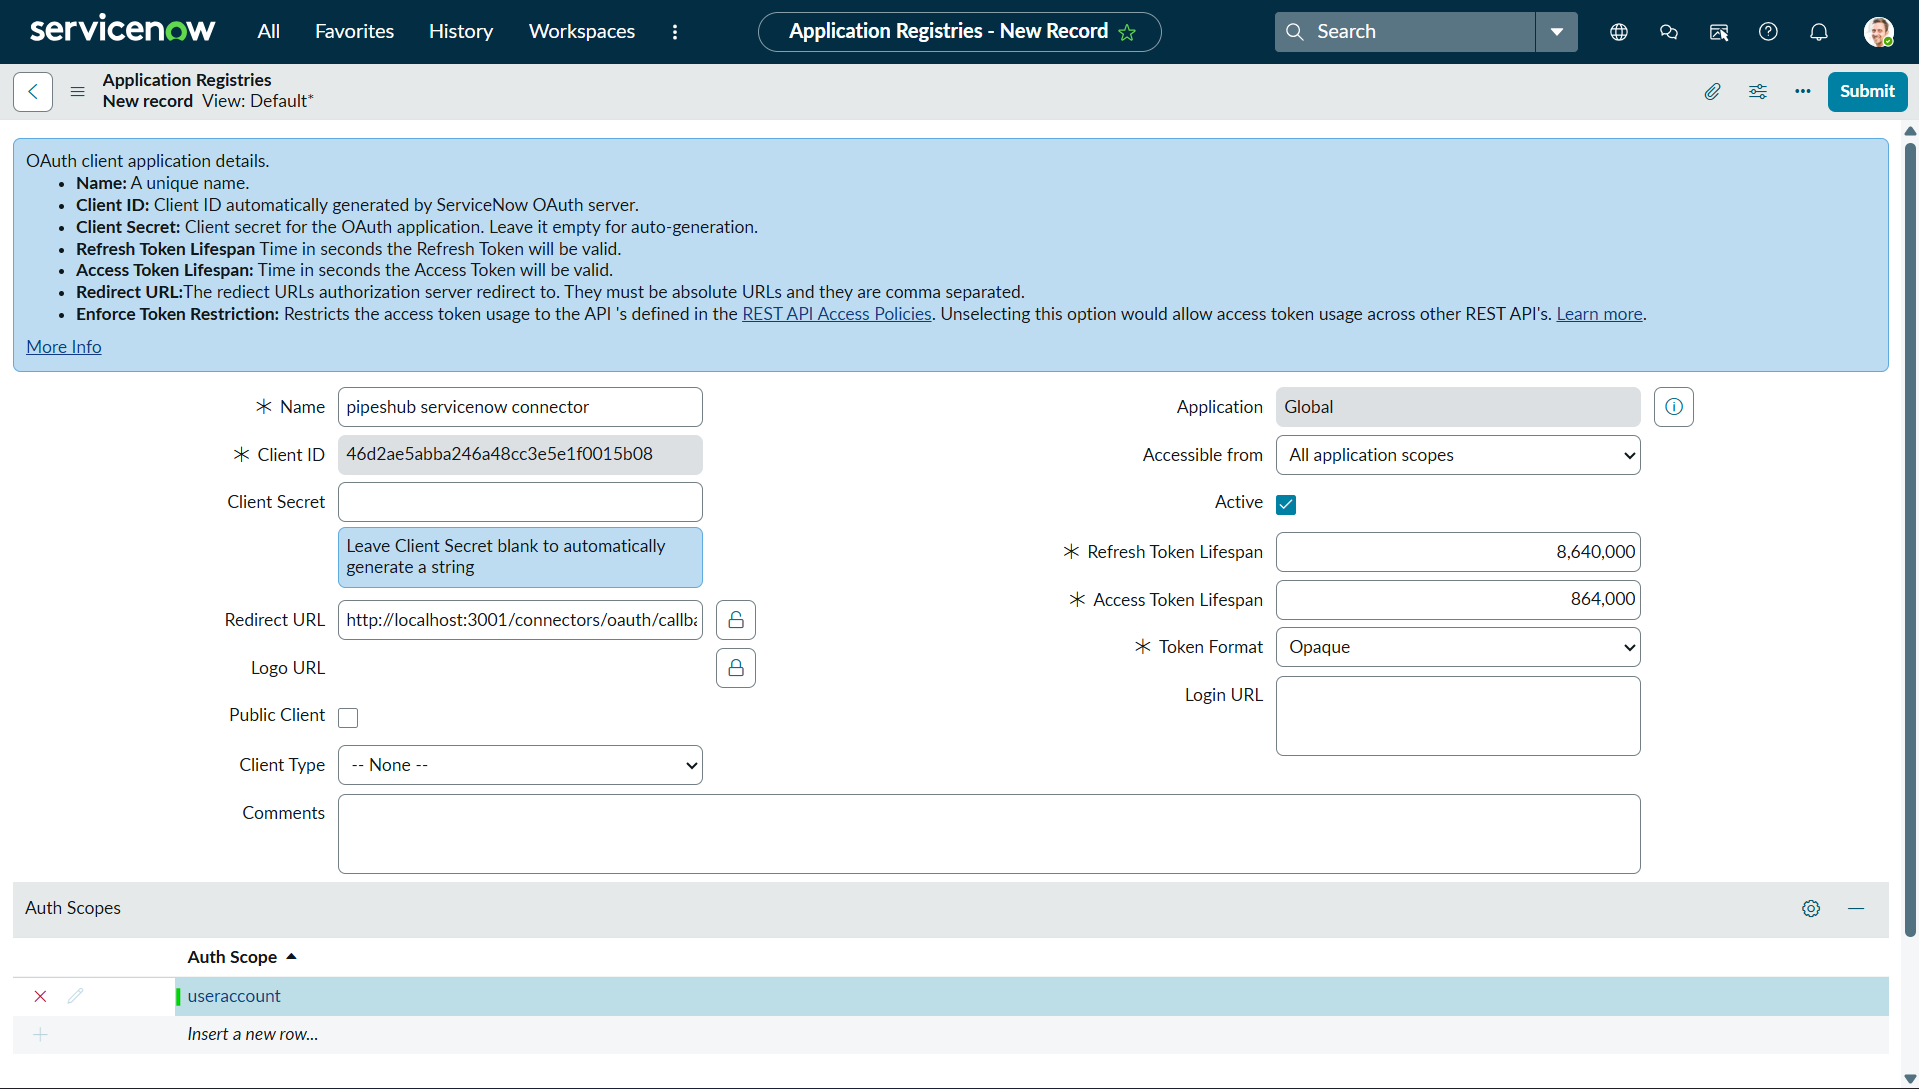
- Copy Credentials:
- Client ID: Copy and save securely
- Client Secret: Copy and save securely
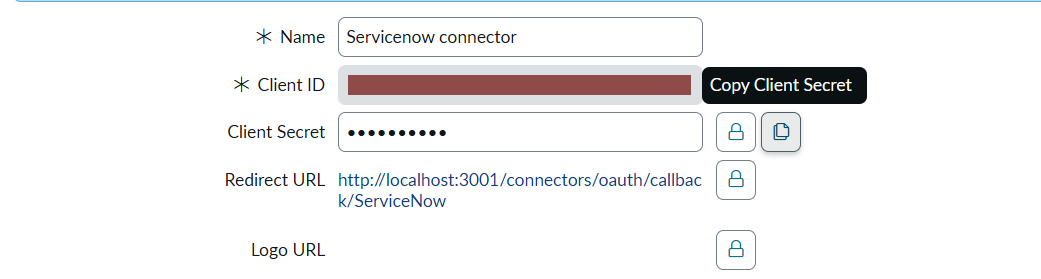
- Click “Submit” to save the application
Step 2: Verify Admin User Permissions
The admin user authenticating the OAuth connection needs appropriate roles for user impersonation:- Navigate to System Security → Users
- Find the admin user who will authenticate the connector
- Verify the user has one of the following roles:
adminrole (recommended)impersonaterole
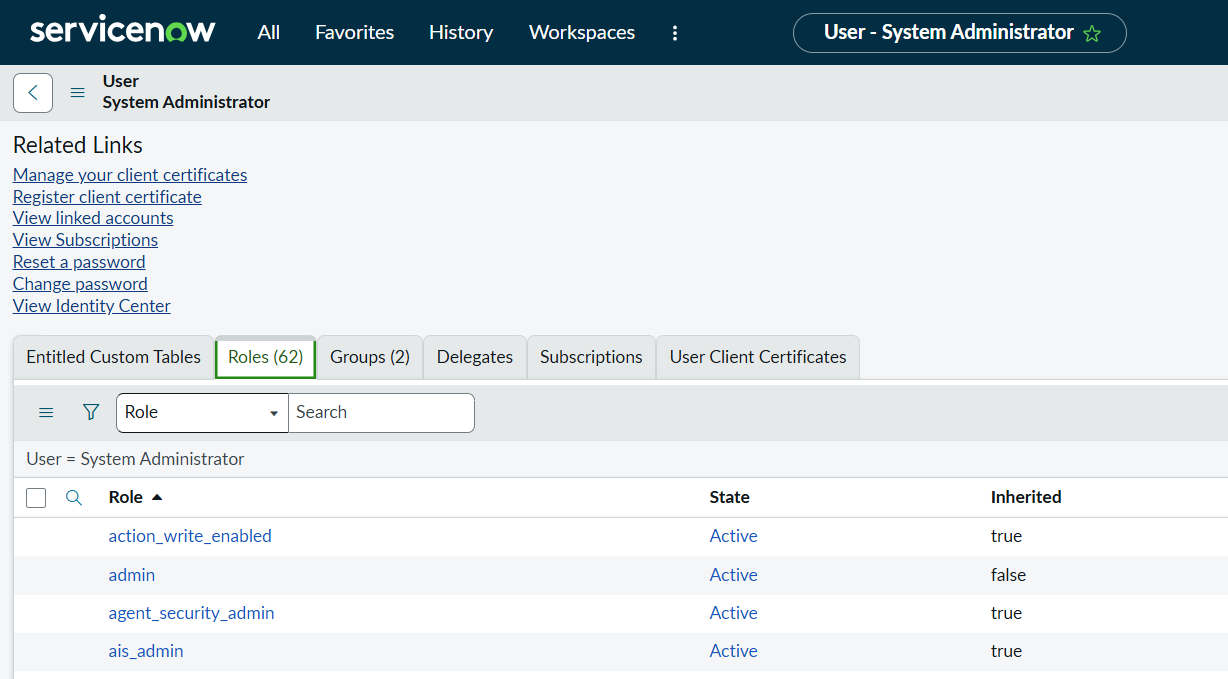
Most administrator accounts already have the
admin role by default. User impersonation allows the connector to access Knowledge Base articles on behalf of different users while respecting their individual permissions.Step 3: Prepare Instance URLs
You’ll need three URLs based on your ServiceNow instance:If your instance URL is:https://dev12345.service-now.comThen:- Instance URL:
https://dev12345.service-now.com - Authorize URL:
https://dev12345.service-now.com/oauth_auth.do - Token URL:
https://dev12345.service-now.com/oauth_token.do
Simply append
/oauth_auth.do for the Authorize URL and /oauth_token.do for the Token URL to your instance URL.Step 4: Configure Connector in PipesHub
- Navigate to Settings → Connectors in PipesHub
- Find the ServiceNow connector and click “Configure”
- Enter the following details:
- ServiceNow Instance URL: Your instance URL (e.g.,
https://dev12345.service-now.com) - ServiceNow Authorize URL: Instance URL +
/oauth_auth.do - ServiceNow Token URL: Instance URL +
/oauth_token.do - Client ID: From Step 1
- Client Secret: From Step 1
- ServiceNow Instance URL: Your instance URL (e.g.,
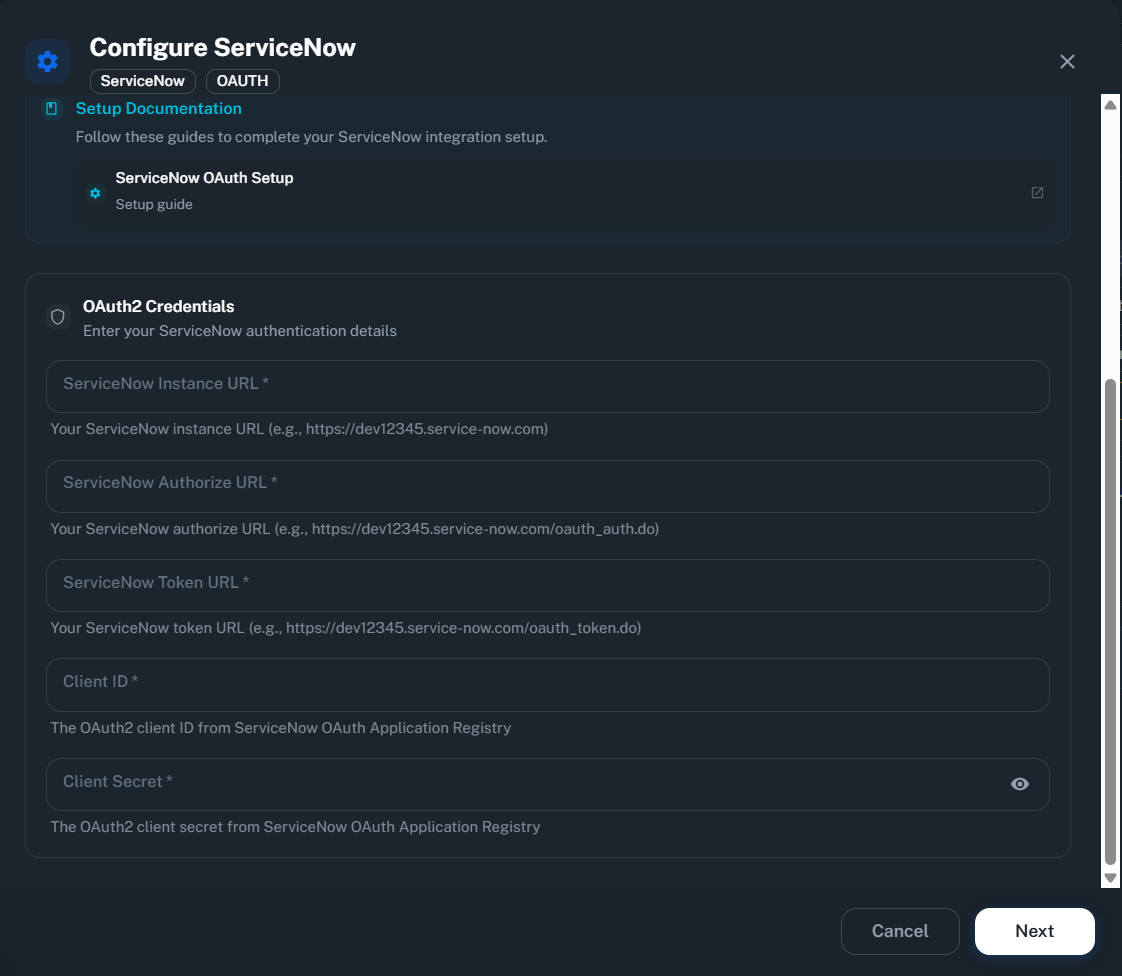
- Click “Next” or “Save Configuration”
Step 5: Authorize Connection
- After saving configuration, you’ll be redirected to ServiceNow
- Sign in with your administrator account (if not already signed in)
- Review the permissions requested by PipesHub connector
- Click “Allow” to authorize the connection
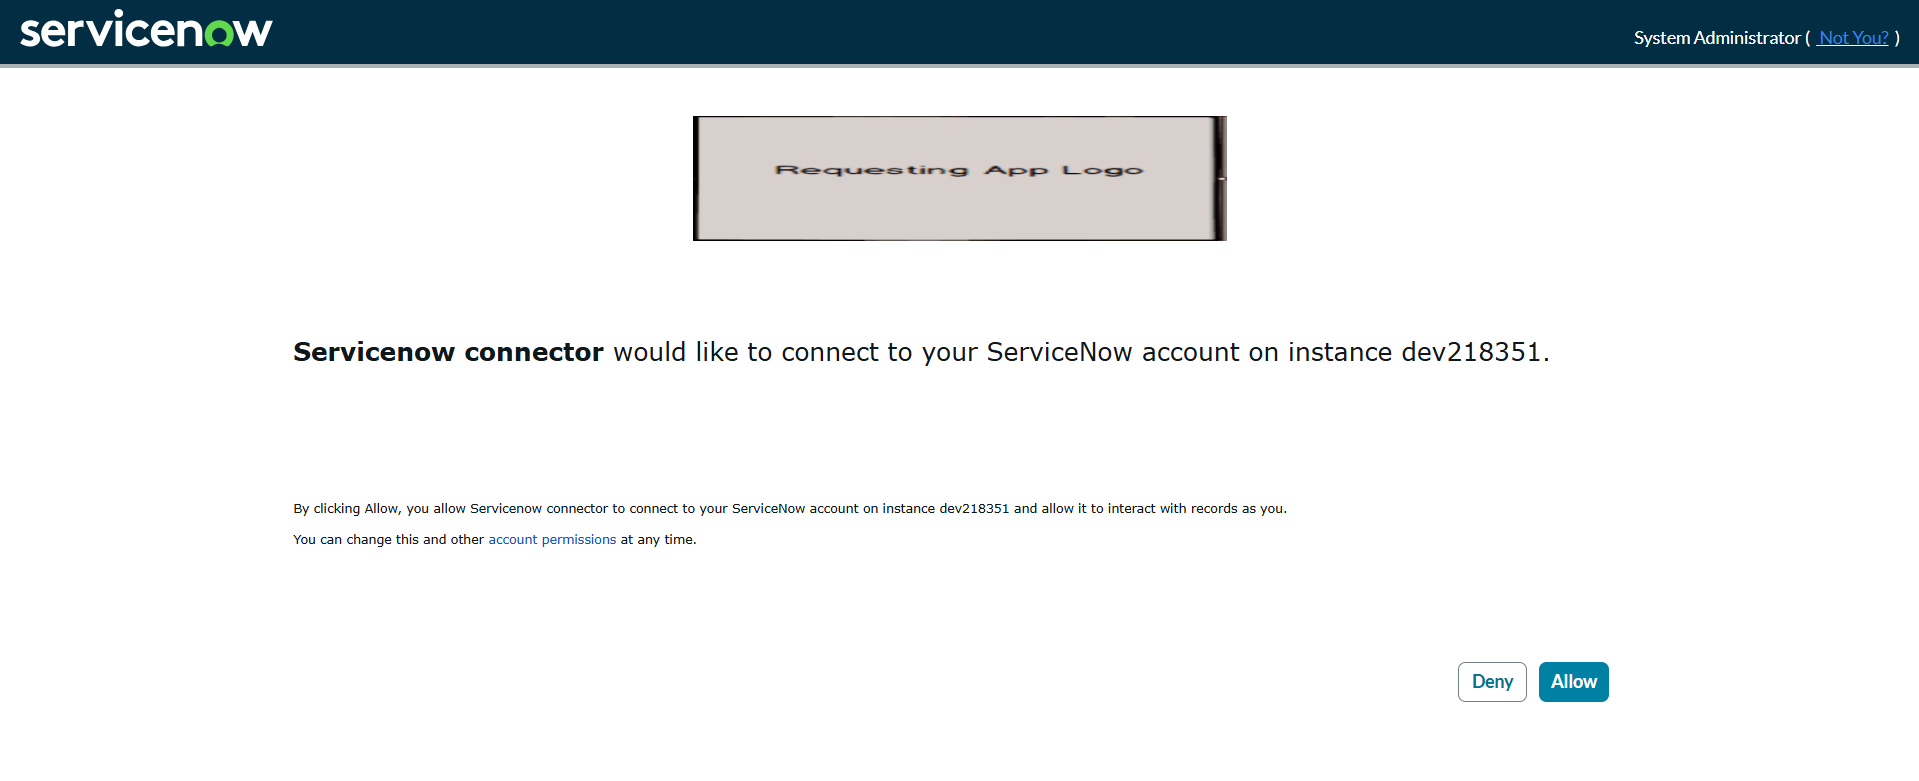
- You’ll be redirected back to PipesHub with a success message
The authorization grants PipesHub access to your ServiceNow Knowledge Base data using the admin account credentials while maintaining user-level permissions through impersonation.
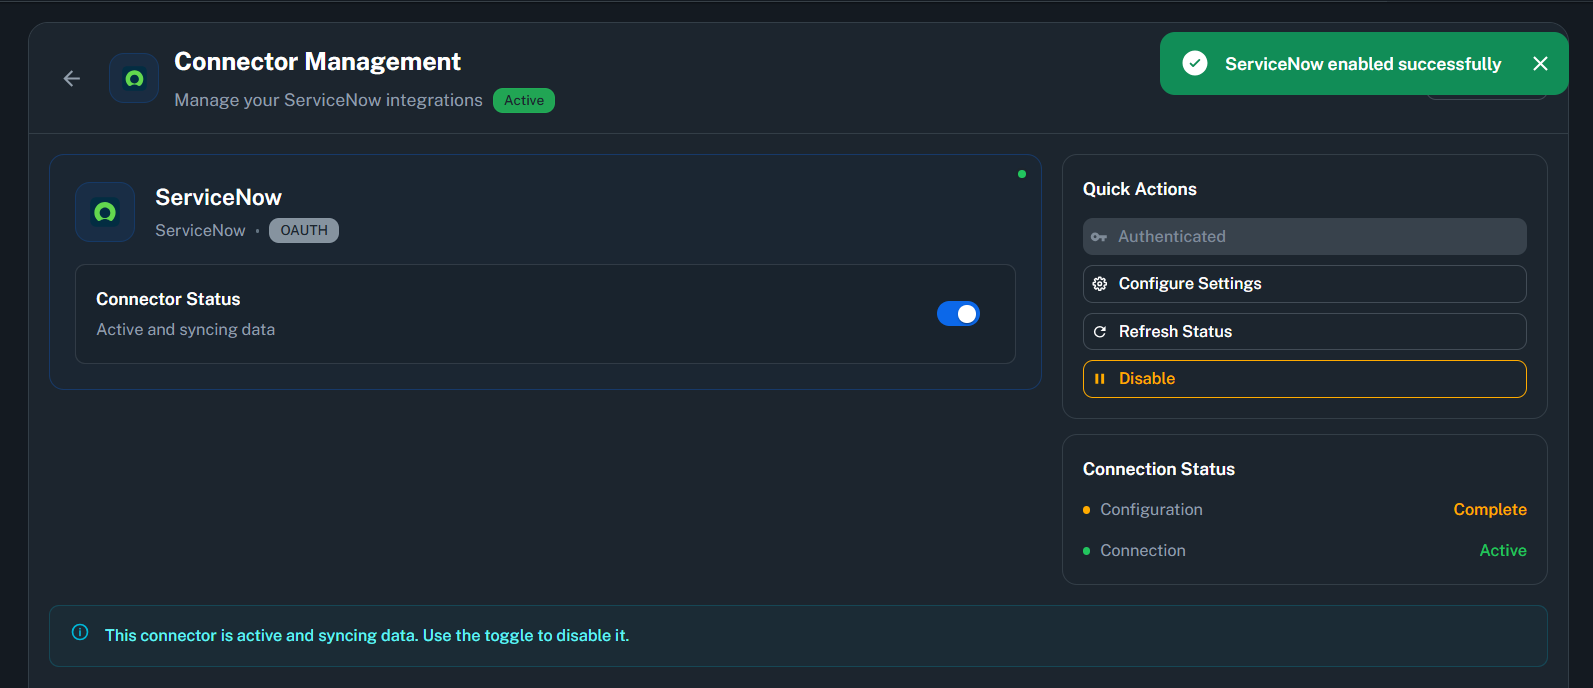
Step 6: Enable the Connector
- After successful authorization, toggle the connector to “Enable”

- The connector will verify credentials and begin initial sync
- Wait for the status to show “Active and syncing data”
Initial sync duration depends on the number of Knowledge Base articles, categories, and users in your ServiceNow instance.
Supported Features
The ServiceNow connector syncs the following data:- Users: User profiles and permissions
- Groups: User groups and memberships
- Knowledge Bases: KB structures and configurations
- Categories: Article categories and hierarchies
- Articles: Knowledge Base articles with full content
- Attachments: Files attached to articles
Data Sync Behavior
Initial Sync
- Fetches all users, groups, knowledge bases, categories, and articles
- Respects user permissions for article visibility
- Duration depends on the size of your Knowledge Base
Incremental Sync
- Uses timestamp-based synchronization (
sys_updated_onfield) - Only syncs new or modified content since last sync
- Efficient delta queries reduce API calls and sync time
User Impersonation
- Single admin OAuth token authenticates the connector
- Connector impersonates individual users when fetching articles
- Each user sees only articles they have permission to access
- Maintains ServiceNow’s access control and security model
Troubleshooting
Common Issues
Invalid client credentials error:- Verify Client ID and Client Secret are correct
- Ensure you copied the full values without extra spaces
- Check that the OAuth application is active in ServiceNow
- Verify the admin user has
adminorimpersonaterole - Ensure the admin account is active and not locked
- Check that Knowledge Base access is granted to the admin user
- Instance URL format must be:
https://instance-name.service-now.com - Do not include trailing slashes or additional paths
- Ensure URLs match exactly (Instance, Authorize, Token)
- Refresh tokens expire based on the configured lifespan
- Disable and re-enable the connector to re-authenticate
- Consider increasing Refresh Token Lifespan in ServiceNow OAuth settings
- Verify the admin user has Knowledge Base read access
- Check user group memberships for article access
- Ensure ACLs (Access Control Lists) are configured correctly in ServiceNow
ServiceNow Version Compatibility
This connector has been tested with ServiceNow version Zurich and should work with other recent versions (Rome, San Diego, Tokyo, Utah, Vancouver, Washington, Xanadu).ServiceNow maintains backward compatibility for OAuth 2.0 and Table APIs across versions, ensuring the connector works reliably.
FAQ
Queries not returning results. What could be wrong?
Queries not returning results. What could be wrong?
There are three common causes:
-
Email mismatch - The email used during connector authentication doesn’t match your PipesHub account email. This causes permission issues preventing you from accessing synced data.
- Fix: Reconfigure the connector and authenticate using the same email as your PipesHub account.
-
Records show in “All Records” but not in search - Documents display in the All Records section but don’t appear in search query results.
- Fix: Verify sync filters in the connector settings and ensure indexing has completed. Check that the data matches your search query criteria.
-
Data not yet indexed - The connector is still syncing or hasn’t completed the initial indexing process.
- Fix: Go to Settings > Connectors, check the sync status, and wait for indexing to complete.
Ready to Get Started?
Connect your ServiceNow Knowledge Base to PipesHub in just a few minutes. Follow the steps above to enable organization-wide knowledge search and access.