

Slack Toolset
Team messaging, channels, and collaboration
ReadyCommunication
Overview
The Slack toolset enables AI agents to interact with your Slack workspace. Send messages, search conversations, manage channels, and collaborate with your team.Key Capabilities
- Send messages to channels and direct messages
- Reply to messages and manage threads
- Search messages, files, and channels
- View channel history and members
- Get user and group information
- Add reactions and pin messages
- Update and delete messages
Available Tools
Configuration Guide
Setup
Setup
Step 1: Create a Slack app
- Go to api.slack.com/apps and sign in.
- Click Create New App.
- Choose From a manifest.
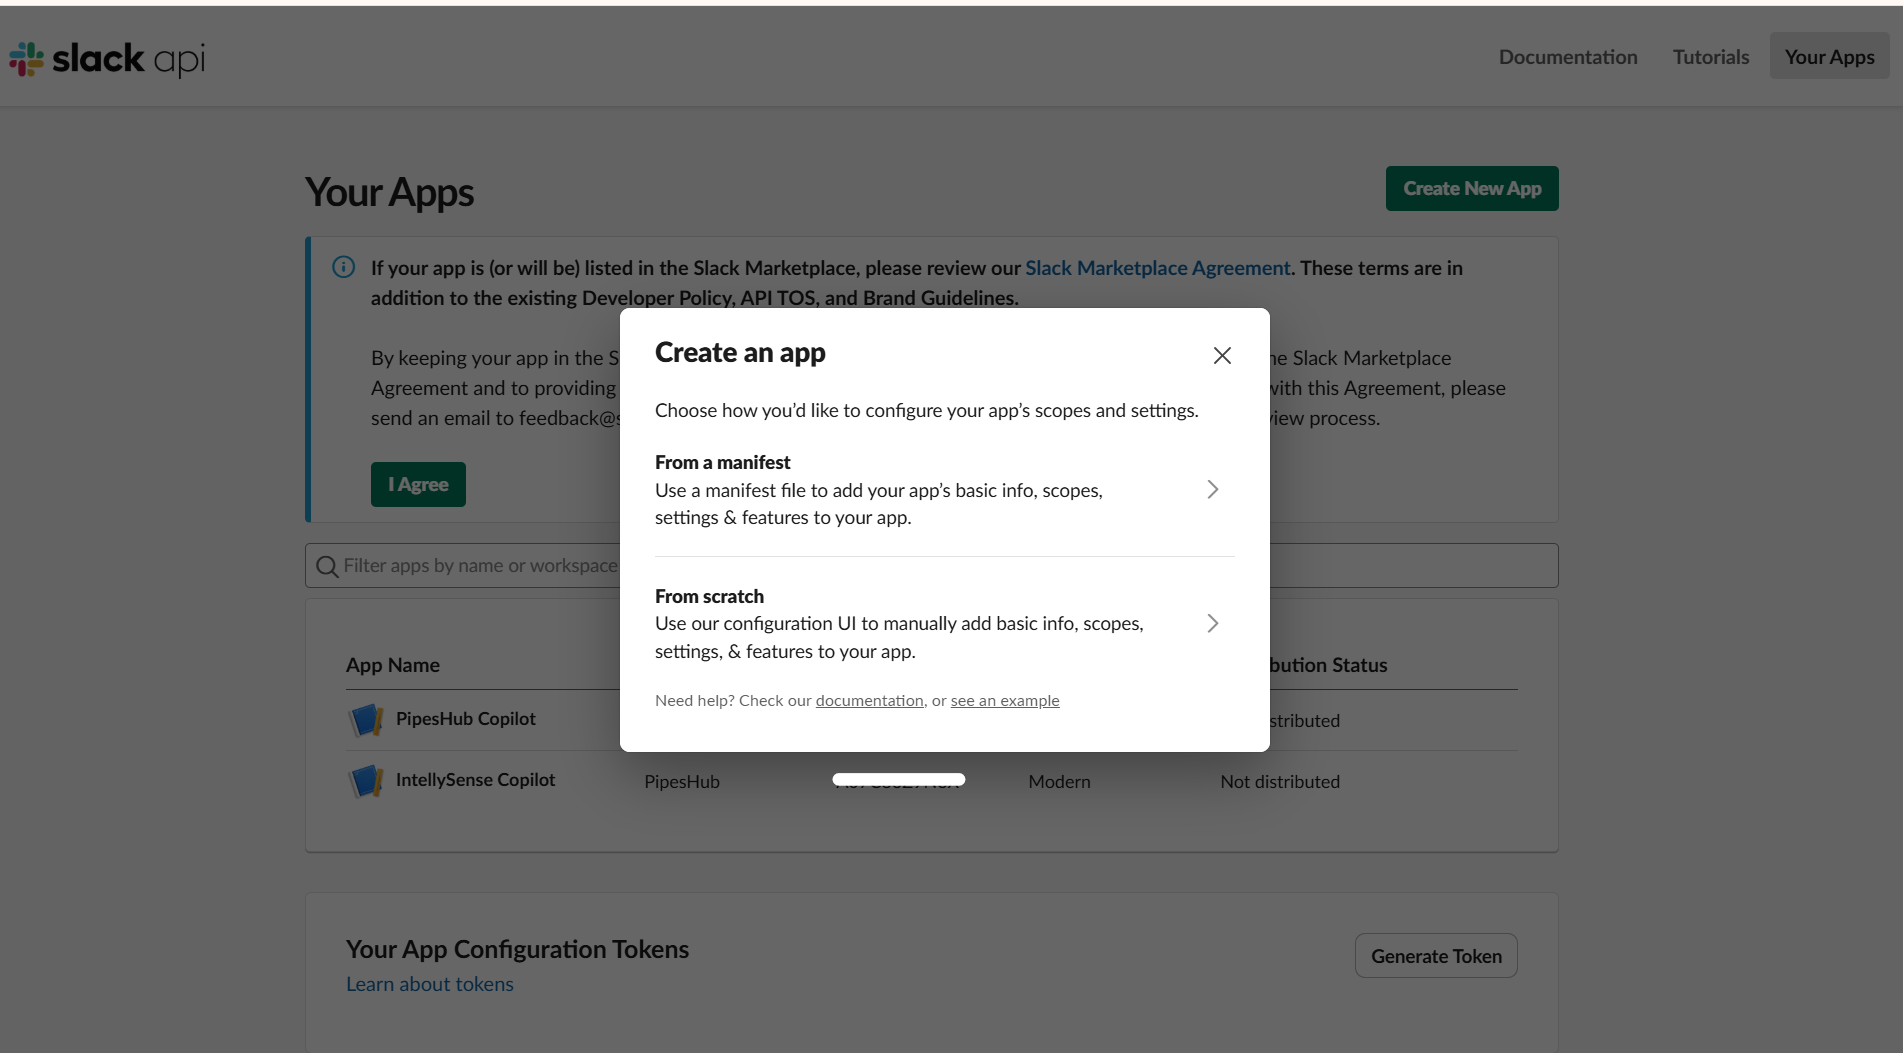
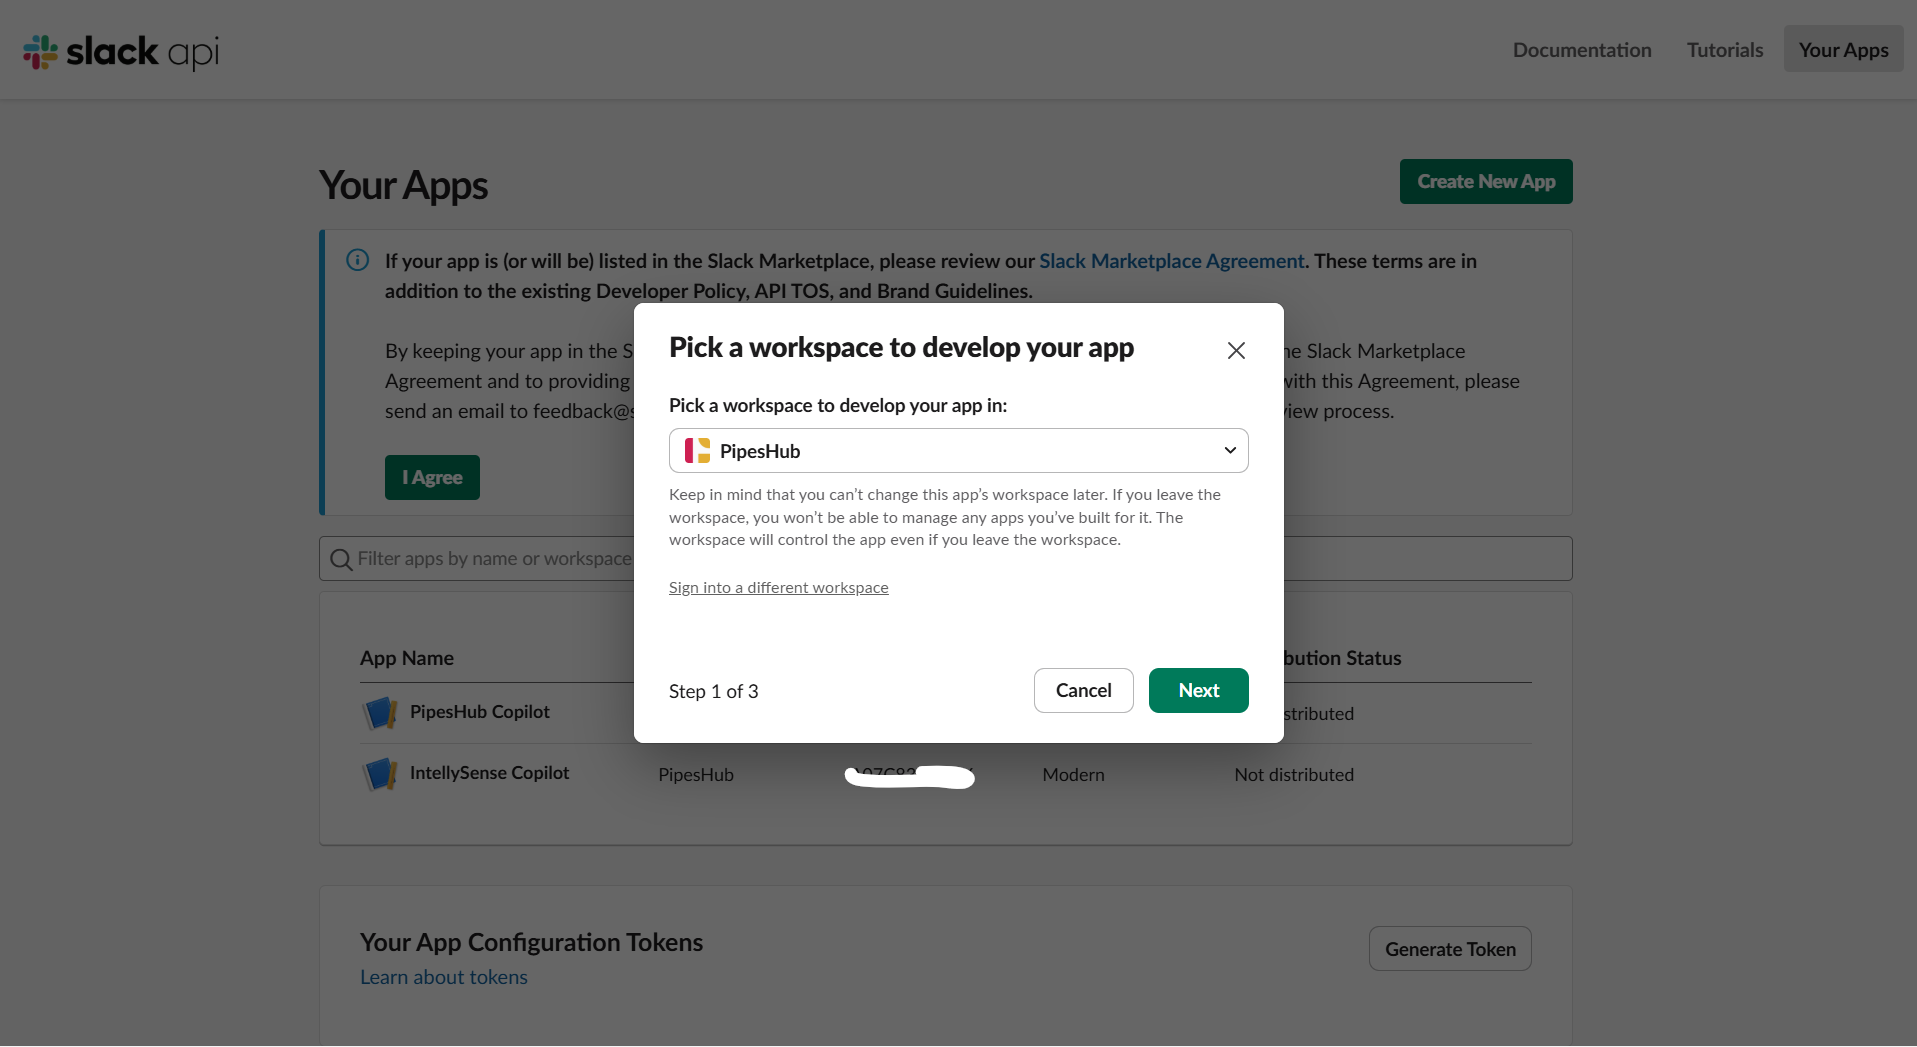
- Select the workspace where you want to install the app.
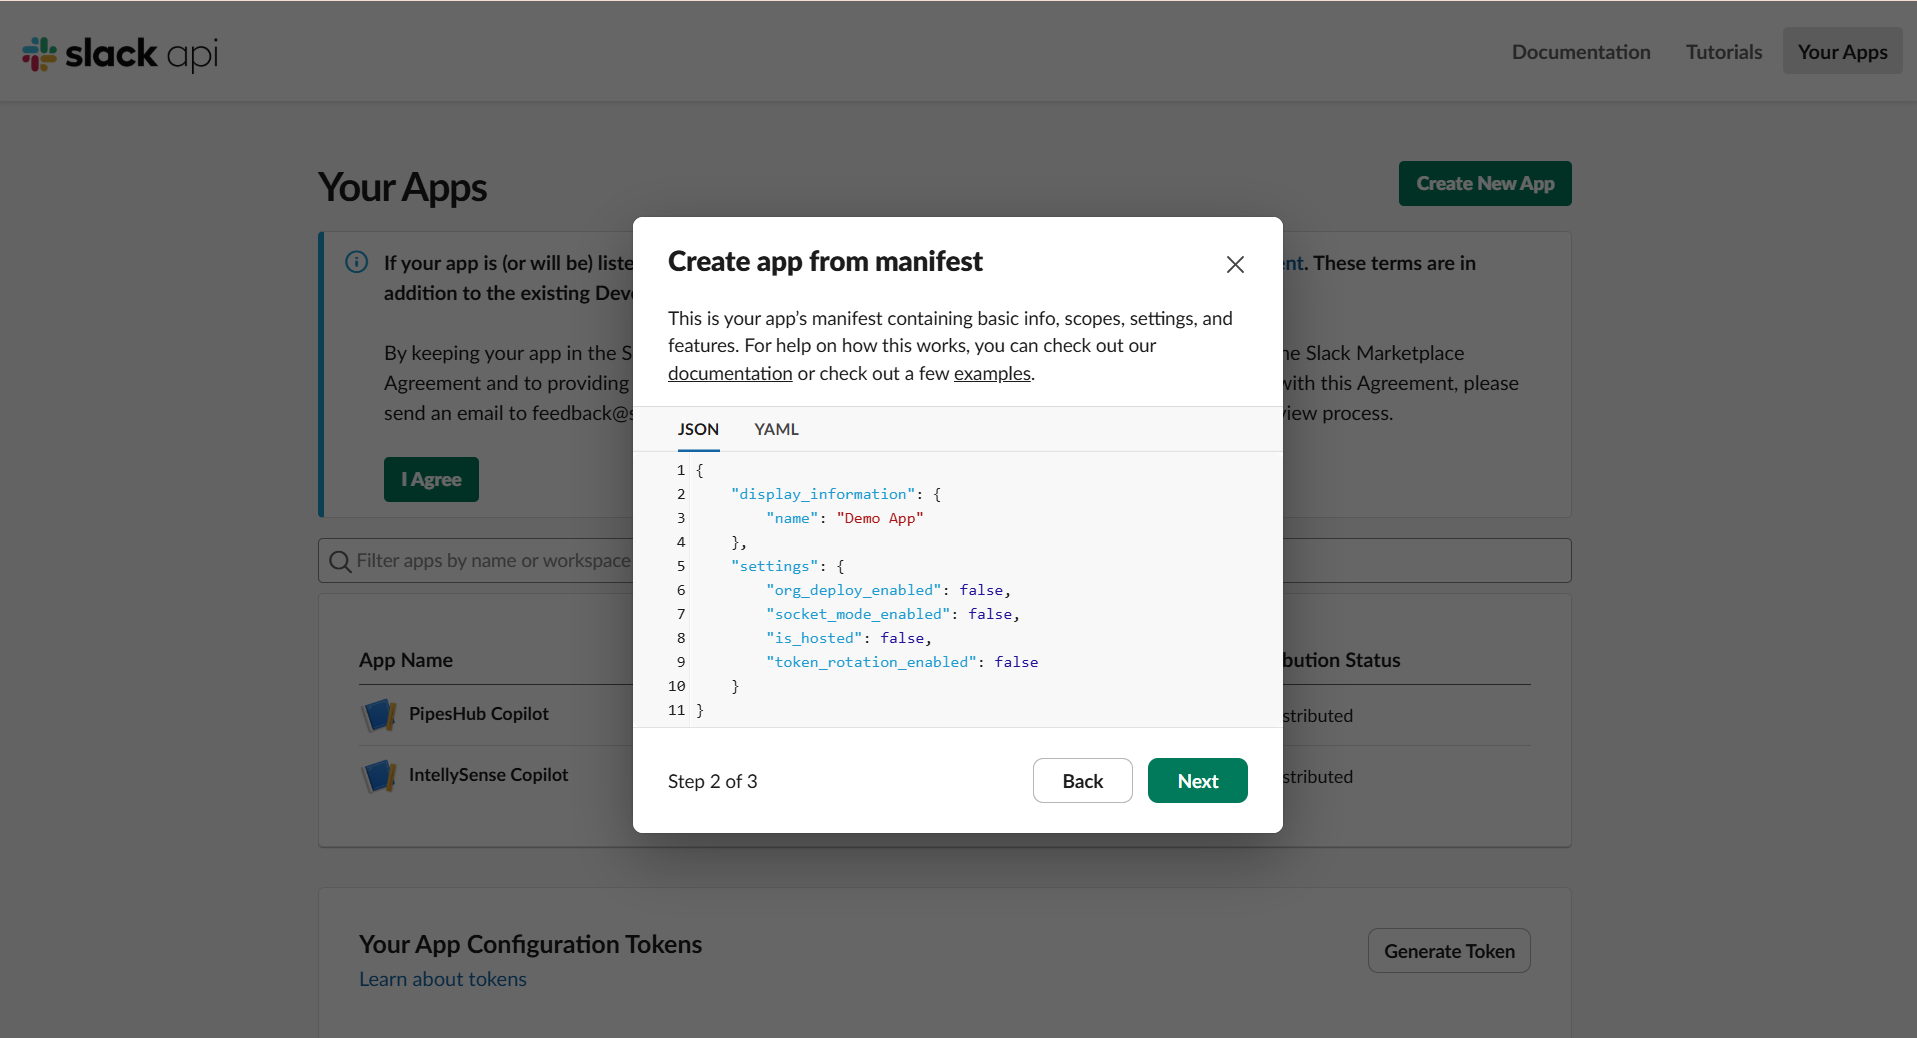
- The manifest JSON editor opens. Click Next to proceed.
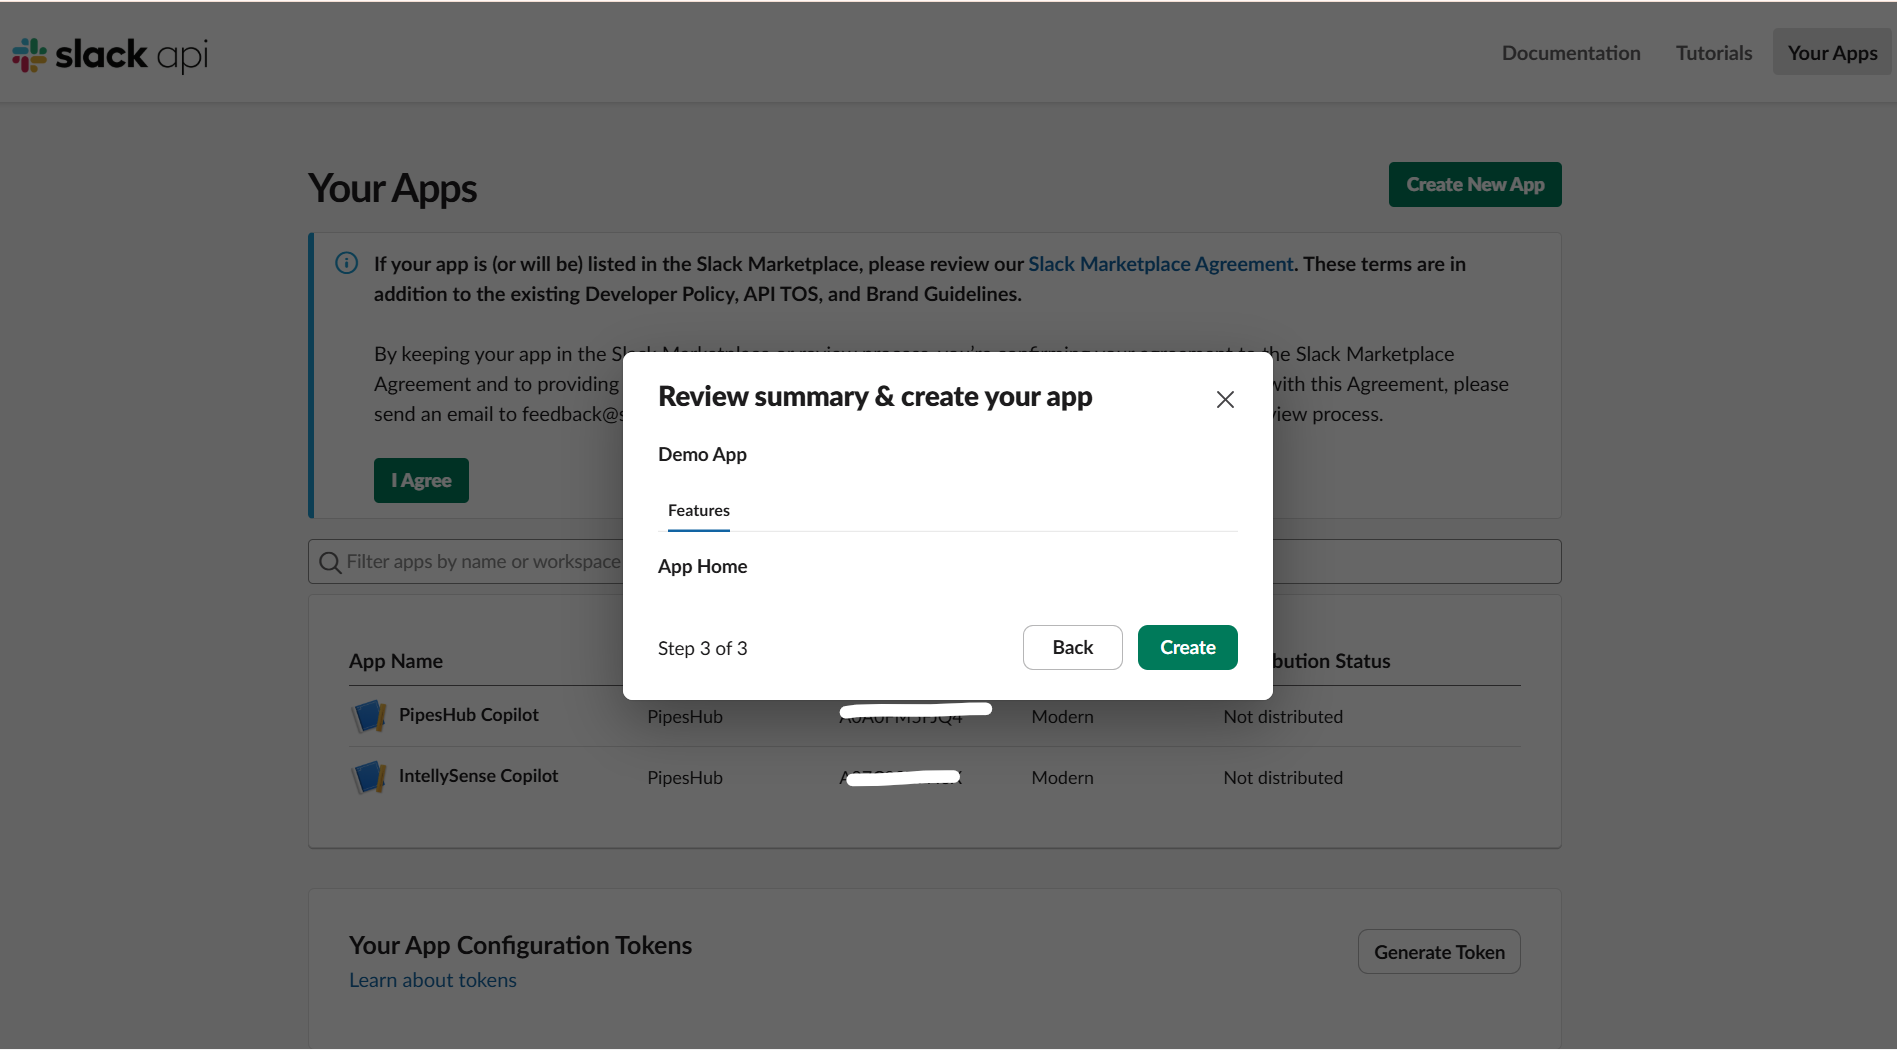
- Review the app summary and click Create.
You need admin access to install Slack apps in your workspace, or your workspace must allow members to install apps. If app installation is restricted, ask a workspace admin to approve the app after you create it.
Step 2: Get the Redirect URI from PipesHub
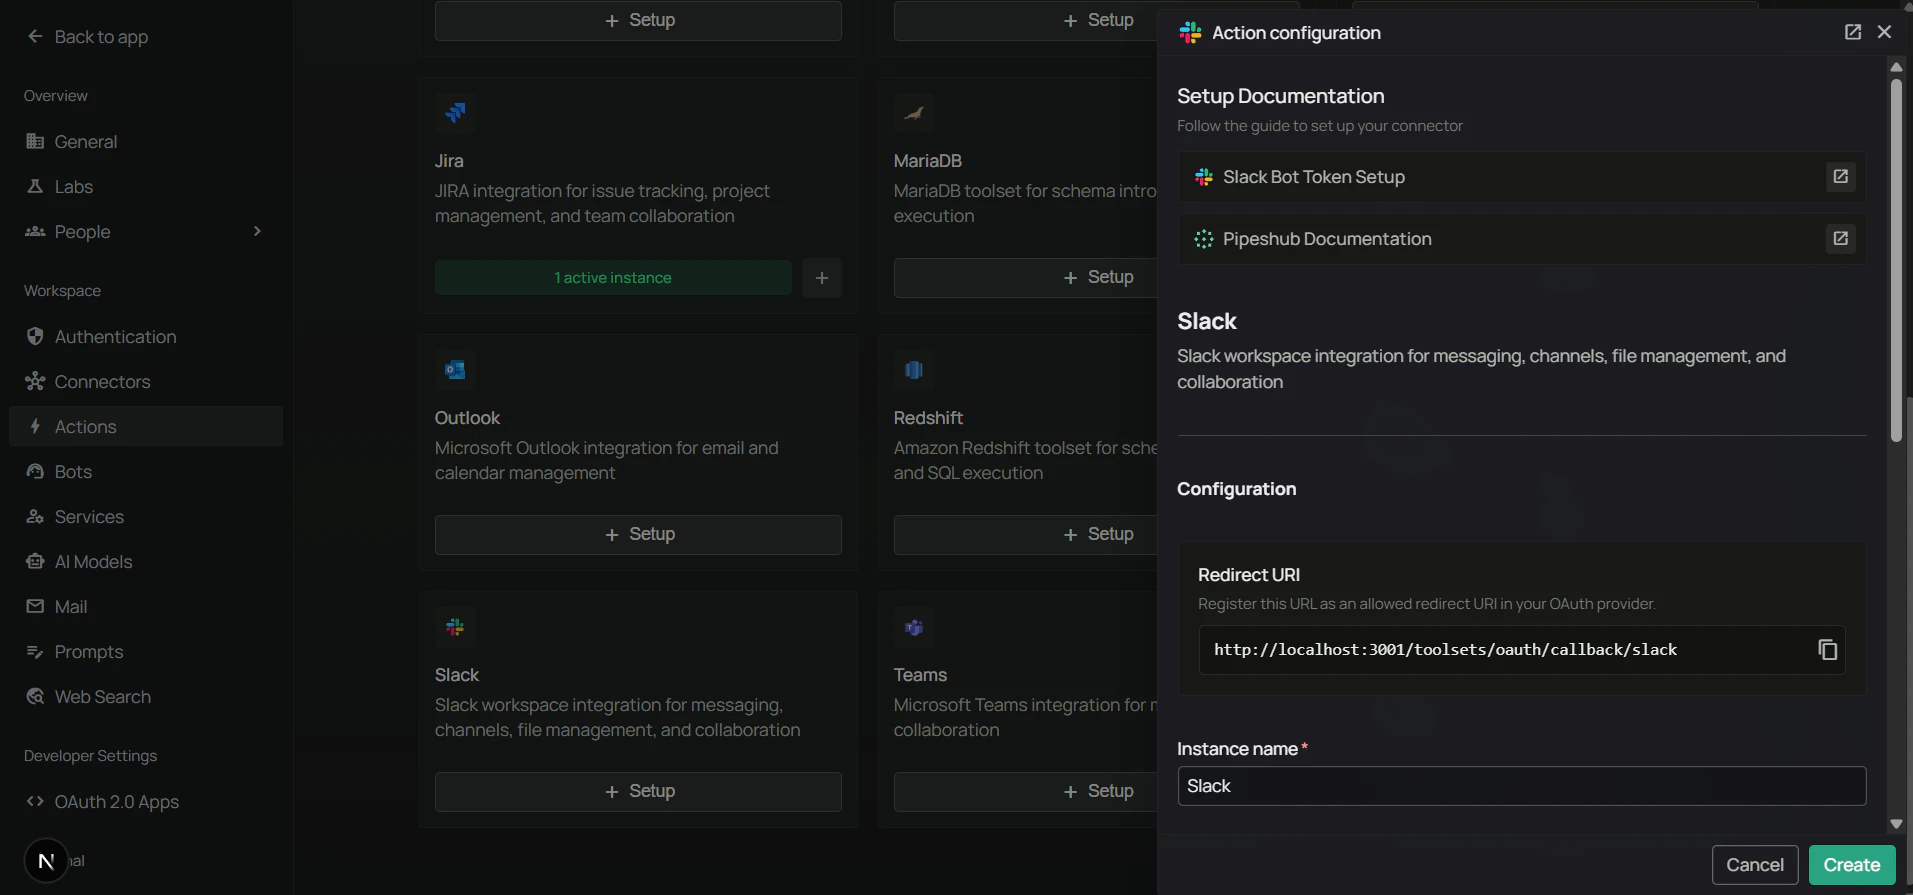
Before configuring the Redirect URL in Slack, copy the Redirect URI from PipesHub so the values match exactly.- In PipesHub, go to Workspace Settings → Actions.
- Find Slack in the list and click + Setup (or Configure).
- Copy the Redirect URI shown in the dialog.
Step 3: Configure the Redirect URL in Slack
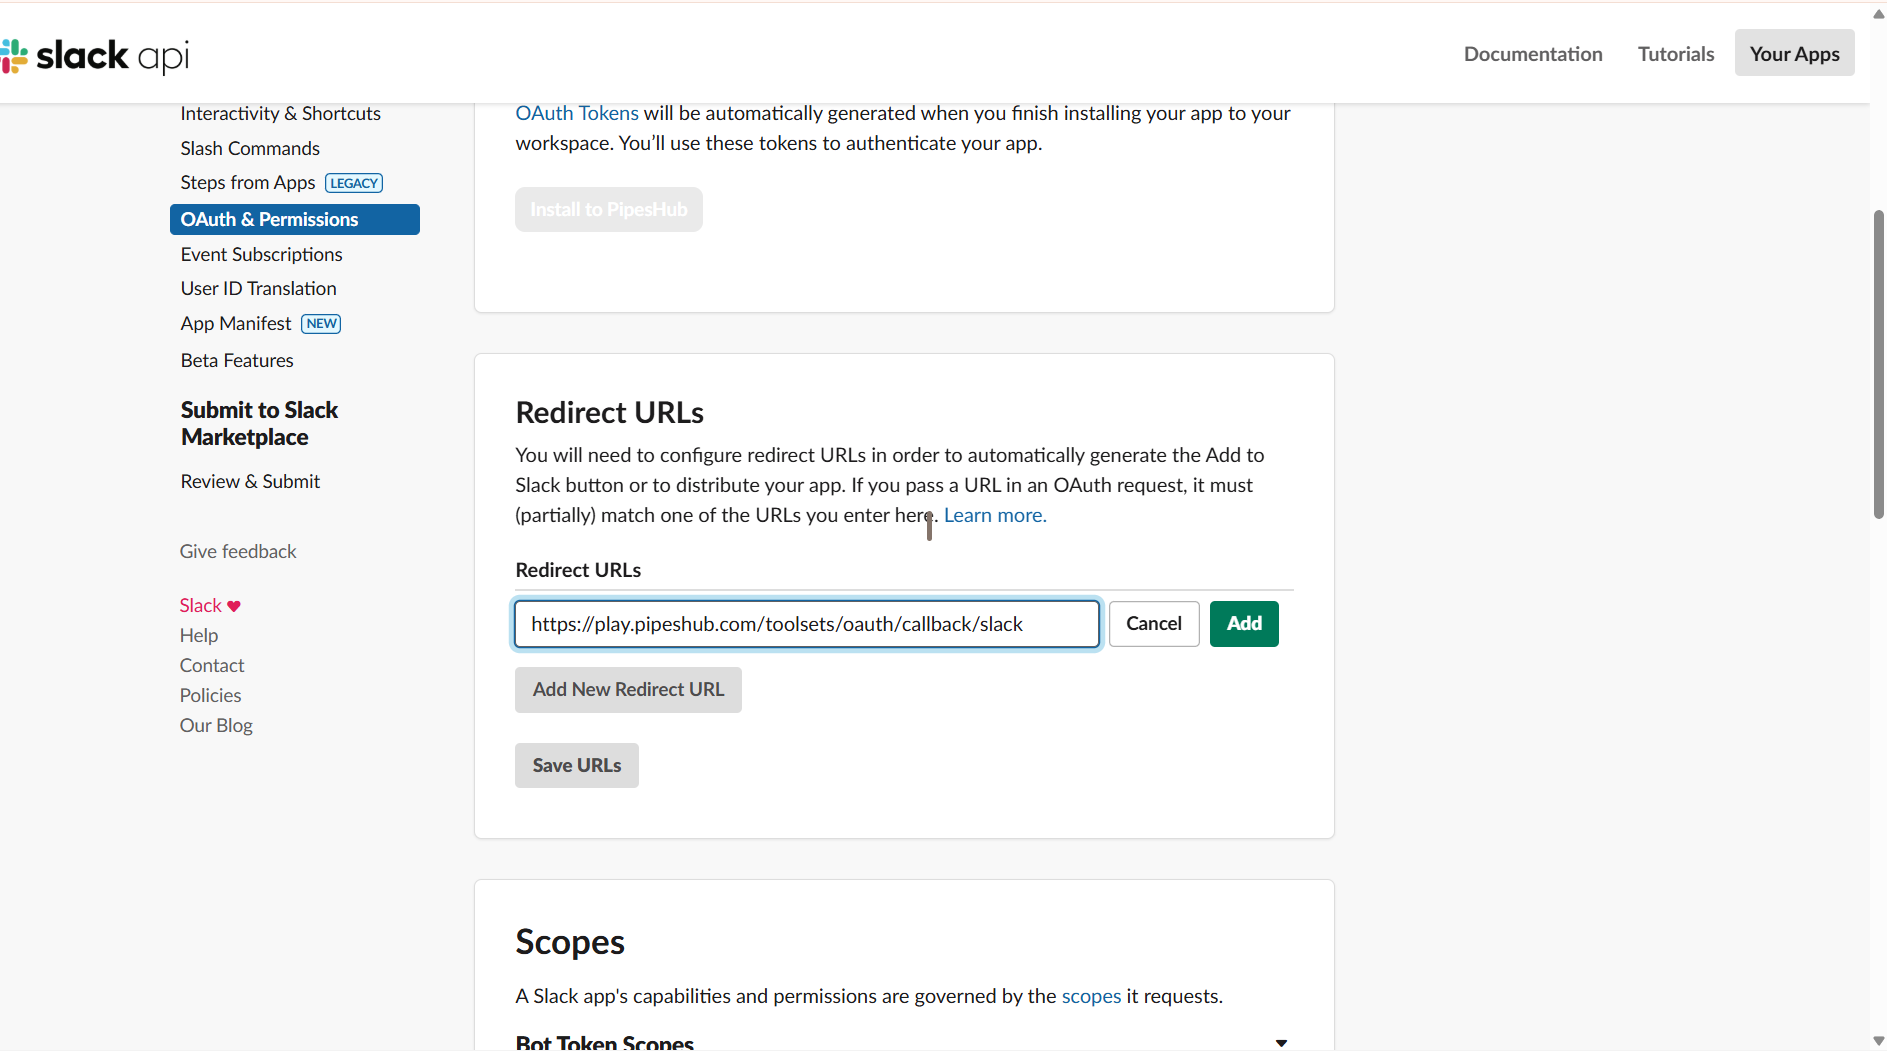
- In your Slack app settings, open OAuth & Permissions in the left sidebar.
- Under Redirect URLs, click Add New Redirect URL.
- Paste the Redirect URI you copied from PipesHub.
- Click Add, then Save URLs.
Step 4: Add required scopes
In OAuth & Permissions, scroll to Scopes. Slack splits scopes into two sections — Bot Token Scopes and User Token Scopes — and you’ll need to add some in each.Bot Token Scopes
Add these under the Bot Token Scopes section.MessagingChannels
Users
Files, reactions, pins, user groups
User Token Scopes
Scroll further down on the same page to the User Token Scopes section and add these. They are not available as Bot Token Scopes — you must add them here for the corresponding tools to work.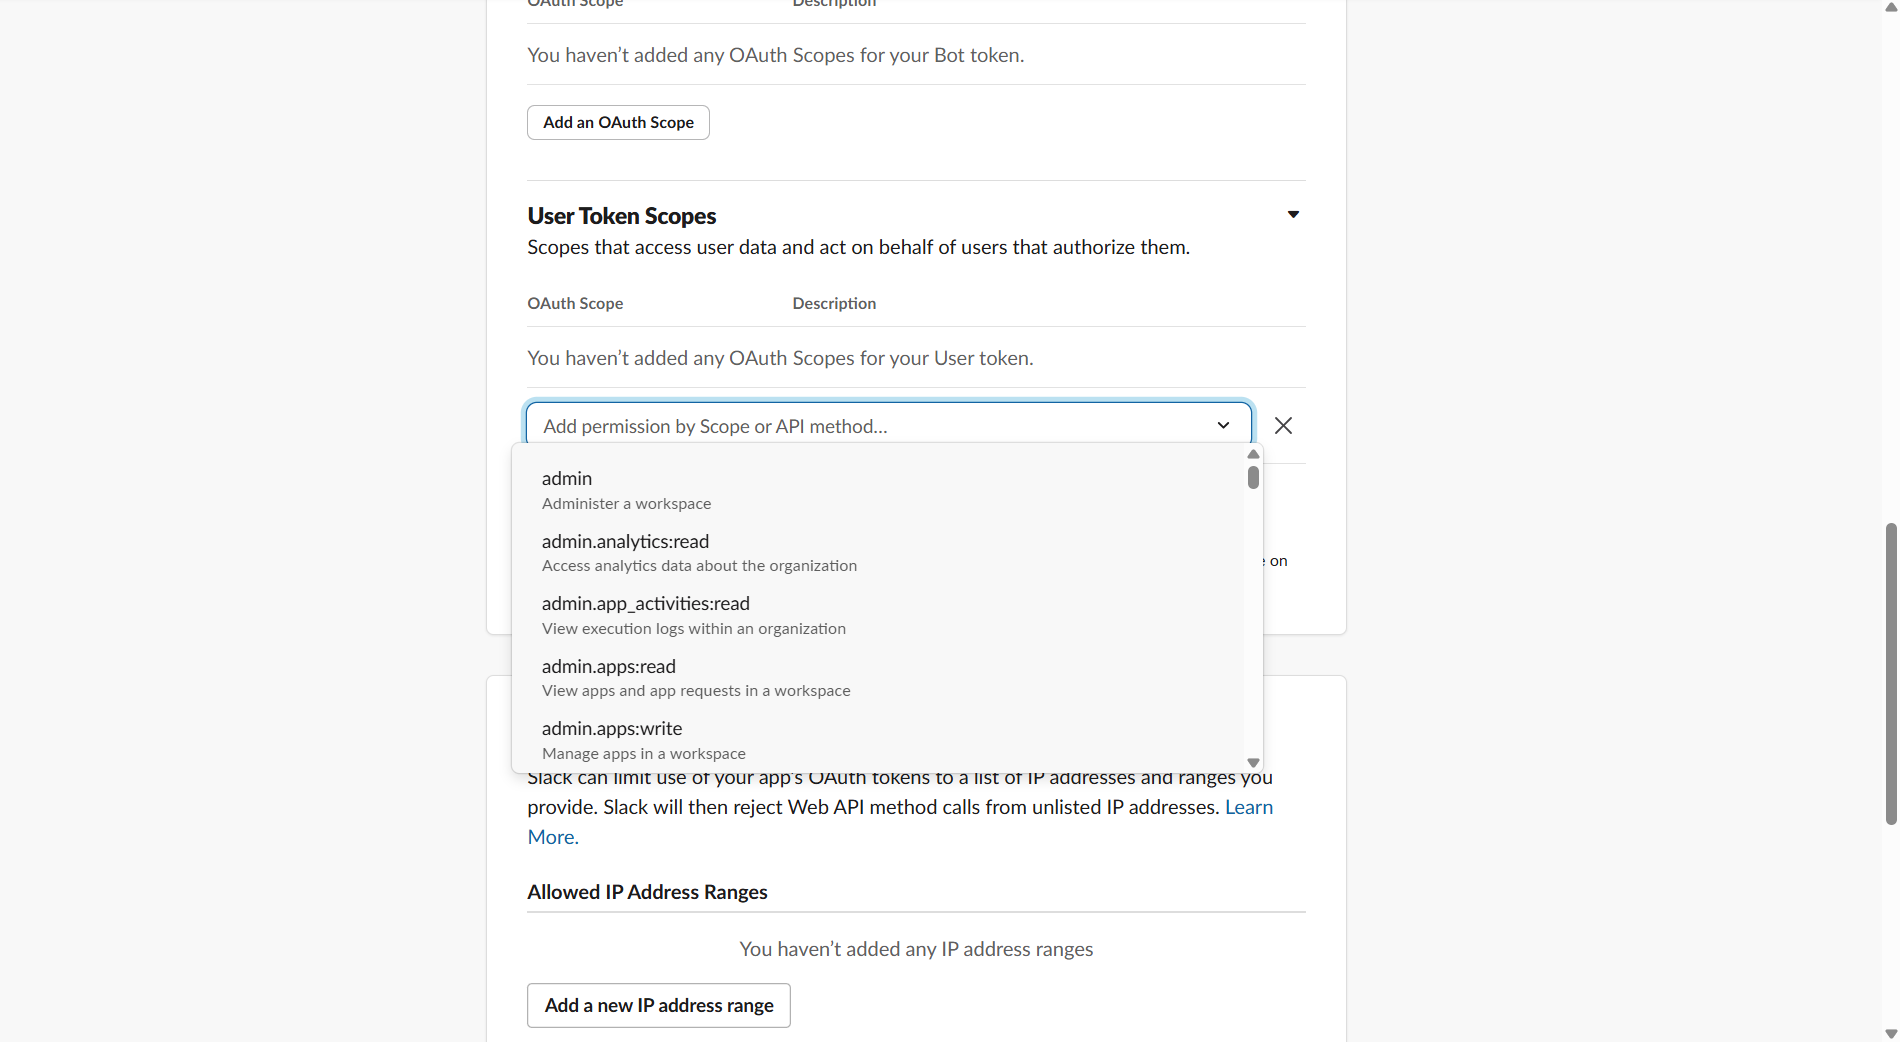
If you change scopes after the toolset is already authenticated, existing users must re-authorize to pick up the new scopes.
Step 5: Copy Client ID and Client Secret
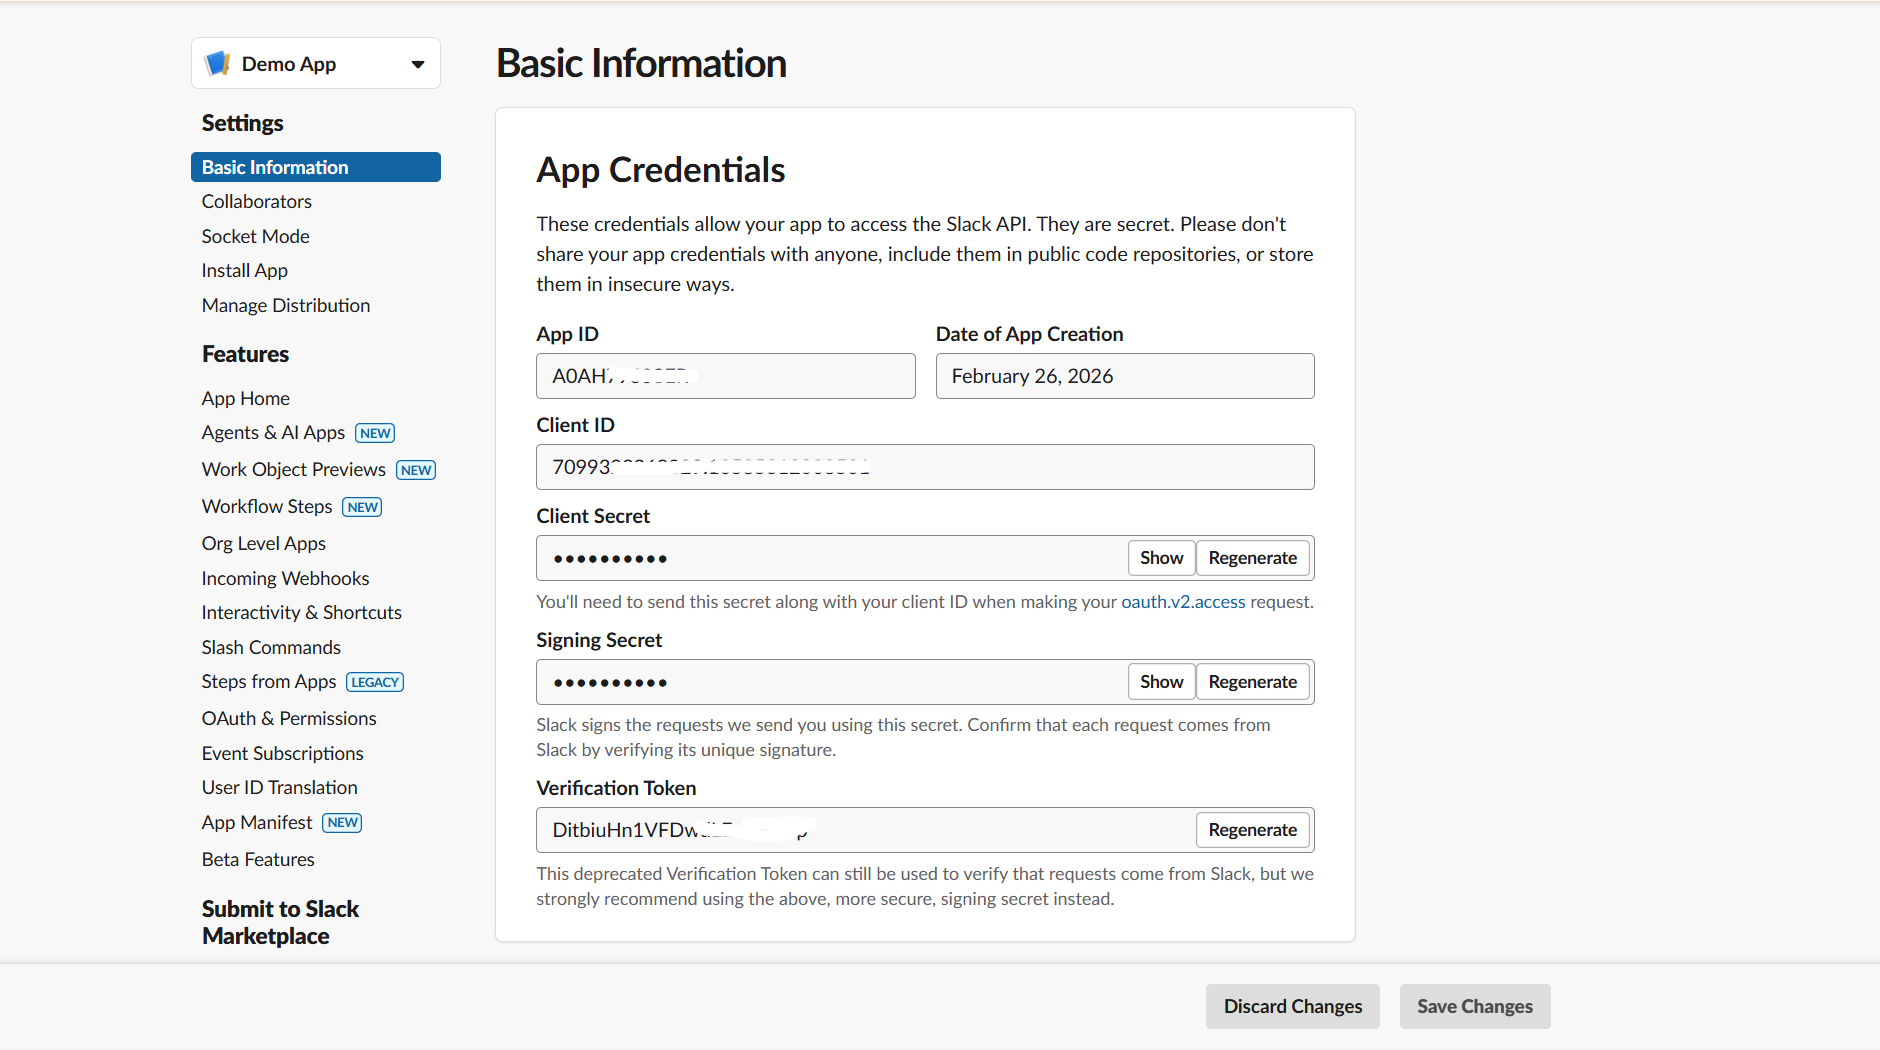
- In Slack app settings, open Basic Information.
- Scroll to App Credentials.
- Copy:
- Client ID — used as Client ID in PipesHub.
- Client Secret — click Show to reveal, then copy. Used as Client Secret in PipesHub.
Step 6: Configure the Slack toolset in PipesHub
- In PipesHub, return to Workspace Settings → Actions.
- Find Slack and reopen the setup dialog.
- Confirm the Redirect URI matches the Redirect URL you saved in Slack in Step 3.
- Paste your Client ID and Client Secret, then save the instance.
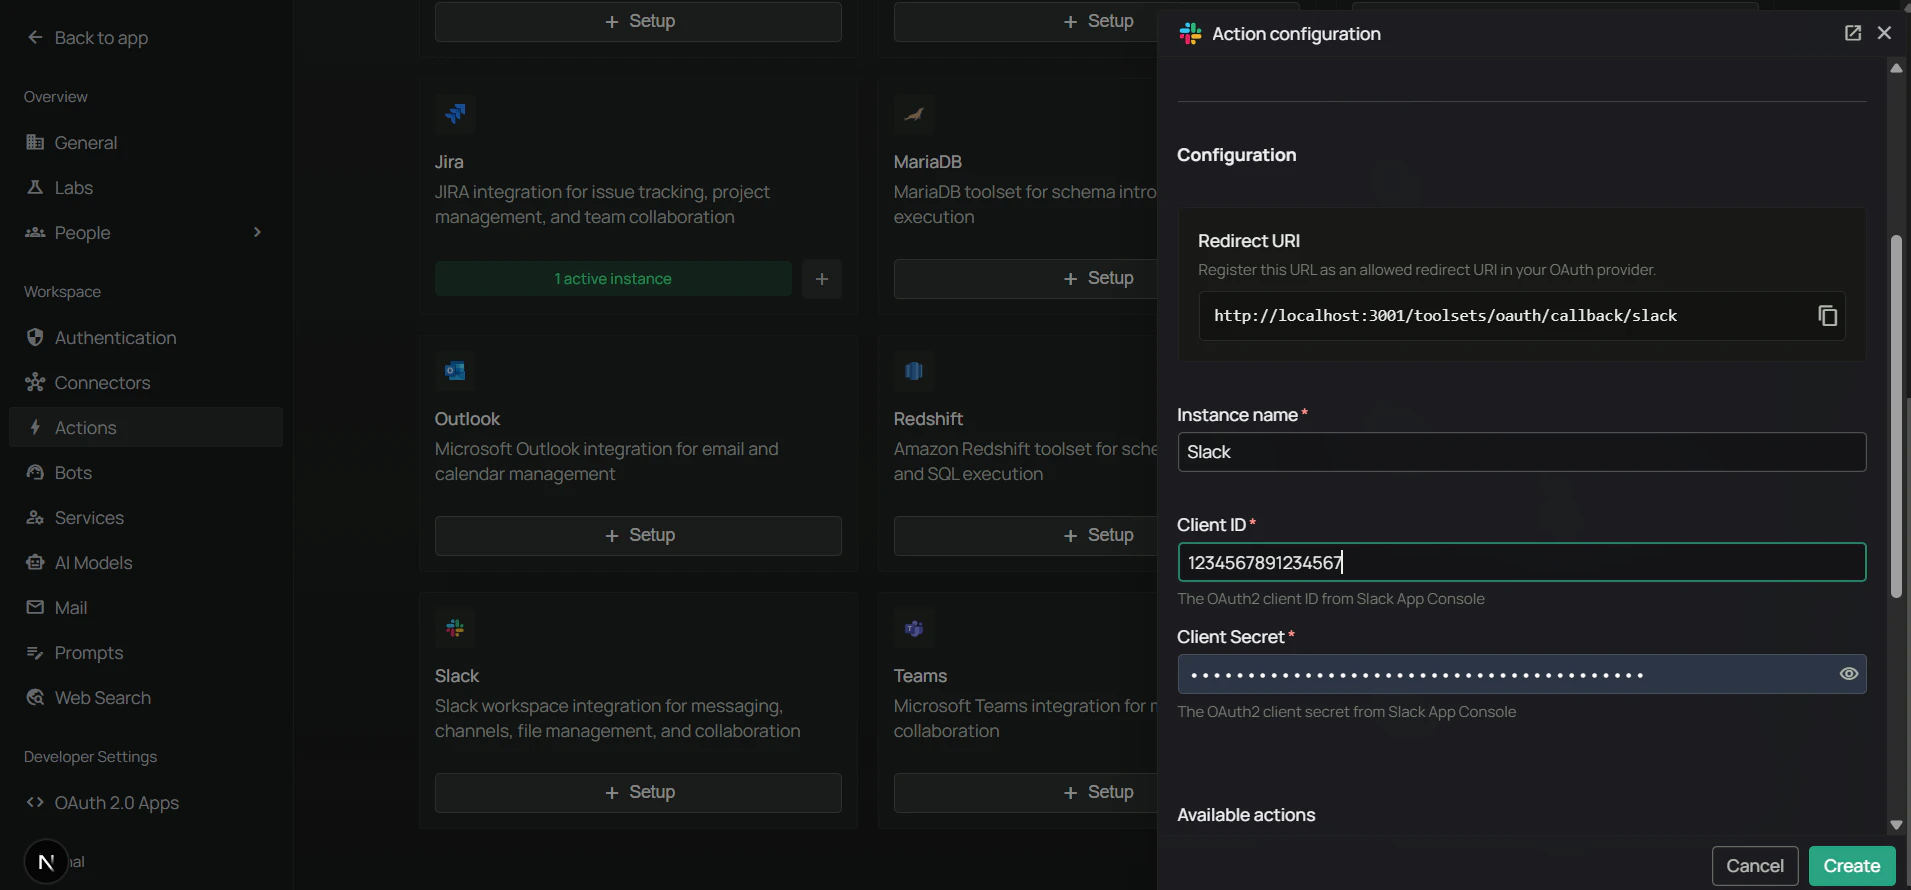
Step 7: Authenticate the Slack toolset
Authentication uses the same OAuth flow in either location:- Admins can authenticate the shared instance directly under Workspace Settings → Actions.
- Users can authenticate their own personal instance under Your actions (in the Personal section of the sidebar).
- On the Slack tile (in Actions or Your actions), click Authenticate with OAuth.
- A popup opens to Slack’s authorization page — select your workspace, review the requested scopes, and click Allow.
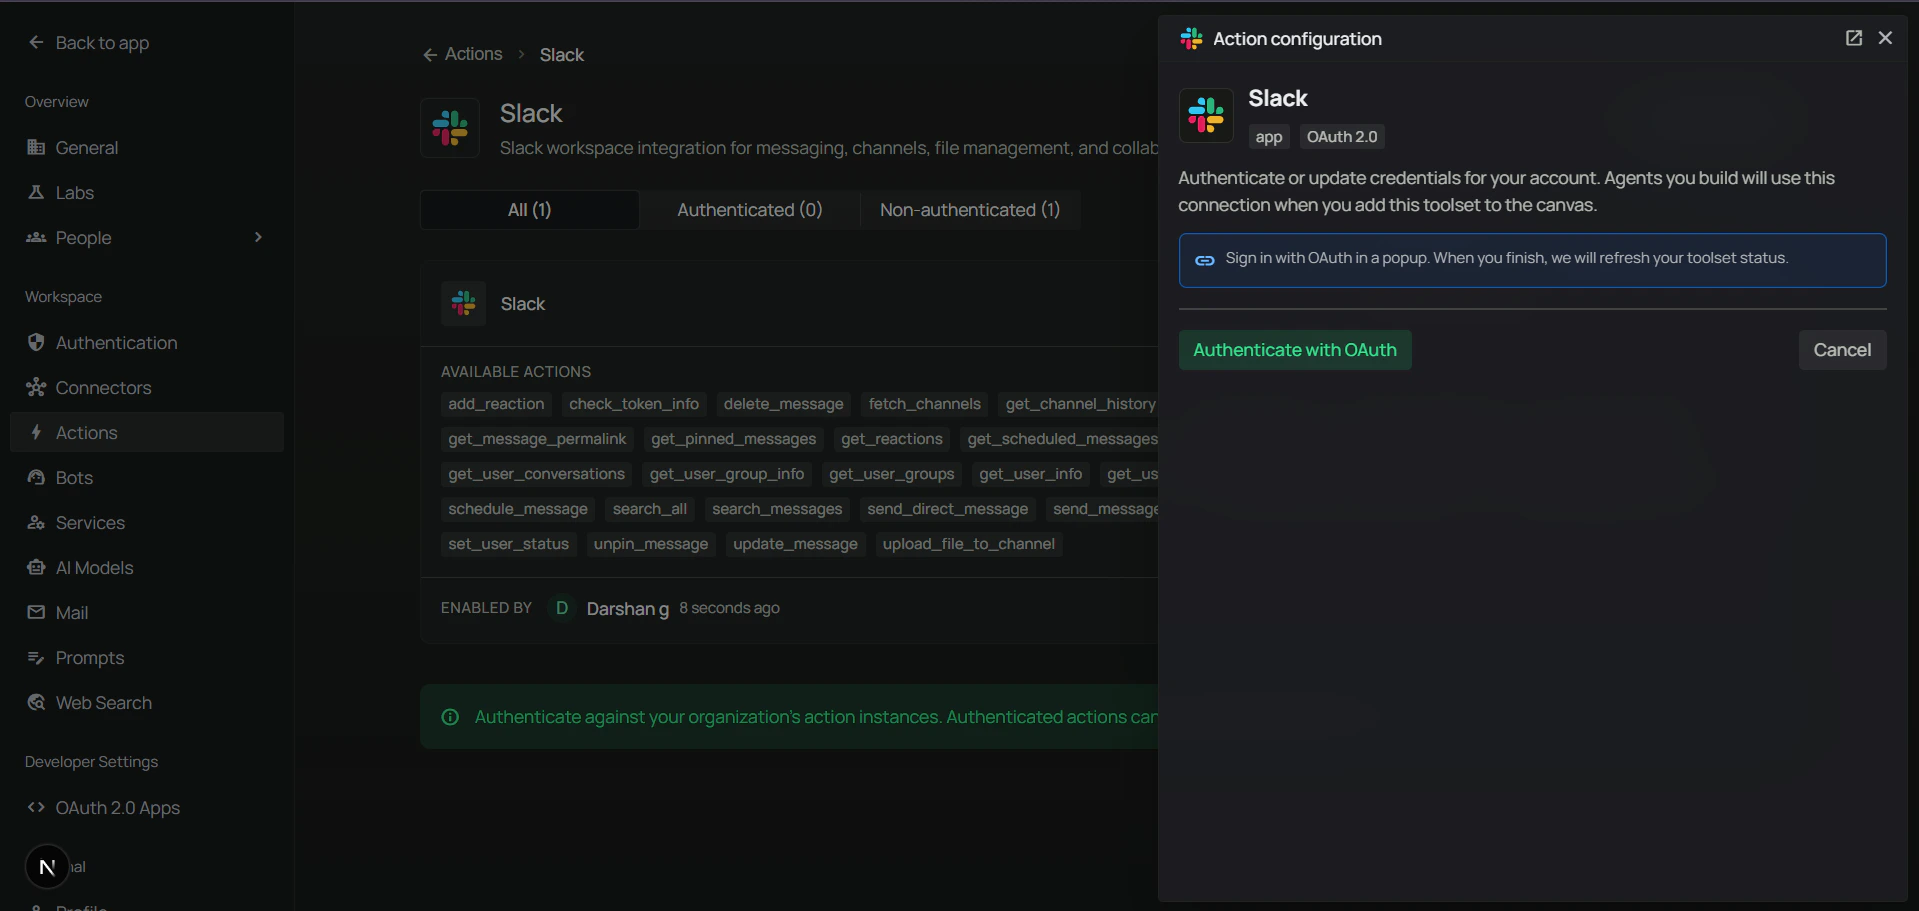
- The popup closes and the Slack tile shows Authenticated status.
Step 8: Add Slack to an agent
- Go to the Home page.
- Next to Agents, click + to create a new agent.
- Give the agent a name, drag the Slack toolset onto the canvas, connect it to the Agent Core node with your model and chat input/output, then create the agent.
FAQ
What's the difference between Slack Connector and Slack Toolset?
What's the difference between Slack Connector and Slack Toolset?
Example: Use Slack Connector to search past message history. Use Slack Toolset to let agents send messages or post updates.
Usage Tips
How do I send a message to a channel?Ask your agent to “send a message to #marketing” with your content. How do I send a direct message?
Ask to “send a DM to John about the meeting” or “directly message sarah@company.com”. The agent can send private messages to any user. Giving the person’s email is the surest way to reach the right person. An email address nobody in the workspace has is refused rather than matched to someone with a similar name, and a longer name you type (such as “Joanna”) no longer matches a shorter one in the directory (such as “Ann”). If Slack won’t let the agent read the directory (a rate limit or a missing scope), the agent says so instead of “User not found”. Are long lists complete?
Listing tools (channel members, users, conversations) read every page Slack returns. If Slack stops partway, the agent is told the list is incomplete rather than being handed part of it as if it were the whole. Errors come back in plain words with what to do next, worded for the user token this toolset signs in with. Does the toolset work with Slack token rotation?
Yes. If your Slack app has token rotation turned on, its sign-in expires about every 12 hours, and PipesHub renews it automatically before then.
- If the agent says “The Slack sign-in has expired. PipesHub renews it automatically, so try again in a few minutes.”, wait a few minutes and ask again. If it keeps happening, reconnect the Slack toolset in Settings > Toolsets.
- If the agent says “Slack did not accept the saved sign-in.”, Slack has refused the sign-in (for example, it was revoked or the app was reinstalled), and renewing can’t fix it. Reconnect the Slack toolset in Settings > Toolsets.
Ask to “reply to that message in thread” or “respond to the latest message in #engineering”. The agent can reply in threads to keep conversations organized. How do I search for messages?
Ask to “search Slack for [keyword]” or “find messages about the project launch”. The agent searches across messages, files, and channels. How do I add reactions?
Ask to “add a ✅ reaction to that message” or “react with 👍 to John’s message”. The agent can add emoji reactions to any message. How do I get channel history?
Ask to “show me recent messages in #support” or “get the last 10 messages from #engineering”. The agent can retrieve message history from any channel.