Overview
The OneDrive toolset lets AI agents work with files in Microsoft OneDrive (and other drives you can access through Microsoft Graph), including shared libraries, downloads, sharing with people, and basic OneNote notebook operations. It uses delegated OAuth (user consent) so actions run as the signed-in user.Key Capabilities
- Drives and browsing - List drives, open the root folder, list folders and files, and fetch item metadata
- Search - Search within a drive by keyword; search across content shared with you
- Shared with me - List and search files others have shared with you without needing a drive ID first
- File and folder actions - Create folders, rename, move, and copy items (copy may complete asynchronously)
- Sharing - Invite specific people by email with read, write, or owner roles
- Content and links - Get short-lived download URLs; read file content (parsed text and structured output for many formats, subject to size limits)
- New Word files - Create a new
.docxin a folder, optionally with initial text content - OneNote - Create notebooks, sections, and pages; list sections and pages; read page HTML
drive_id. Call get_drives first when the drive is unknown.
Available Tools
Drive and navigation
Search and shared content
Organize, copy, and share
Download and read content
Create files and OneNote
Configuration Guide
Setup
Setup
Step 1: Open App registrations from the Azure portal home
- Go to portal.azure.com and sign in.
- On the home page, find Azure services and click App registrations. You can also search the top bar for App registrations or open Microsoft Entra ID and choose App registrations from there.

Step 2: Start a new registration
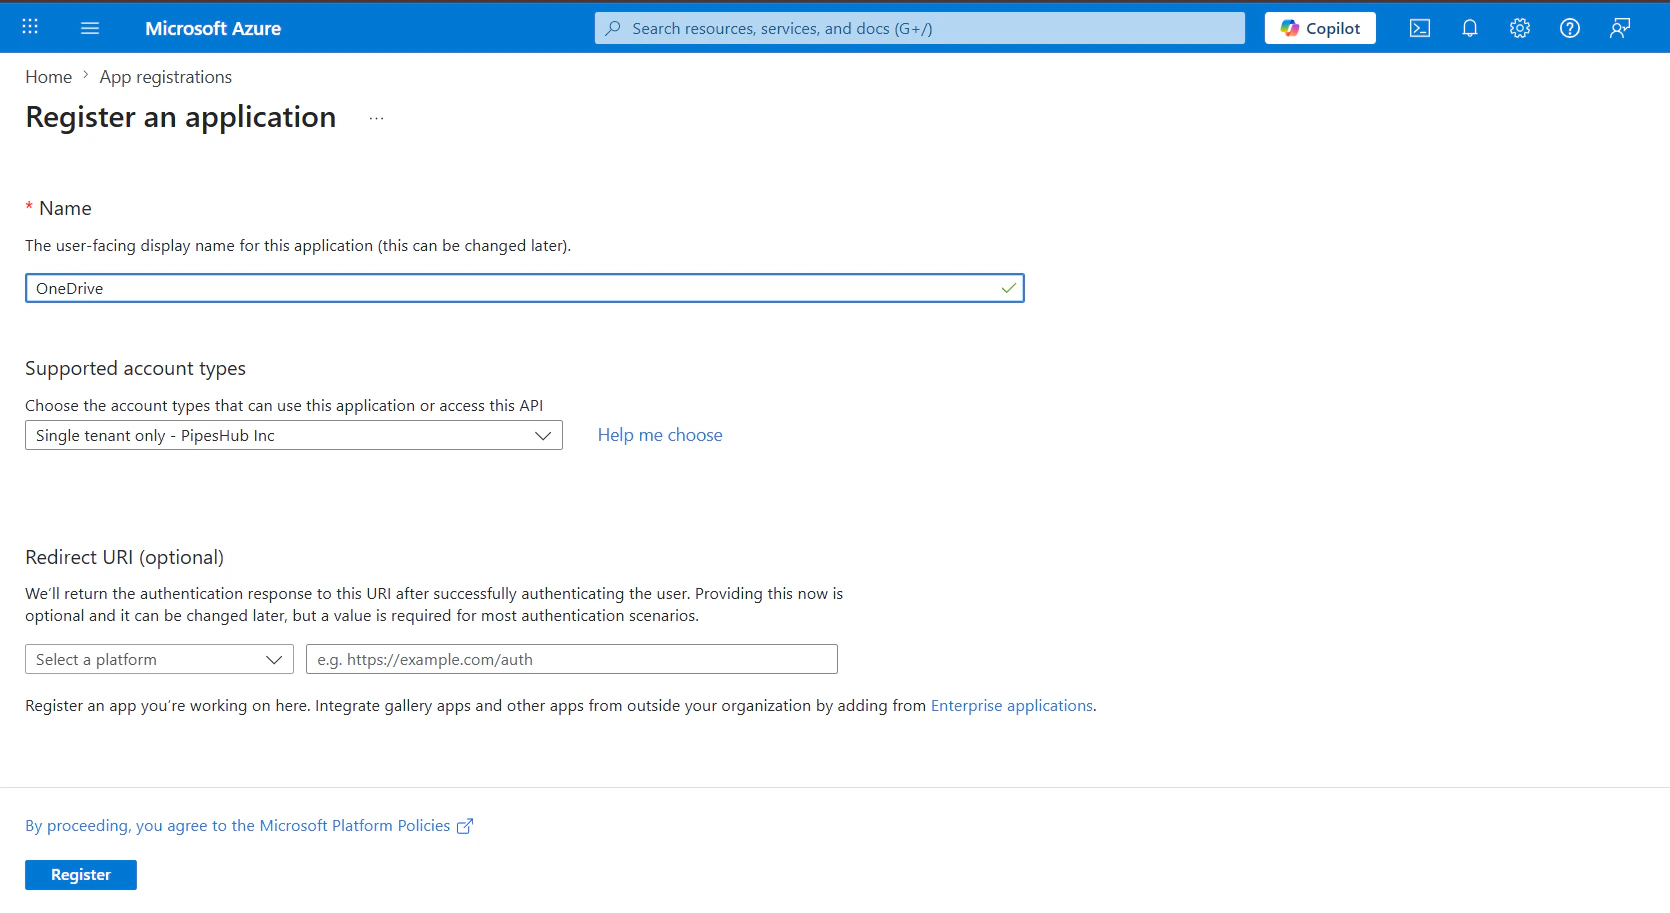
On the App registrations page, click + New registration.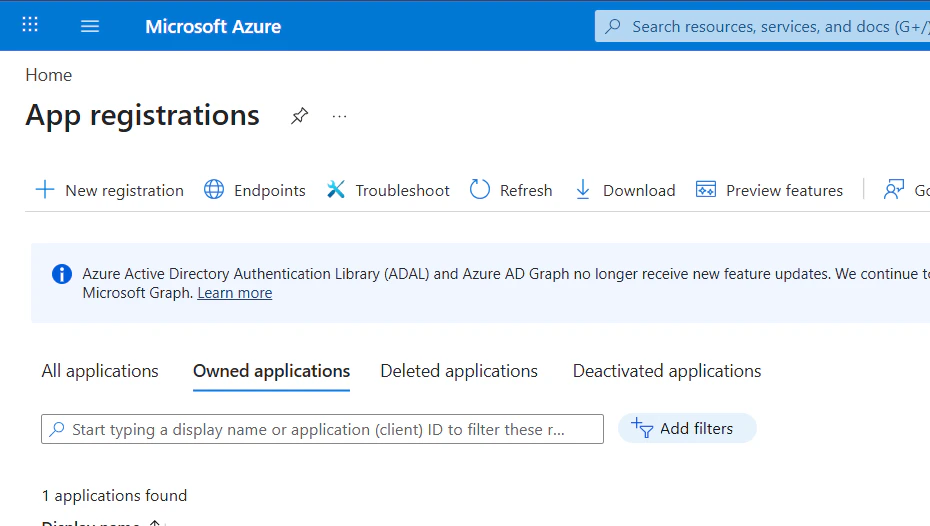
Step 3: Register the application
- Name: Enter a display name (for example,
PipesHub OneDrive Toolset). - Supported account types: Choose who can sign in—for example Accounts in any organizational directory and personal Microsoft accounts for broad support, or a single-tenant option if you only use your organization.
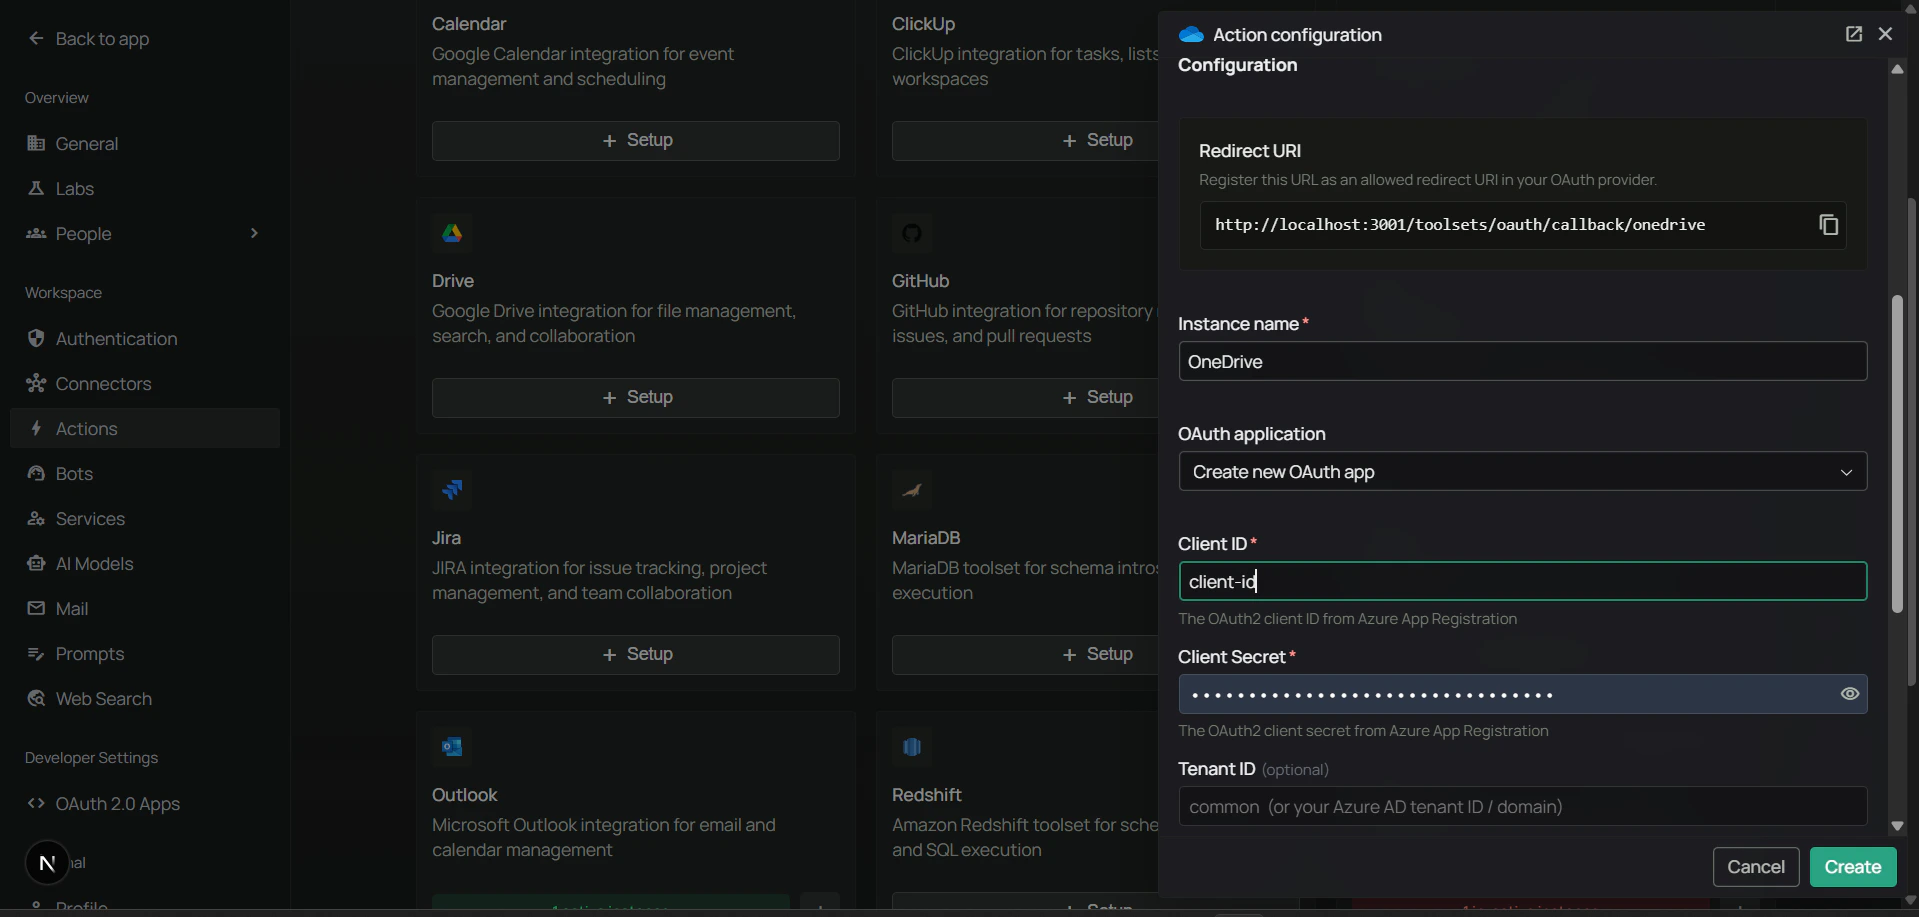
- Redirect URI: Use the Web redirect URI from the PipesHub Configure OneDrive (or Microsoft 365 files) dialog in toolset settings where OneDrive is set up—for example Workspace → Actions and the OneDrive toolset + Setup / Configure flow.
- Click Register.
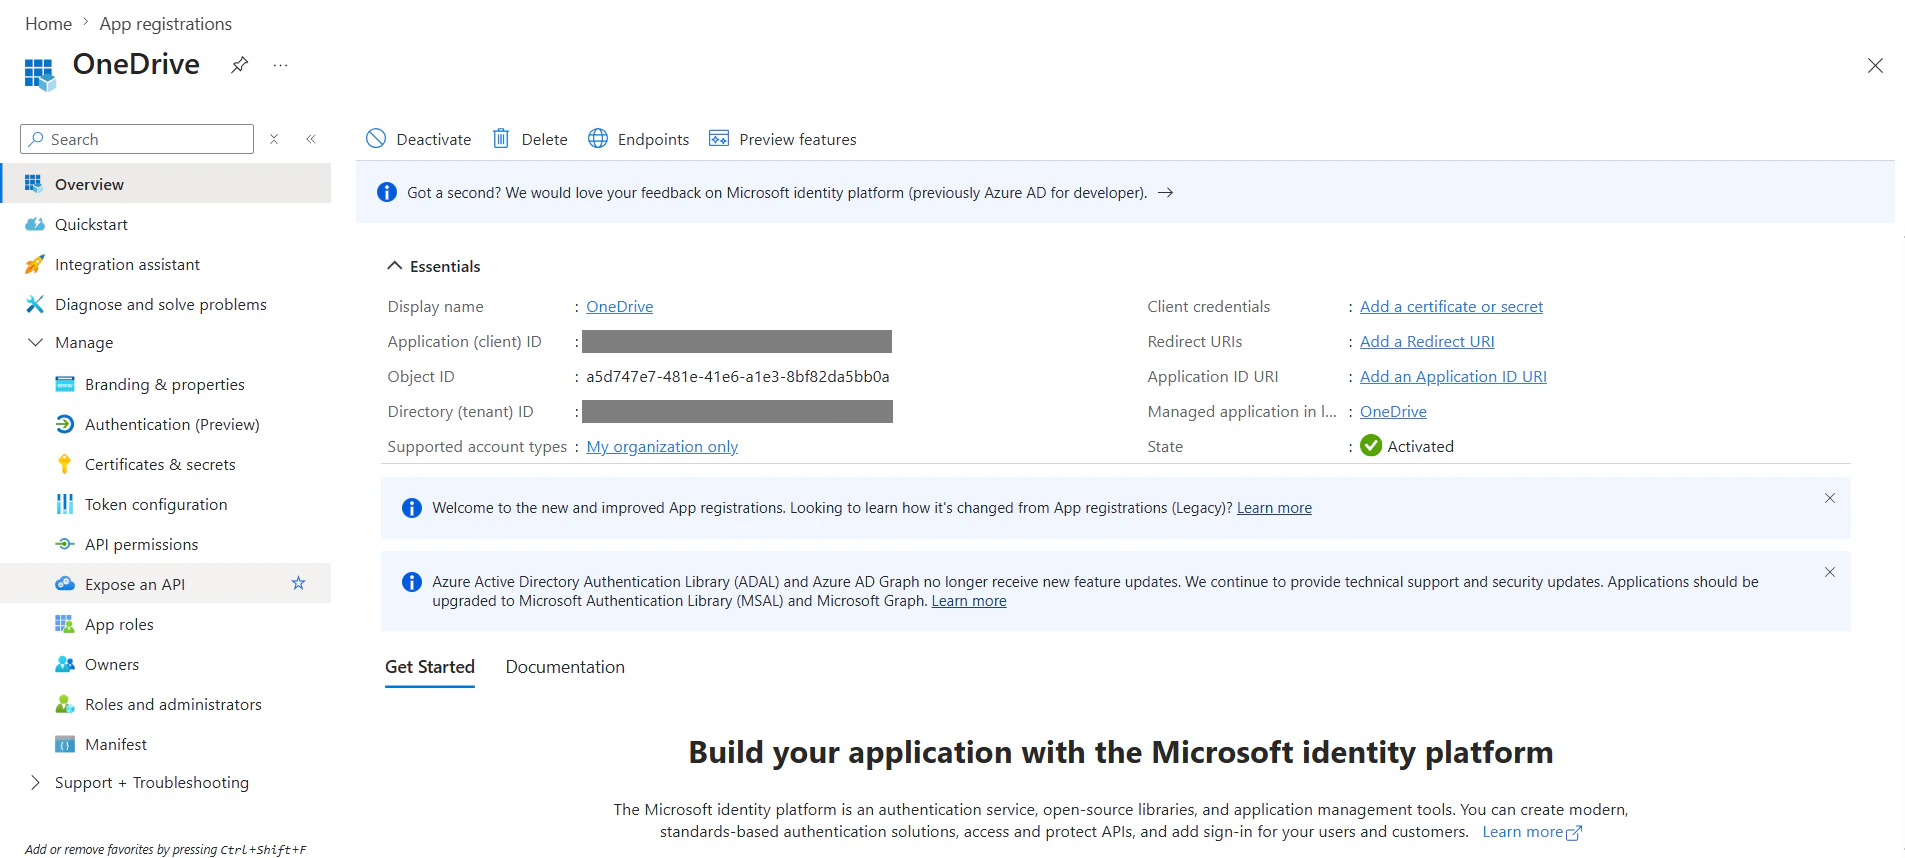
Step 4: Copy Application (client) ID and Directory (tenant) ID
On the Overview page for your app, copy:- Application (client) ID — used as Client ID in PipesHub.
- Directory (tenant) ID — used as Tenant ID in PipesHub (or use
common/ leave blank per the toolset dialog if you want both work/school and personal accounts).
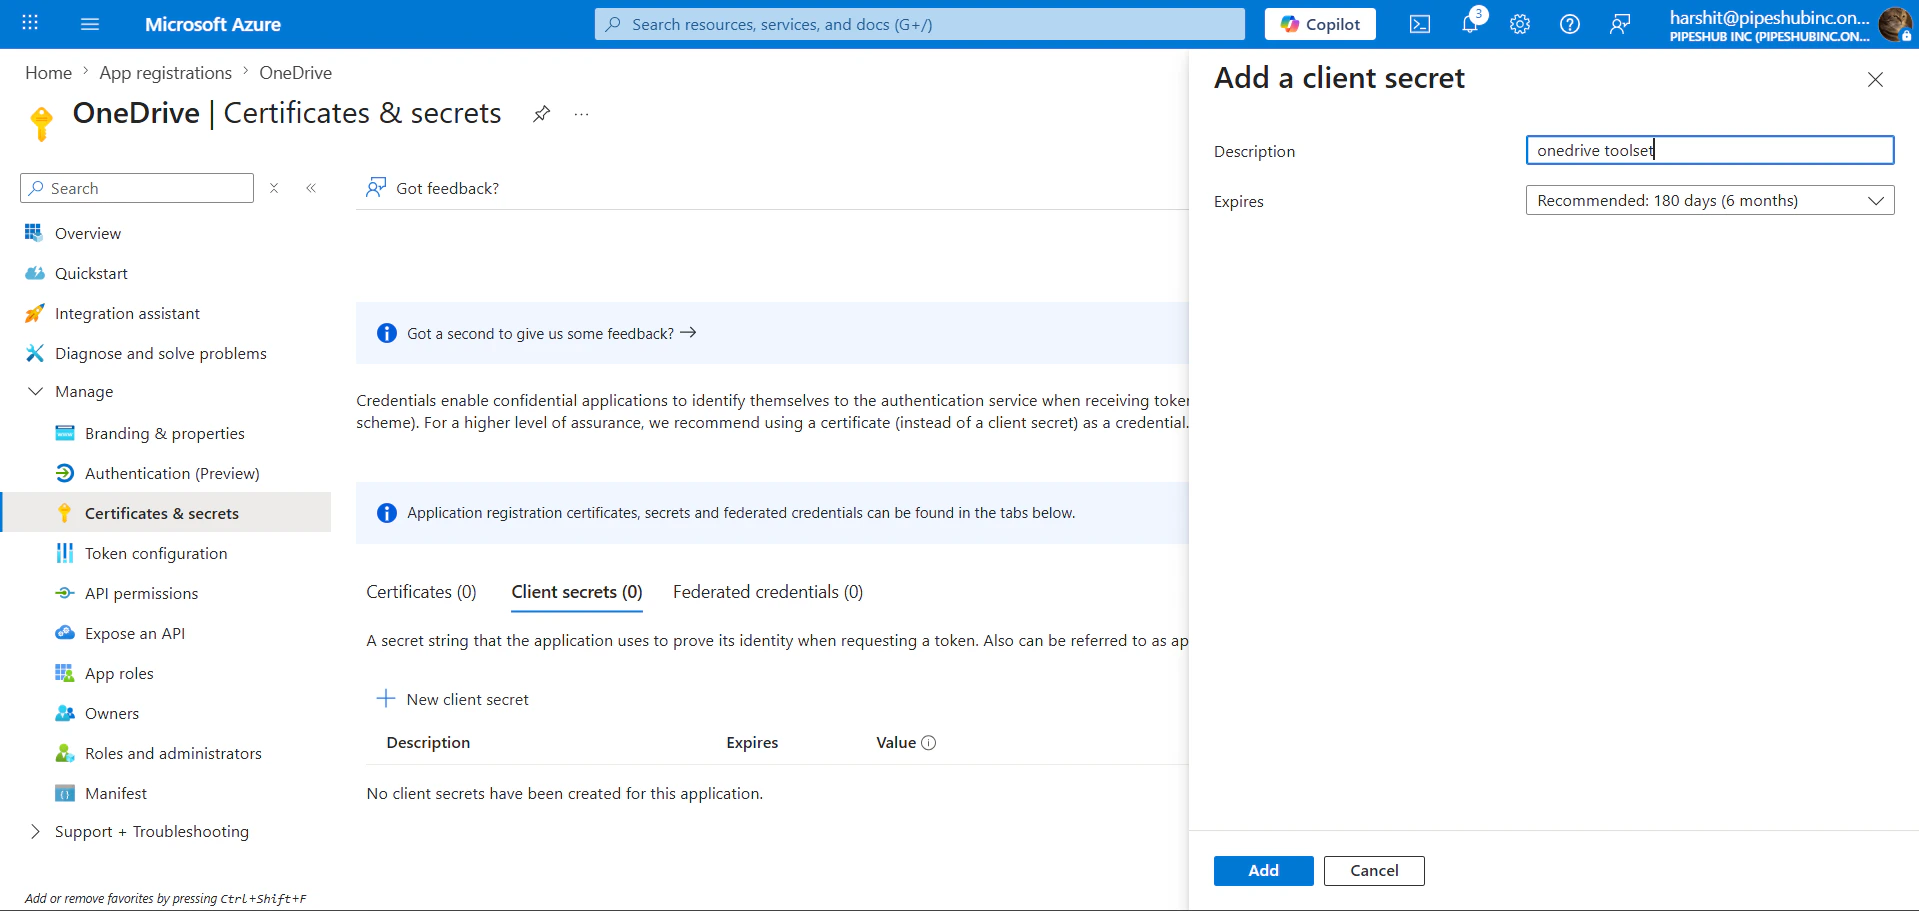
Step 5: Create a client secret
- In the left sidebar under Manage, open Certificates & secrets.
- On the Client secrets tab, click + New client secret.
- Add a description, choose an expiration, then click Add.
- Copy the secret value immediately — it is shown only once.
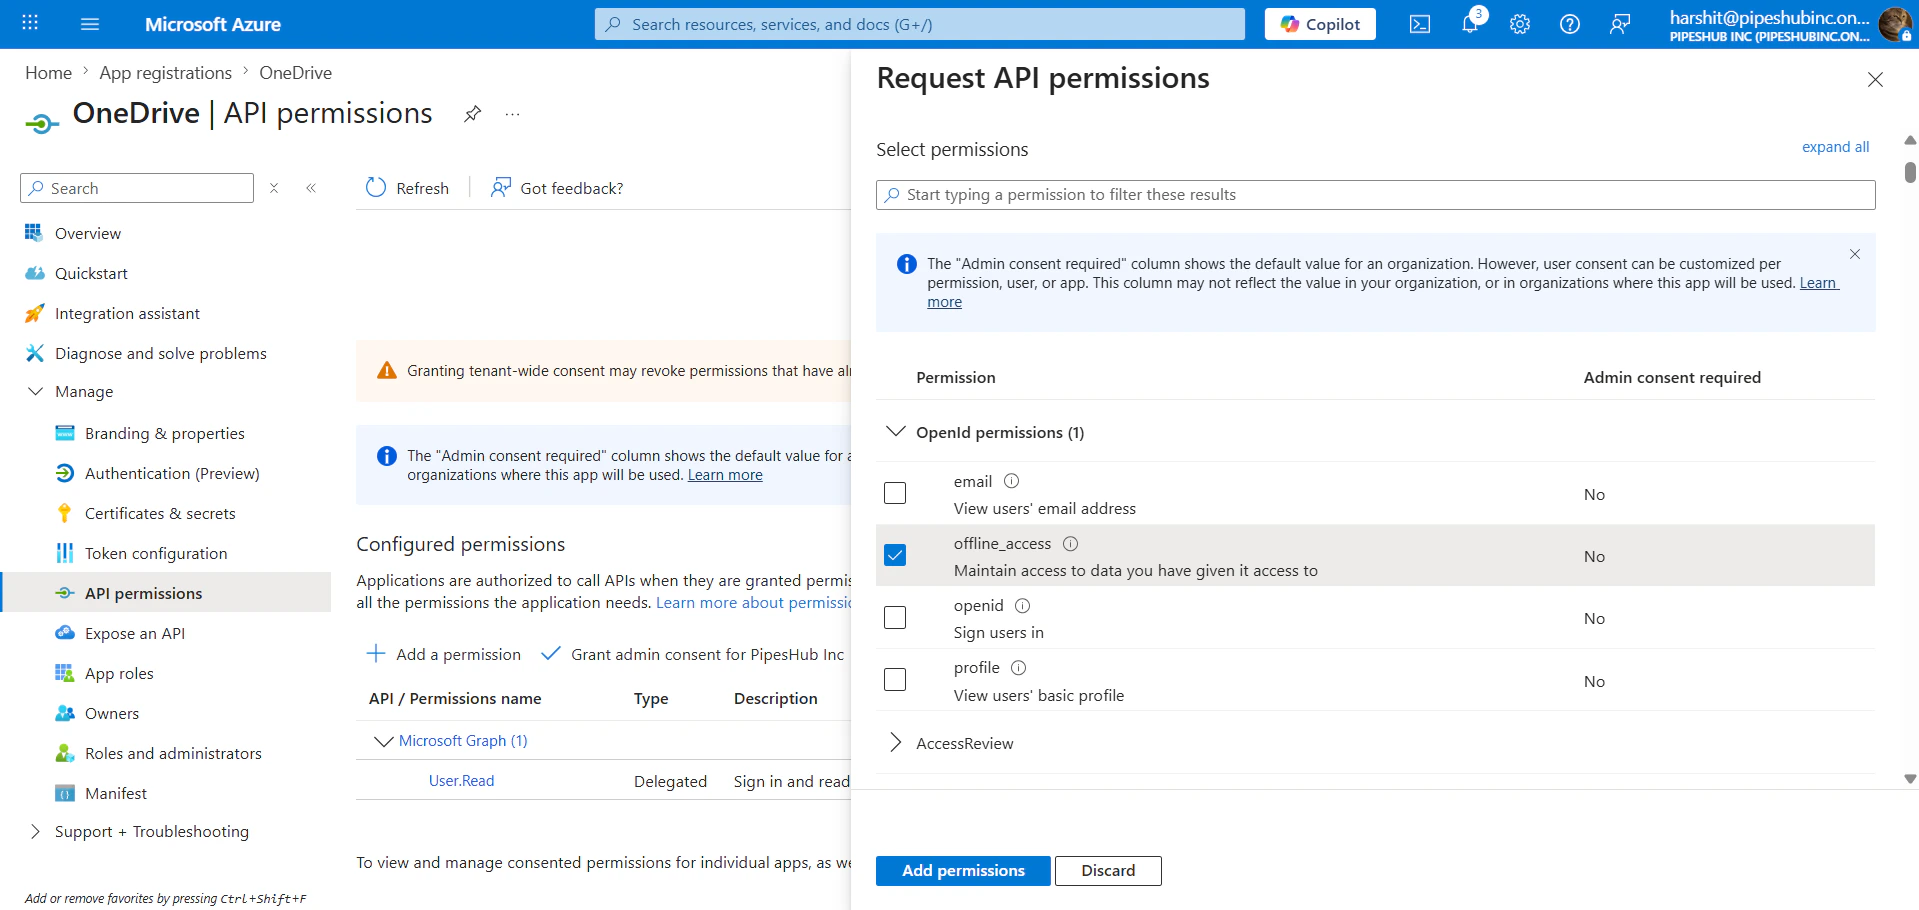
Step 6: Add Microsoft Graph API permissions
- In the left sidebar, open API permissions.
- Click + Add a permission → Microsoft Graph → Delegated permissions.
- Add the permissions your agents need, for example:
If users rely on SharePoint document libraries that appear as drives, you may also need delegated Sites permissions appropriate to your tenant (for example
Sites.Read.All or Sites.ReadWrite.All). Start with the table above and add permissions if Graph returns authorization errors for specific drives.The OneDrive toolset uses Delegated permissions so actions run as the signed-in user, not only as the application.
Step 7: Grant admin consent
Click Grant admin consent for your organization (the button includes your tenant name) and confirm, so delegated permissions show as granted for the tenant (especially for permissions that require admin approval).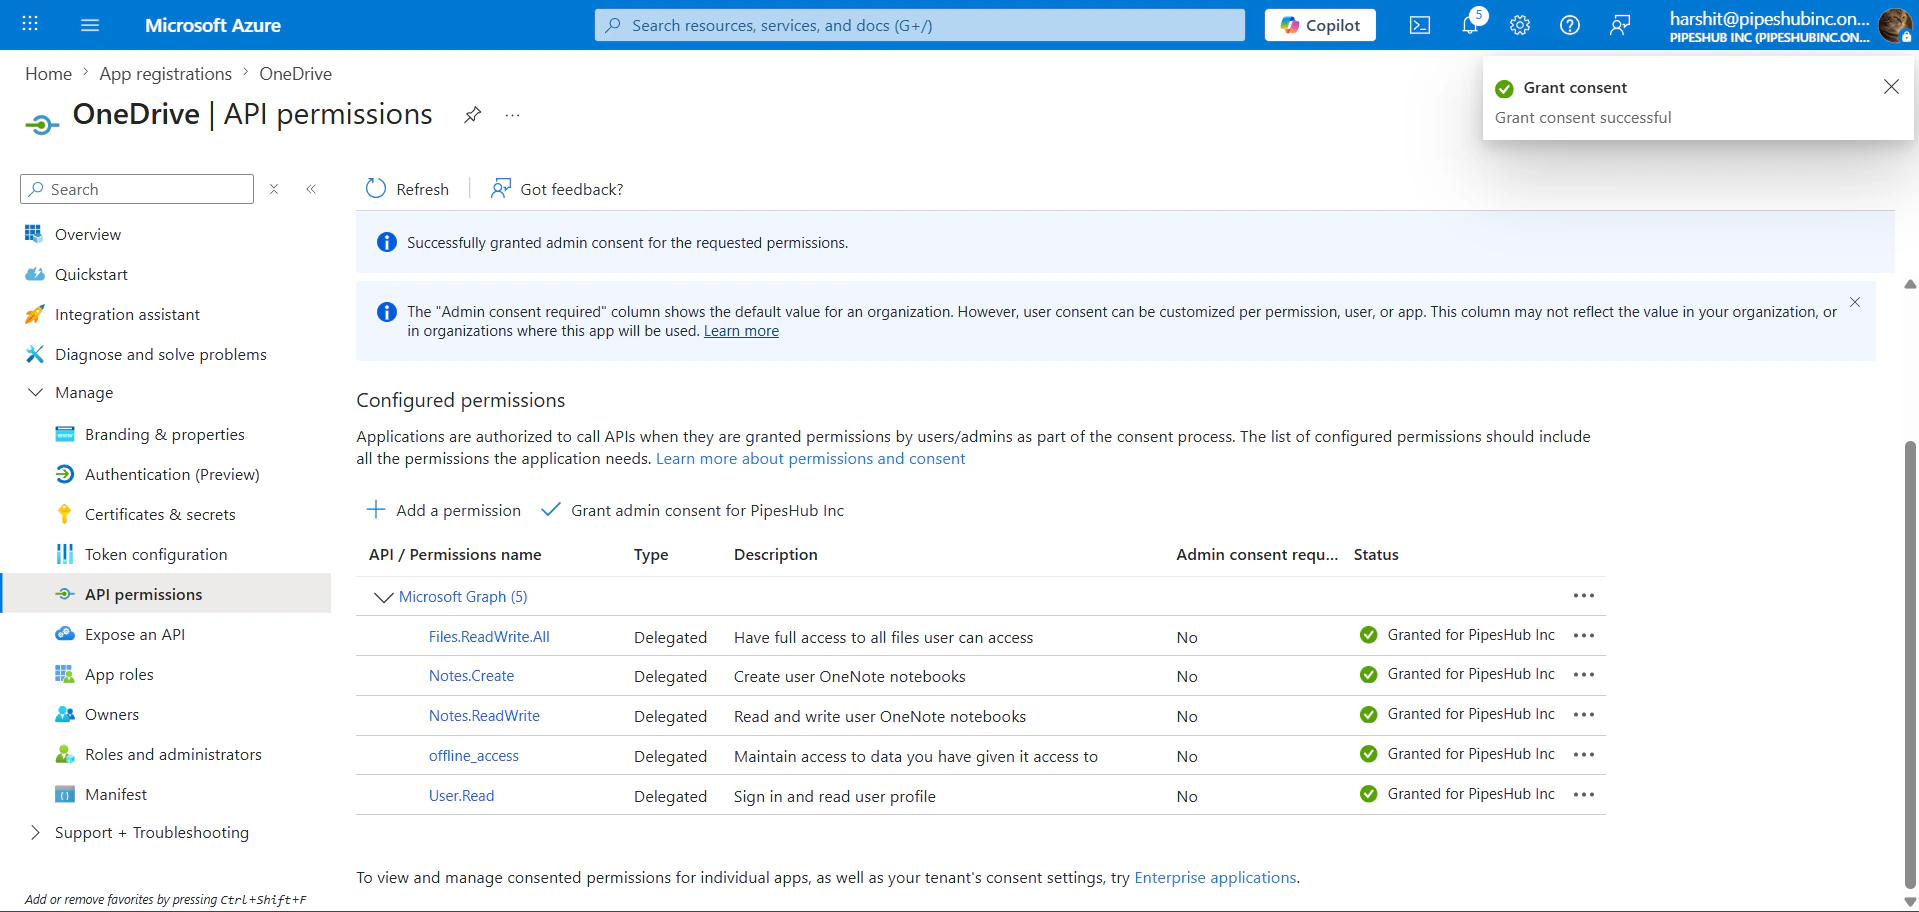
Step 8: Configure the OneDrive toolset in PipesHub
- In PipesHub, go to Workspace → Actions (or the area where toolsets are configured for your workspace).
- Find OneDrive (or the Microsoft 365 files toolset that includes these tools) and open setup / configuration (+ Setup or Configure).
- Confirm the Redirect URI in the dialog matches the Web redirect URI you registered in Azure Step 3.
- Enter Client ID, Client Secret, and optionally Tenant ID (
commonor your tenant/domain per the form), then create or save the instance.
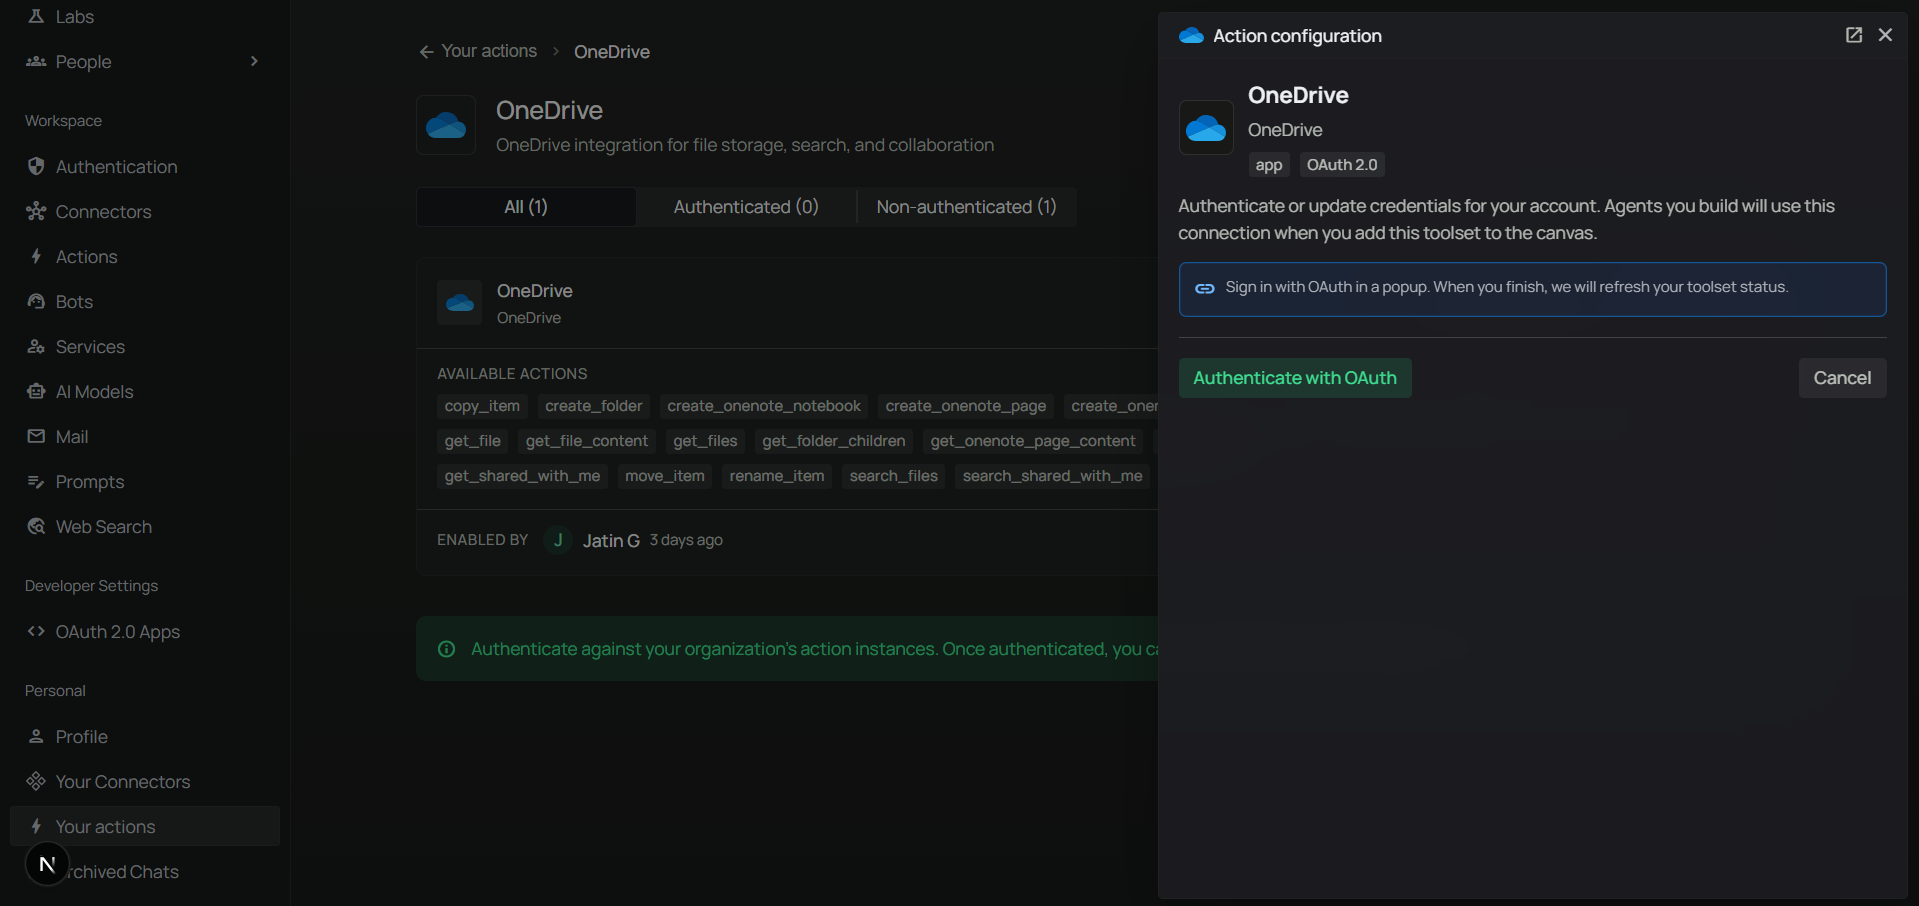
Step 9: Authenticate the toolset under Your actions
- Open Your actions (or the equivalent entry under Personal in the sidebar).
- Select your OneDrive instance and complete Authenticate with OAuth (Microsoft sign-in, then accept permissions).
Step 10: Add OneDrive to an agent
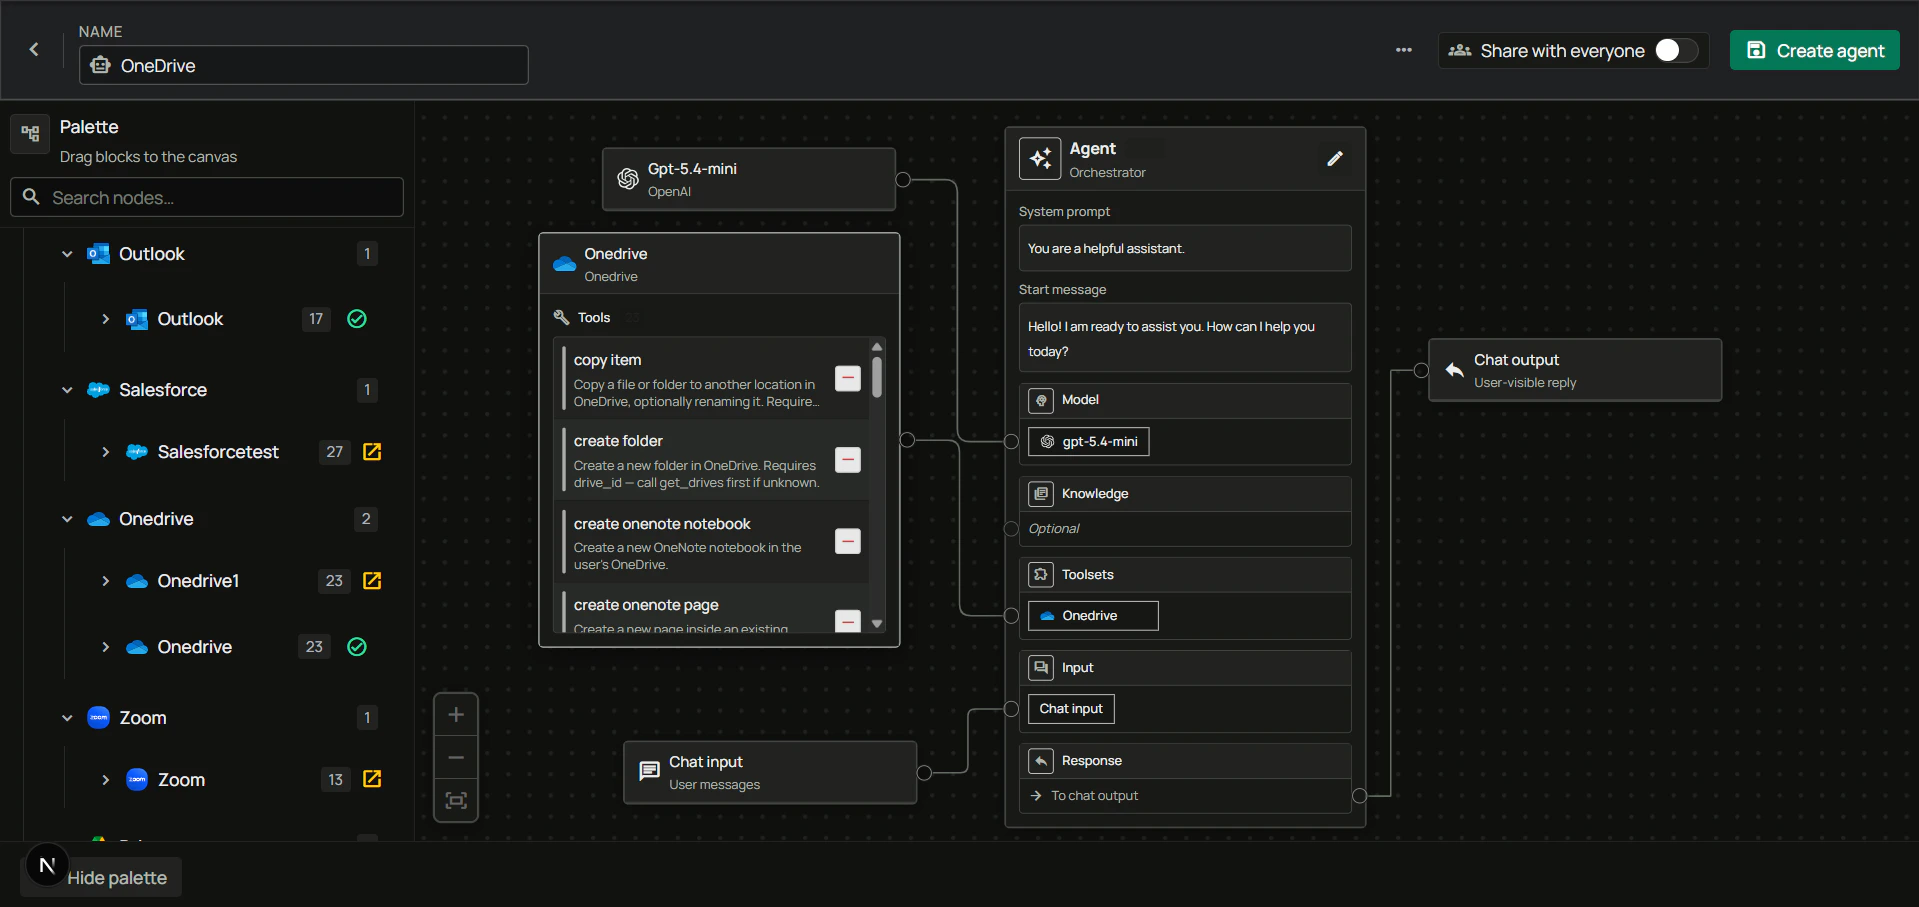
- Go to the Home page.
- Next to Agents, click + to create a new agent.
- Give the agent a name, drag the OneDrive toolset onto the canvas, connect it to the Agent node with your model and chat input/output, then create the agent.
FAQ
What's the difference between the OneDrive Connector and the OneDrive Toolset?
What's the difference between the OneDrive Connector and the OneDrive Toolset?
Example: Use the OneDrive Connector to ingest documents for semantic search. Use the OneDrive Toolset when the agent should list folders, search by keyword, copy files, or share a document while the user is signed in.
Usage Tips
Example: Find a document by nameAsk the agent to search your OneDrive for “Q3 roadmap” (it should resolve
drive_id, then run search_files or browse folders as needed).
Example: Move a file into a folderAsk to move “Budget.xlsx” into the “Archive” folder (the agent can search for IDs, then call
move_item).
Example: Share read-only with a colleagueAsk to share a specific file with
alice@contoso.com with view access.