Overview
Teams let workspace members group themselves around a shared purpose — a project, a product area, or any collaboration unit. Unlike user groups (which administrators use to manage access), teams are available to every workspace member. A user can belong to any number of teams, and within each team members are assigned a role that determines what they can do with team resources.Team Member Roles
Every member of a team has one of three roles:Navigating to Teams
- Sign in to your PipesHub account
- Open the user menu and click Workspace Settings
- In the workspace sidebar, expand the People section and select Teams

Creating a Team
- From the Teams page, click Create Team in the top-right corner
- The Create Team panel opens on the right
- Enter the Team Name (required) — for example,
Product Engineering - (Optional) Enter a Team Description describing the team’s purpose
- (Optional) Under Add Members, choose a Default Role (
Reader,Writer, orOwner) for the members you’re about to select - Search for and select the users to add to the team
- To change a specific member’s role after adding them, use the role dropdown next to their name in the Member Roles list. Click Apply to all to reset every selected member to the default role
- Click Create Team

Viewing a Team
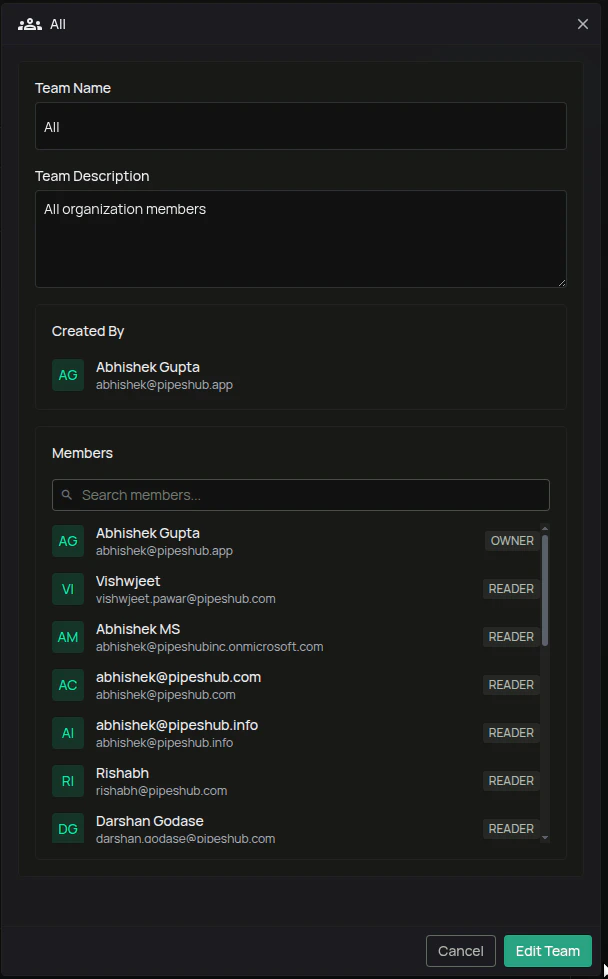
Click a team’s row on the Teams page — or choose View Team from the row actions menu (⋯) — to open the detail panel. The panel shows:- The team’s Name and Description
- Created By — the user who created the team
- Members — a paginated list of members with their roles
Editing a Team
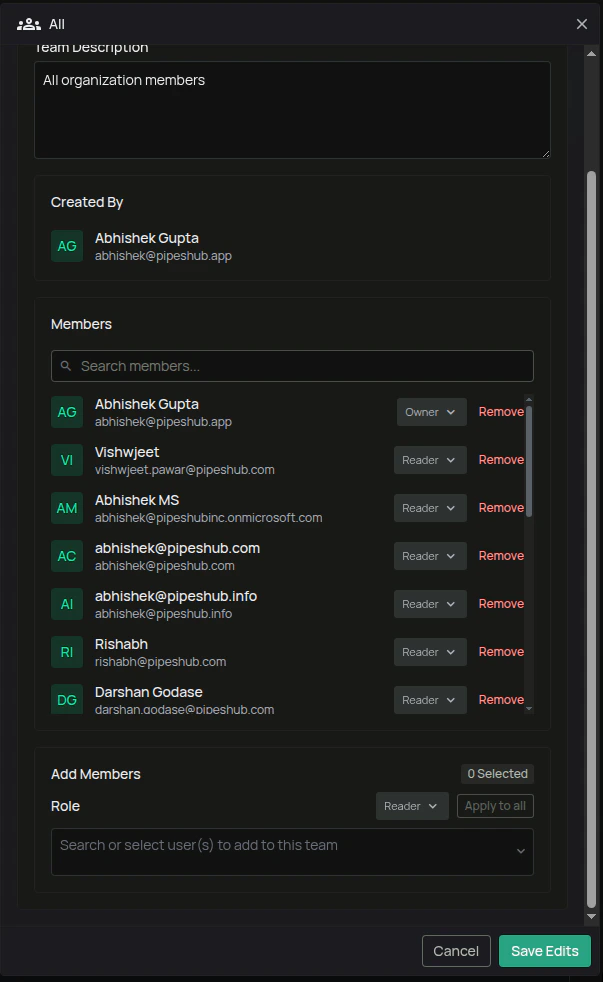
- Open the team detail panel
- Click Edit Team
- Update any of the following, then click Save Edits:
- Team Name or Team Description
- Add Members — search and select additional users, with an optional default role and per-user role overrides
- Member roles — change a current member’s role using the role dropdown next to their name
- Remove members — click Remove next to a member; click Undo before saving to cancel the removal
Deleting a Team
Teams can be deleted only by users who have permission to do so (typically team owners). If the option is available:- Open the team’s detail panel, or open the row actions menu (⋯) on the Teams page
- Click Delete Team (or Delete from the row actions menu)
- Confirm the action
Teams vs. User Groups
Use teams to organize the people doing work together, and user groups to control what members of the workspace can access.